> ## Documentation Index
> Fetch the complete documentation index at: https://docs.domino.ai/llms.txt
> Use this file to discover all available pages before exploring further.
# Synchronize SSO groups and roles
Domino can synchronize Domino administrative user roles and organization membership with attributes in your SAML identity provider. Use this to externalize management of these roles and memberships to the identity provider.
## SAML Group to Organization synchronization
The SAML provider application connected to Domino must include group membership as a multi-valued attribute.
To enable this feature, you must update the Configuration key setting `authentication.oidc.externalOrgsEnabled` to `true`, then restart Domino services.
### Group synchronization attributes
You must include the following attributes if you synchronize groups in Domino.
* Domino Organizations
* **Name:** Can be any name since Domino can map attributes.
* **Multi-valued:** Yes
* **Values:** One or more of the groups the user belongs to in your centralized identity provider. For any groups specified here, the user will be automatically enrolled in a Domino organization with the same name.
Example:
```xml theme={null}
nyc-data-scientists
all-data-scientists
sensitive-claims-users
```
### Attribute mapper
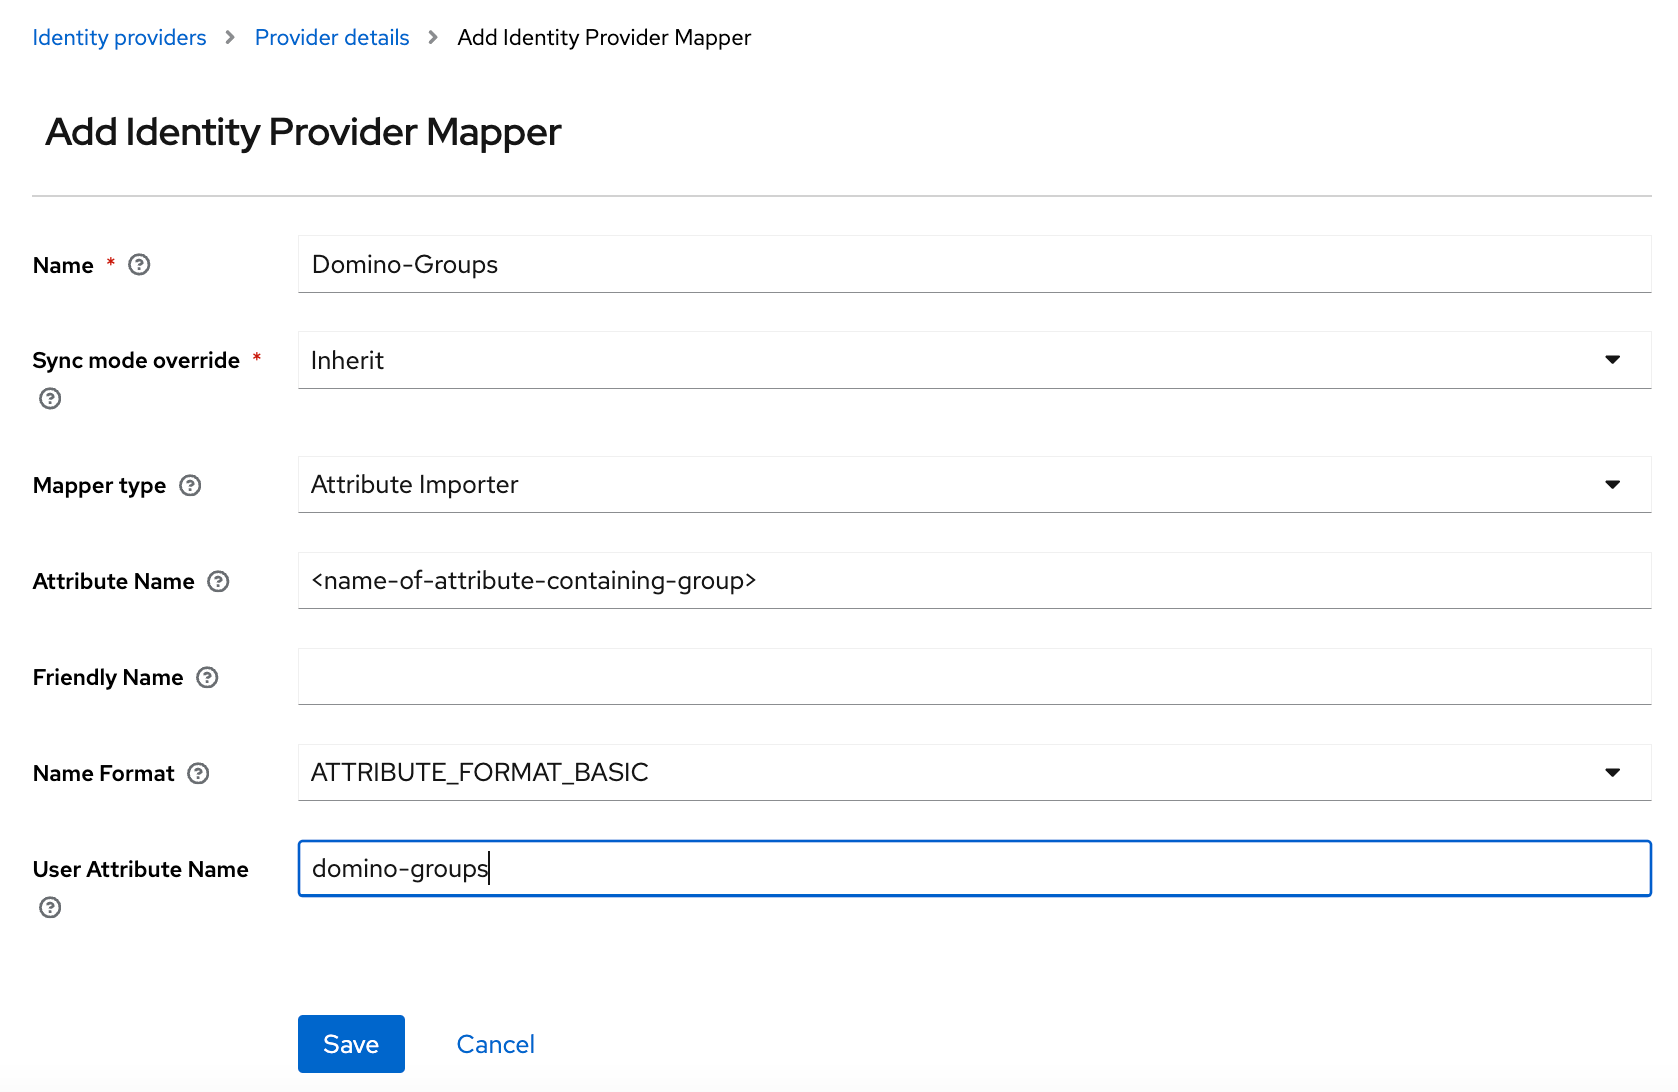
Add an **Attribute Importer** mapper to the provider configuration in Keycloak.
* **Name:** Domino Groups
* **Mapper Type:** `Attribute Importer`
* **Attribute Name:** Name attribute for the element that contains the groups for the user.
* **Friendly Name:** `FriendlyName` attribute for the element that contains the groups for the user.
* **User Attribute Name:** `domino-groups`.
 ### Domino client mapper
When Domino is installed, it automatically creates the `domino-group-mapper` client mapper.
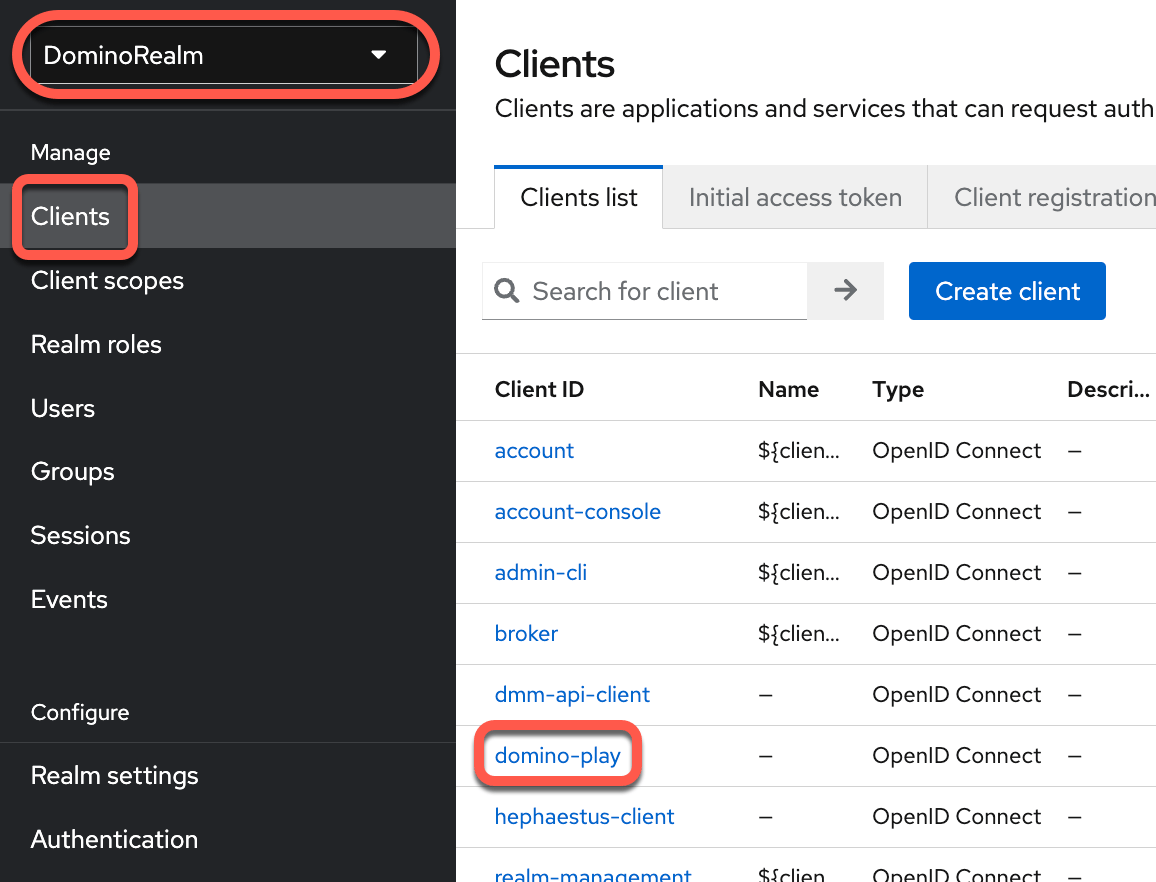
1. To review the client mapper, go to **Clients** > **domino-play**.
### Domino client mapper
When Domino is installed, it automatically creates the `domino-group-mapper` client mapper.
1. To review the client mapper, go to **Clients** > **domino-play**.
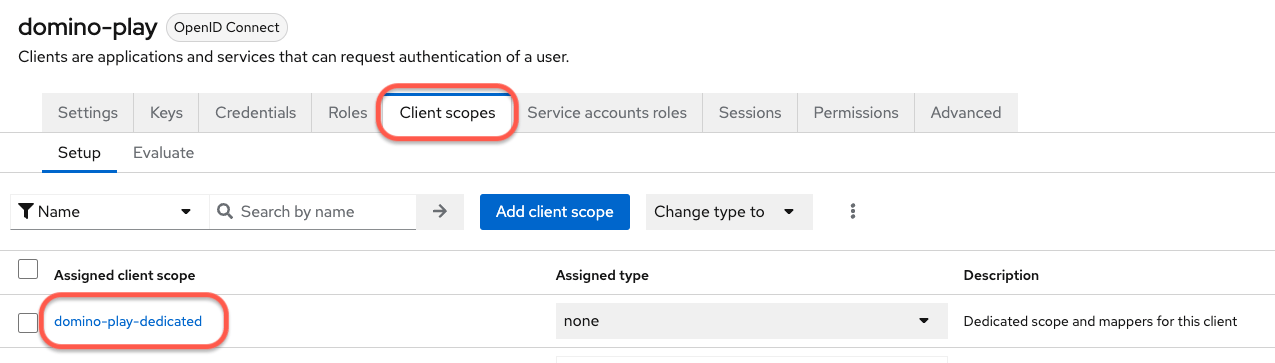
 2. To see the mappers: Go to **Clients** > **domino-play** > **Client Scopes** > **domino-play-dedicated**.
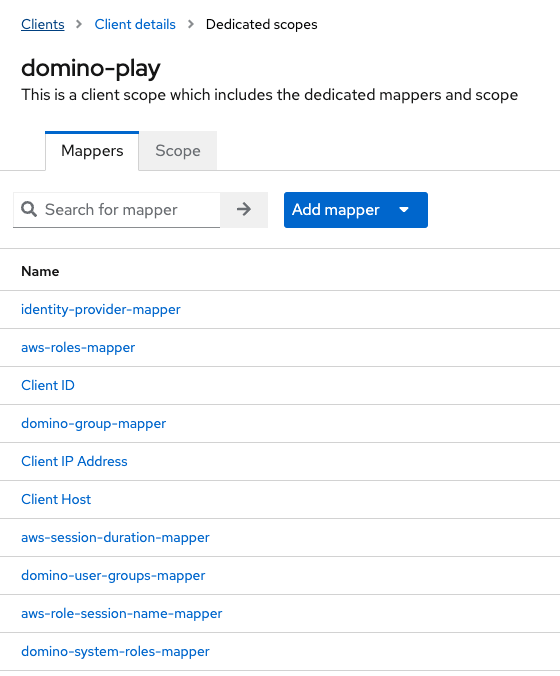
 3. You can see the `domino-group-mapper`.
 ## Role synchronization
In addition to group membership, you can also automatically assign Domino [administrative and/or user roles](/6.3/admin/identity-and-access/manage-users/roles) to users based on attributes from your SAML identity provider.
### Prerequisite
The SAML identity provider application connected to Domino must include attributes that can be mapped to specific Domino roles.
### Attribute mapper
You must add an **Attribute Importer** mapper to the provider configuration in Keycloak:
* **Name:** Domino System Roles.
* **Mapper Type:** `Attribute Importer`.
* **Attribute Name:** Name attribute for the element that contains the Domino system roles for the user.
* **Friendly Name:** `FriendlyName` attribute for the element that contains the groups for the user.
* **User Attribute Name:** `domino-system-roles`.
To see the **Mappers**, go to **Clients** > **domino-play** > **Client Scopes** > **domino-play-dedicated**.
Domino system roles are controlled by the user’s membership in a set of special user groups in Keycloak. When the user is added or removed from such a group, the role change is propagated to Domino either on the next login or, if the user is currently logged in, within a few minutes (5 minutes by default).
When the user’s SAML token carries the role information as described above, the group membership will be updated automatically. The administrator can change the user roles from the [Admin User management page](/6.3/admin/identity-and-access/manage-users/roles), but it will be overwritten on the next SSO login if the `Domino System Roles` mapper is enabled.
### Enable Flows
For customers who already have SSO and External Role Sync enabled, an authenticator has been added to Keycloak when upgrading to Domino 5.7.0. For customers with SSO enabled, but External Role Sync disabled, the authenticator is *not* being added to the Authentication Flows when upgraded to 5.7.0.
For existing customers who don’t have the External Role Sync but now want to enable it, the following manual actions must be taken in the Keycloak UI:
1. Add a new execution to the **Domino First Broker Login** flow:
1. Navigate to **Authentication** > **Flow details** > **Domino First Broker Login**, then click the **Add step** button.
2. Search for `Role Group Assigner` then select the **Domino Role Group assigner** step. Click **Add**.
3. Mark the new **Domino Role Group assigner** execution as `Required`.
2. If the `Domino Post Login` authentication flow doesn’t exist, create it:
1. Navigate to **Authentication** > **Flow details** > **Domino Post Login**, then click the **Add step** button.
2. Search for `Role Group Assigner` then select the **Domino Role Group assigner** step. Click **Add**.
3. Mark the new **Domino Role Group assigner** execution as `Required`.
3. Add the new flows to the Identity providers configuration:
1. Navigate to **Identity providers**.
2. Next to **First login flow override**, select `Domino First Broker Login` from the list.
3. Next to **Post login flow**, select `Domino Post Login` from the list.
## Next steps
Learn how to [propagate AWS credentials](/6.3/admin/identity-and-access/authentication/sso/aws-credential-propagation).
## Role synchronization
In addition to group membership, you can also automatically assign Domino [administrative and/or user roles](/6.3/admin/identity-and-access/manage-users/roles) to users based on attributes from your SAML identity provider.
### Prerequisite
The SAML identity provider application connected to Domino must include attributes that can be mapped to specific Domino roles.
### Attribute mapper
You must add an **Attribute Importer** mapper to the provider configuration in Keycloak:
* **Name:** Domino System Roles.
* **Mapper Type:** `Attribute Importer`.
* **Attribute Name:** Name attribute for the element that contains the Domino system roles for the user.
* **Friendly Name:** `FriendlyName` attribute for the element that contains the groups for the user.
* **User Attribute Name:** `domino-system-roles`.
To see the **Mappers**, go to **Clients** > **domino-play** > **Client Scopes** > **domino-play-dedicated**.
Domino system roles are controlled by the user’s membership in a set of special user groups in Keycloak. When the user is added or removed from such a group, the role change is propagated to Domino either on the next login or, if the user is currently logged in, within a few minutes (5 minutes by default).
When the user’s SAML token carries the role information as described above, the group membership will be updated automatically. The administrator can change the user roles from the [Admin User management page](/6.3/admin/identity-and-access/manage-users/roles), but it will be overwritten on the next SSO login if the `Domino System Roles` mapper is enabled.
### Enable Flows
For customers who already have SSO and External Role Sync enabled, an authenticator has been added to Keycloak when upgrading to Domino 5.7.0. For customers with SSO enabled, but External Role Sync disabled, the authenticator is *not* being added to the Authentication Flows when upgraded to 5.7.0.
For existing customers who don’t have the External Role Sync but now want to enable it, the following manual actions must be taken in the Keycloak UI:
1. Add a new execution to the **Domino First Broker Login** flow:
1. Navigate to **Authentication** > **Flow details** > **Domino First Broker Login**, then click the **Add step** button.
2. Search for `Role Group Assigner` then select the **Domino Role Group assigner** step. Click **Add**.
3. Mark the new **Domino Role Group assigner** execution as `Required`.
2. If the `Domino Post Login` authentication flow doesn’t exist, create it:
1. Navigate to **Authentication** > **Flow details** > **Domino Post Login**, then click the **Add step** button.
2. Search for `Role Group Assigner` then select the **Domino Role Group assigner** step. Click **Add**.
3. Mark the new **Domino Role Group assigner** execution as `Required`.
3. Add the new flows to the Identity providers configuration:
1. Navigate to **Identity providers**.
2. Next to **First login flow override**, select `Domino First Broker Login` from the list.
3. Next to **Post login flow**, select `Domino Post Login` from the list.
## Next steps
Learn how to [propagate AWS credentials](/6.3/admin/identity-and-access/authentication/sso/aws-credential-propagation).