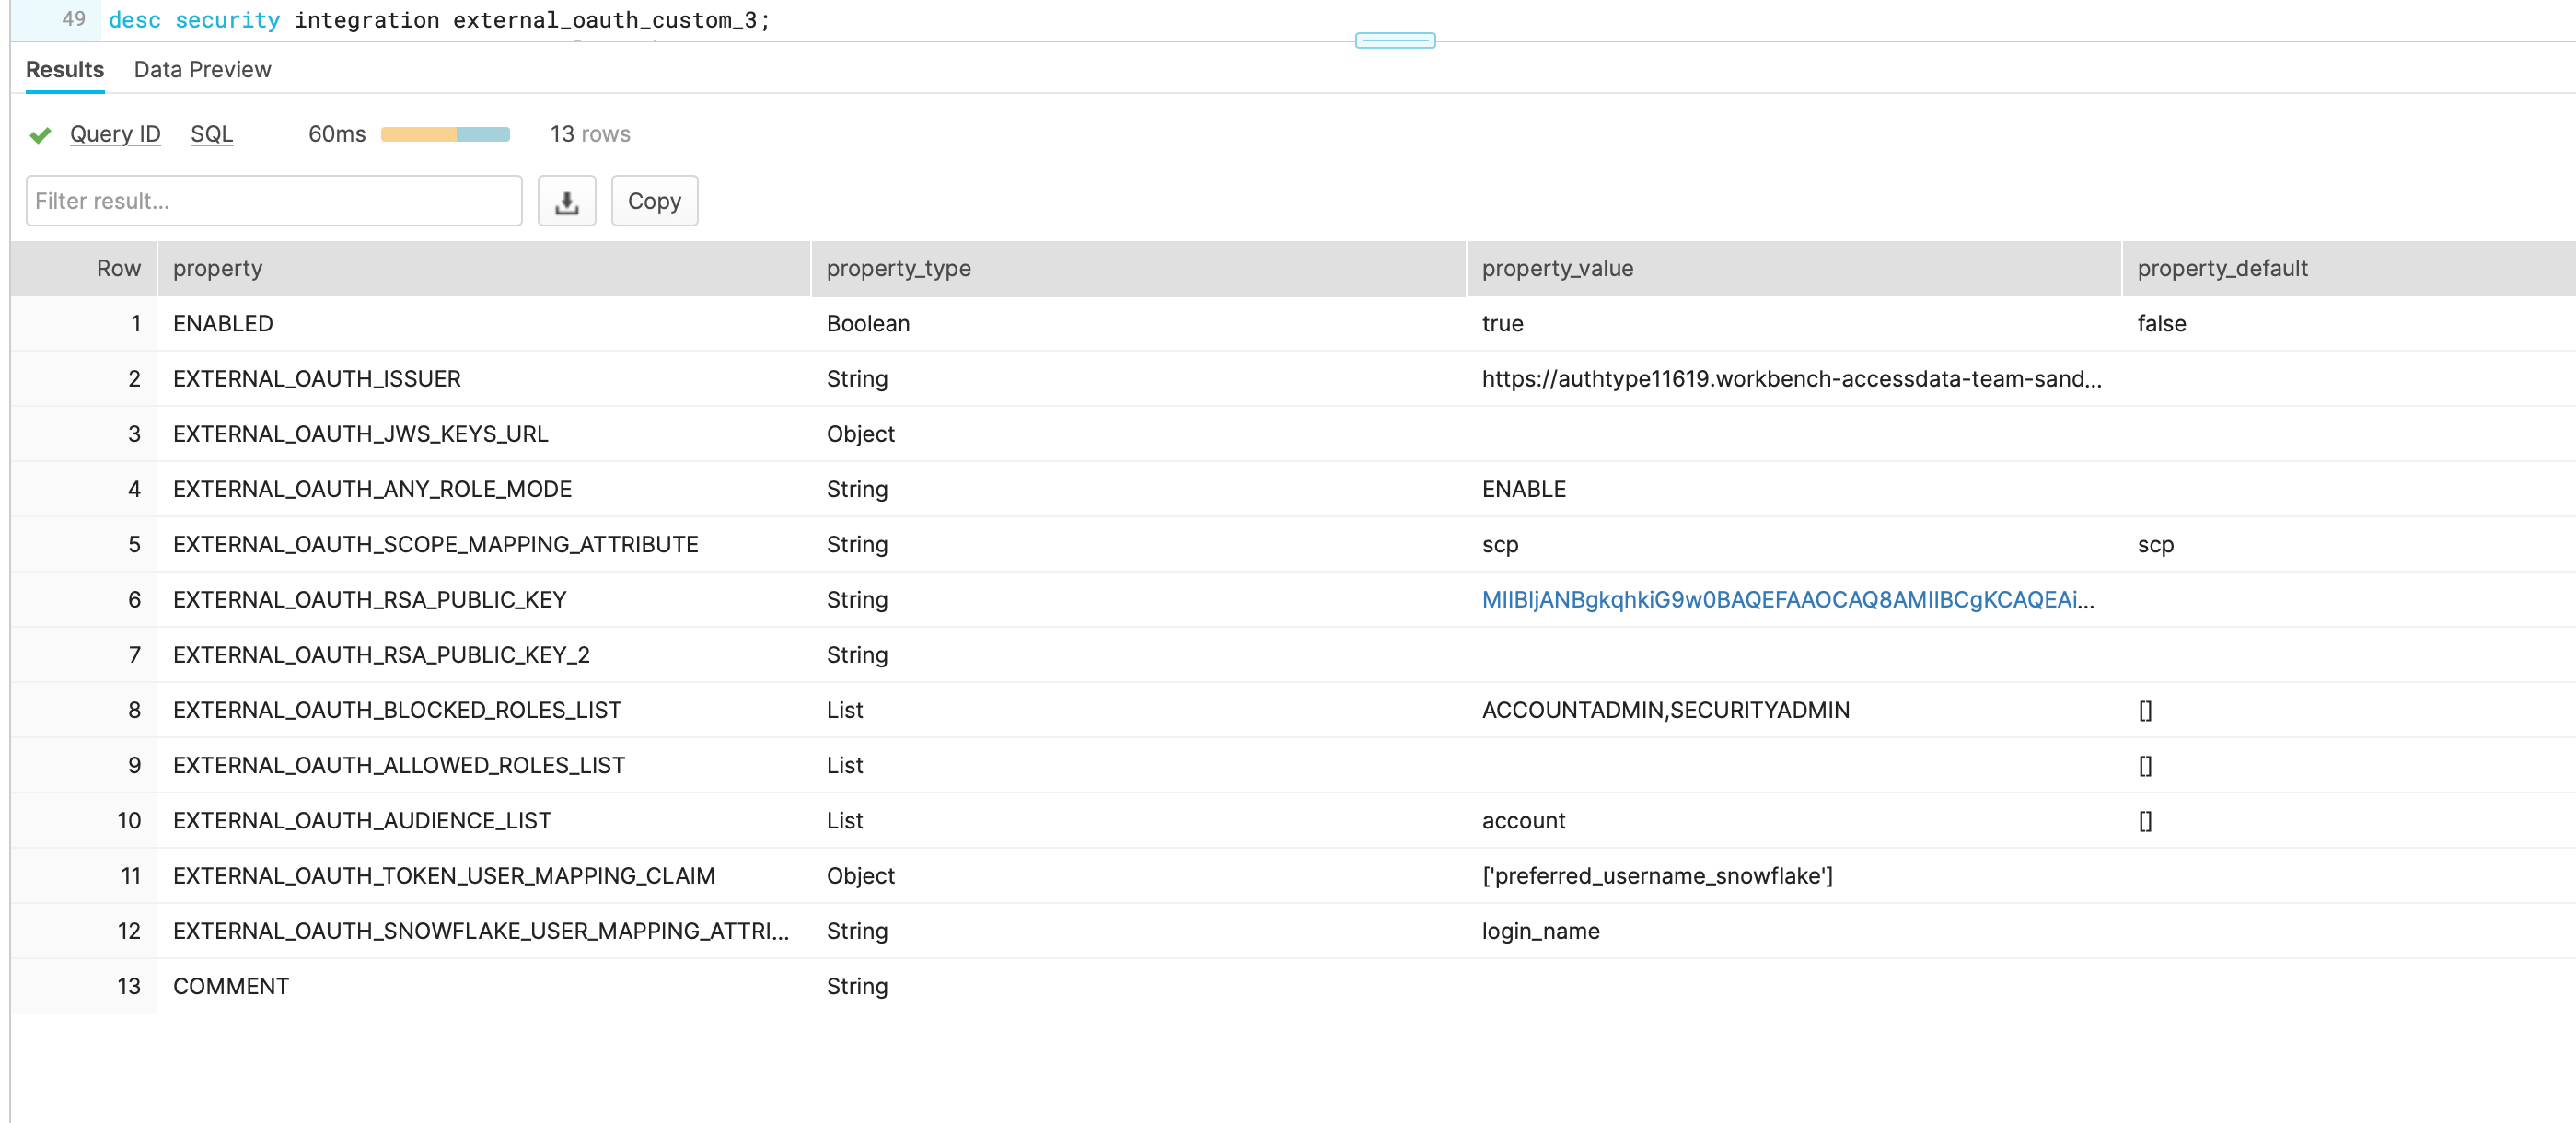
 ## 2. Set up Keycloak integration
The following steps describe how to instruct Keycloak to pass the values that Snowflake’s custom security integration expects in the Domino JWT access token. To do this, create mappers in the `domino-play` client and specify the option to `add to access token` in each mapper. This creates a key-value entry in the Domino JWT token with key being what is specified under `Token Claim Name`.
The value depends on what type of mapper is created. For example, a hardcoded-claim mapper requests a value, which ultimately propagates equally to all users. By contrast, a user-attribute mapper requests a `User Attribute` name, then looks into each Keycloak user attribute for that attribute name and propagates its value. This lets you customize how the Domino JWT token is augmented by each user.
The following is a base solution that matches the base Snowflake custom security integration described previously. This solution is a starting point to build upon for a customized authentication configuration that fits your security needs.
Set up the Keycloak integration:
1. Go to the keycloak admin console at `https://
## 2. Set up Keycloak integration
The following steps describe how to instruct Keycloak to pass the values that Snowflake’s custom security integration expects in the Domino JWT access token. To do this, create mappers in the `domino-play` client and specify the option to `add to access token` in each mapper. This creates a key-value entry in the Domino JWT token with key being what is specified under `Token Claim Name`.
The value depends on what type of mapper is created. For example, a hardcoded-claim mapper requests a value, which ultimately propagates equally to all users. By contrast, a user-attribute mapper requests a `User Attribute` name, then looks into each Keycloak user attribute for that attribute name and propagates its value. This lets you customize how the Domino JWT token is augmented by each user.
The following is a base solution that matches the base Snowflake custom security integration described previously. This solution is a starting point to build upon for a customized authentication configuration that fits your security needs.
Set up the Keycloak integration:
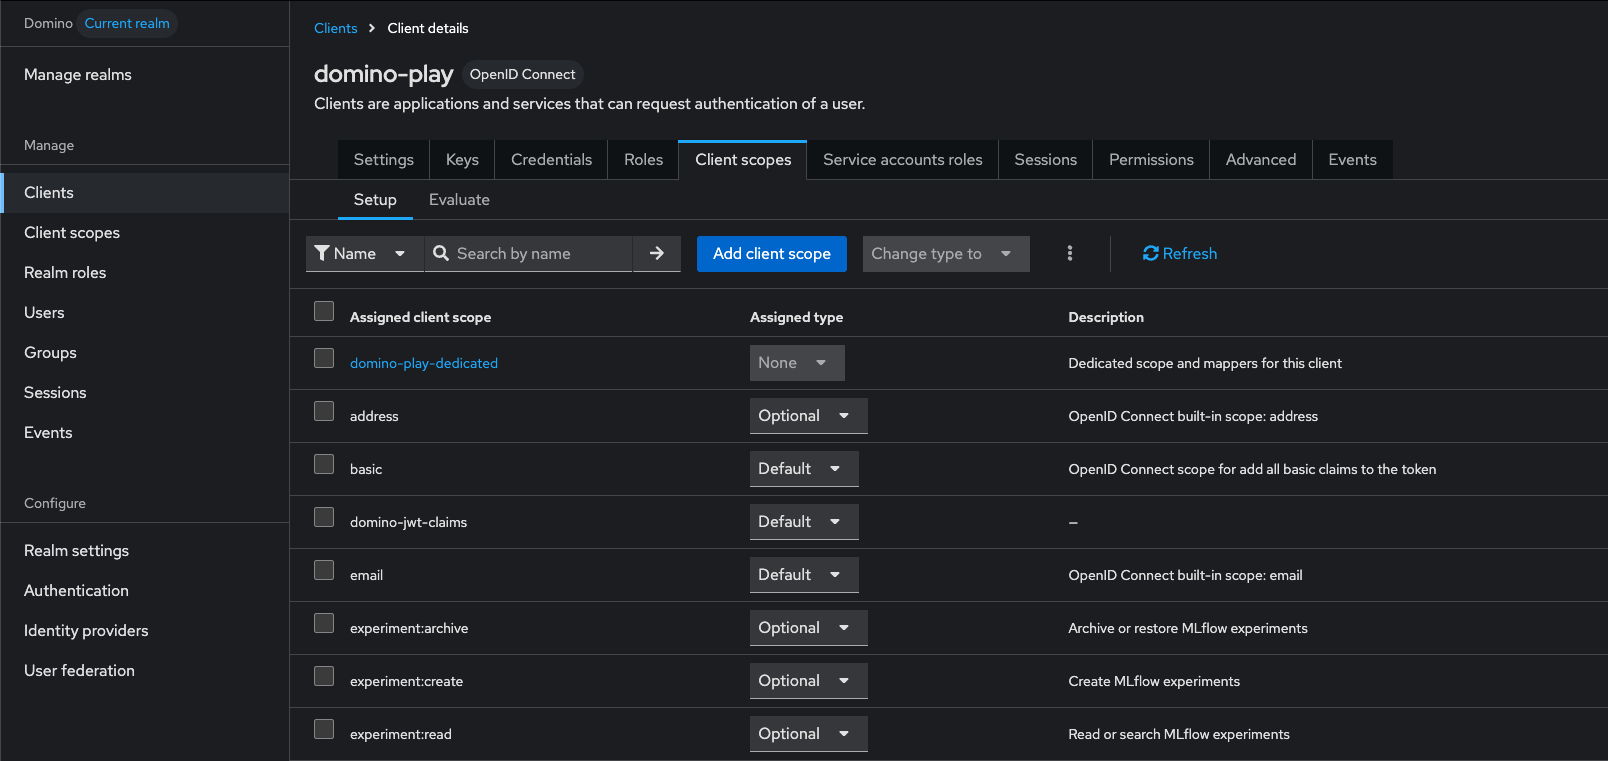
1. Go to the keycloak admin console at `https://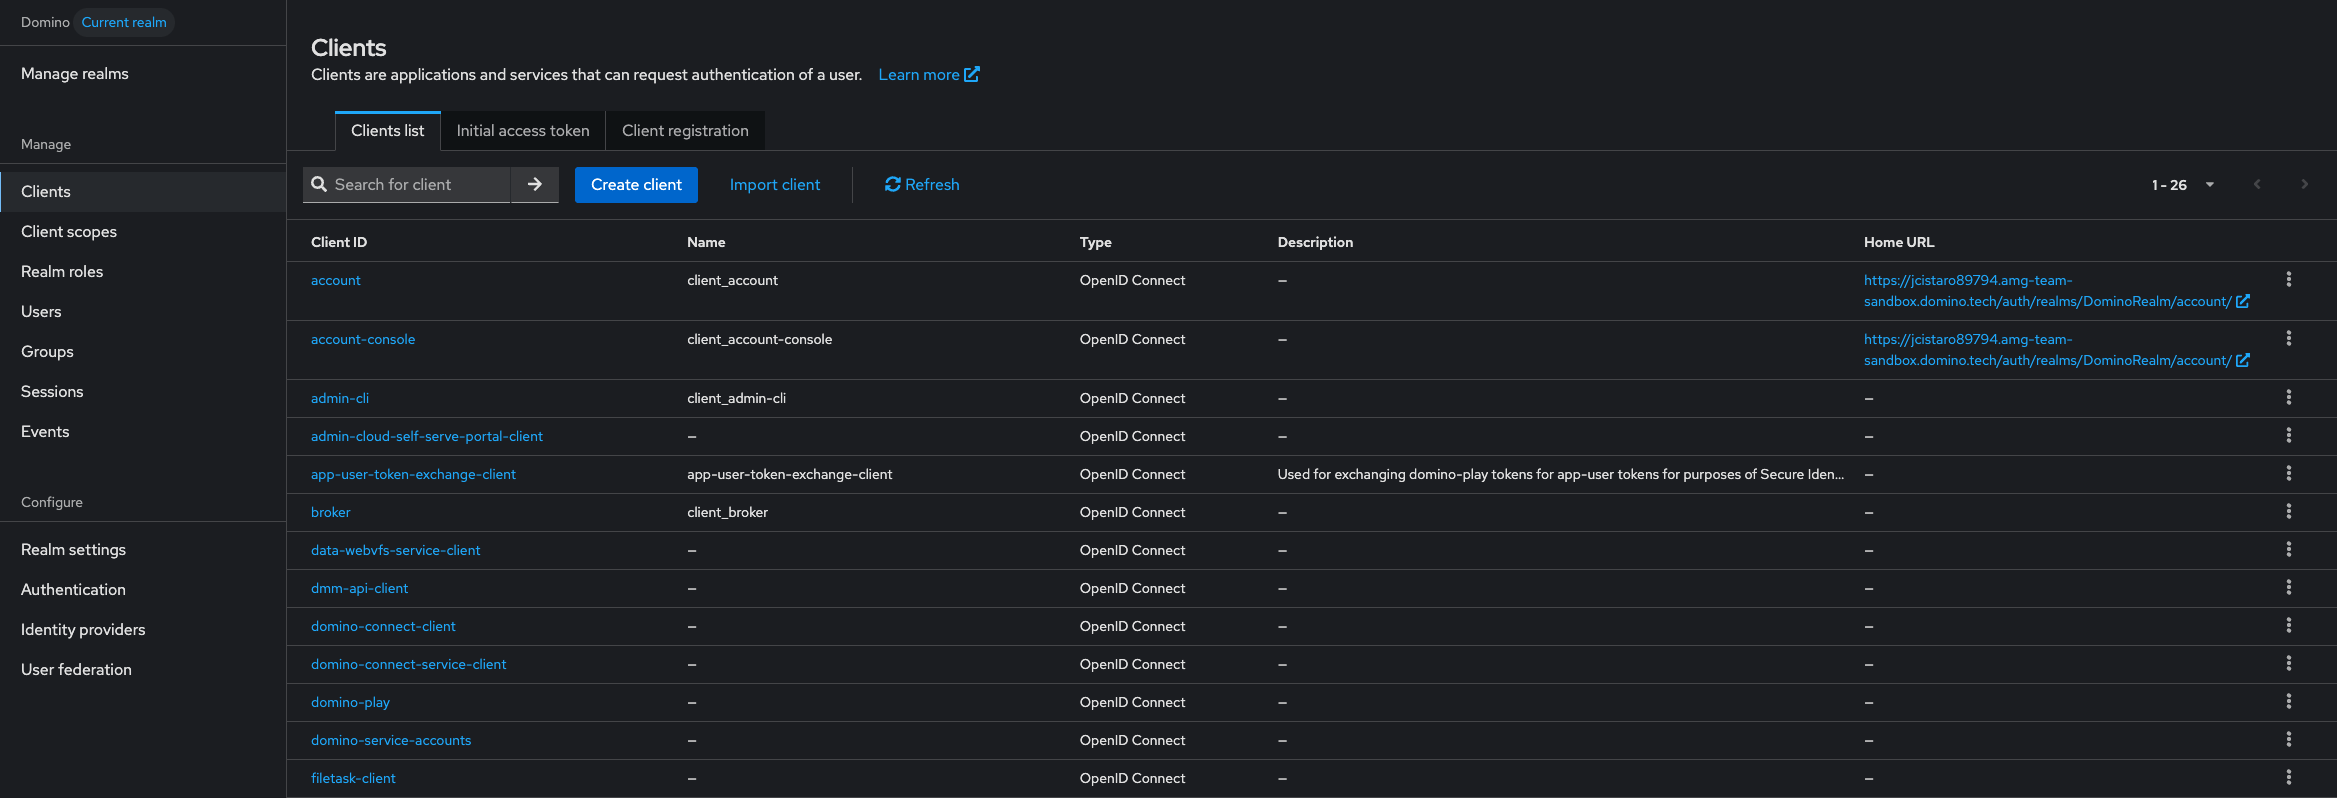 3. From the lookup list, click **domino-play**, then click **Client scopes** > **domino-play-dedicated**.
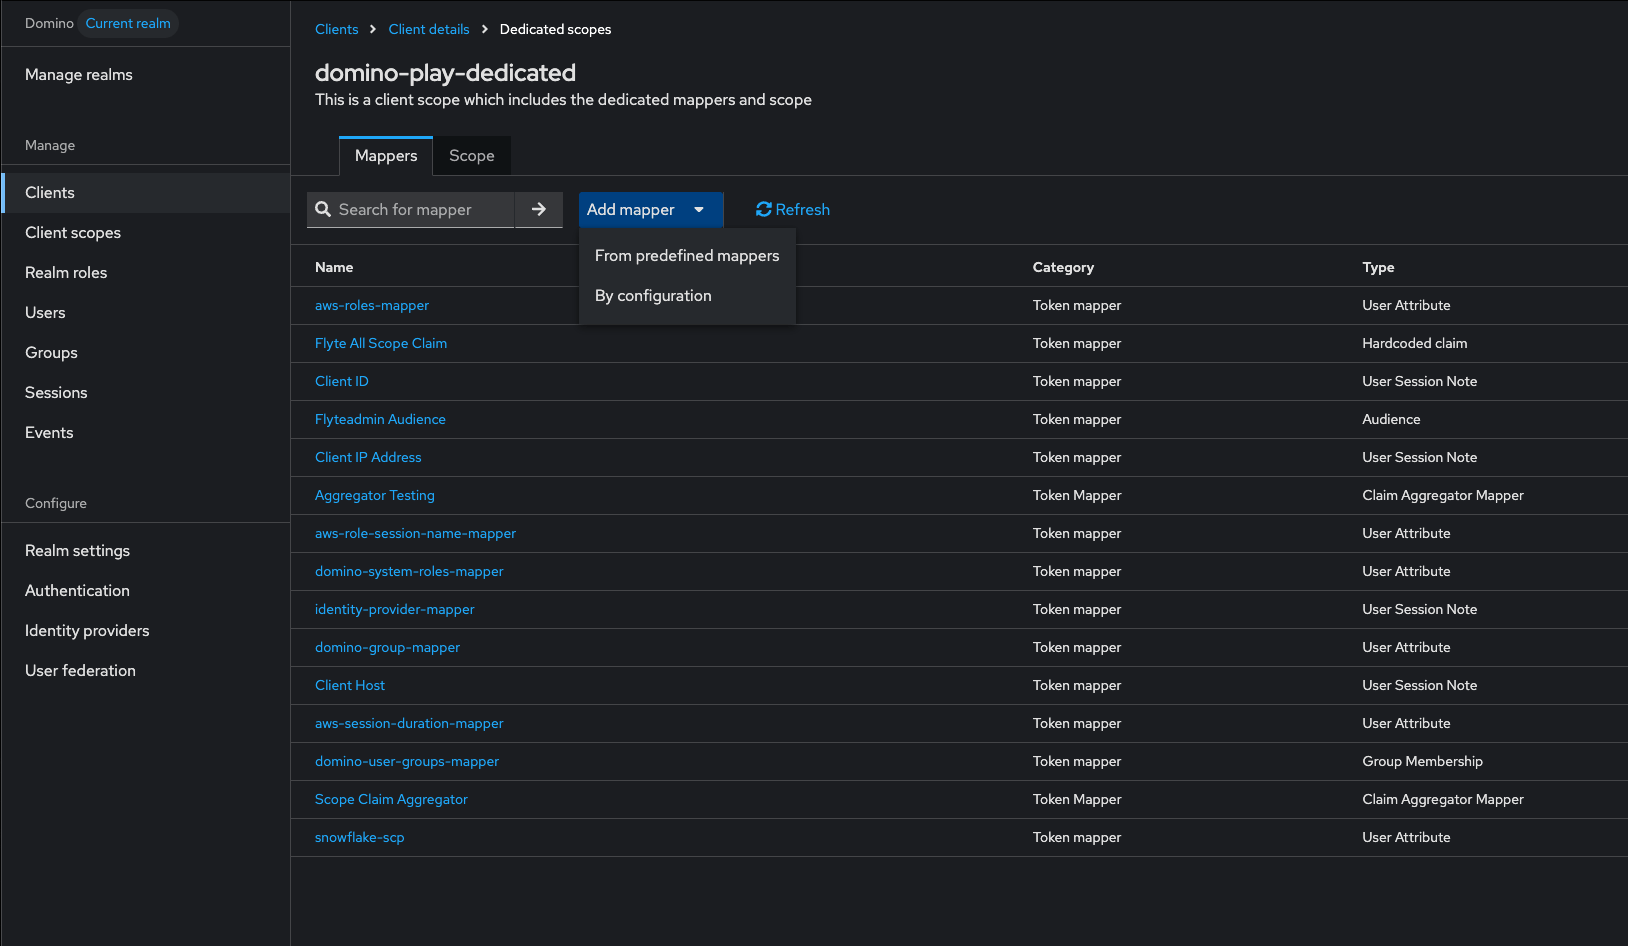
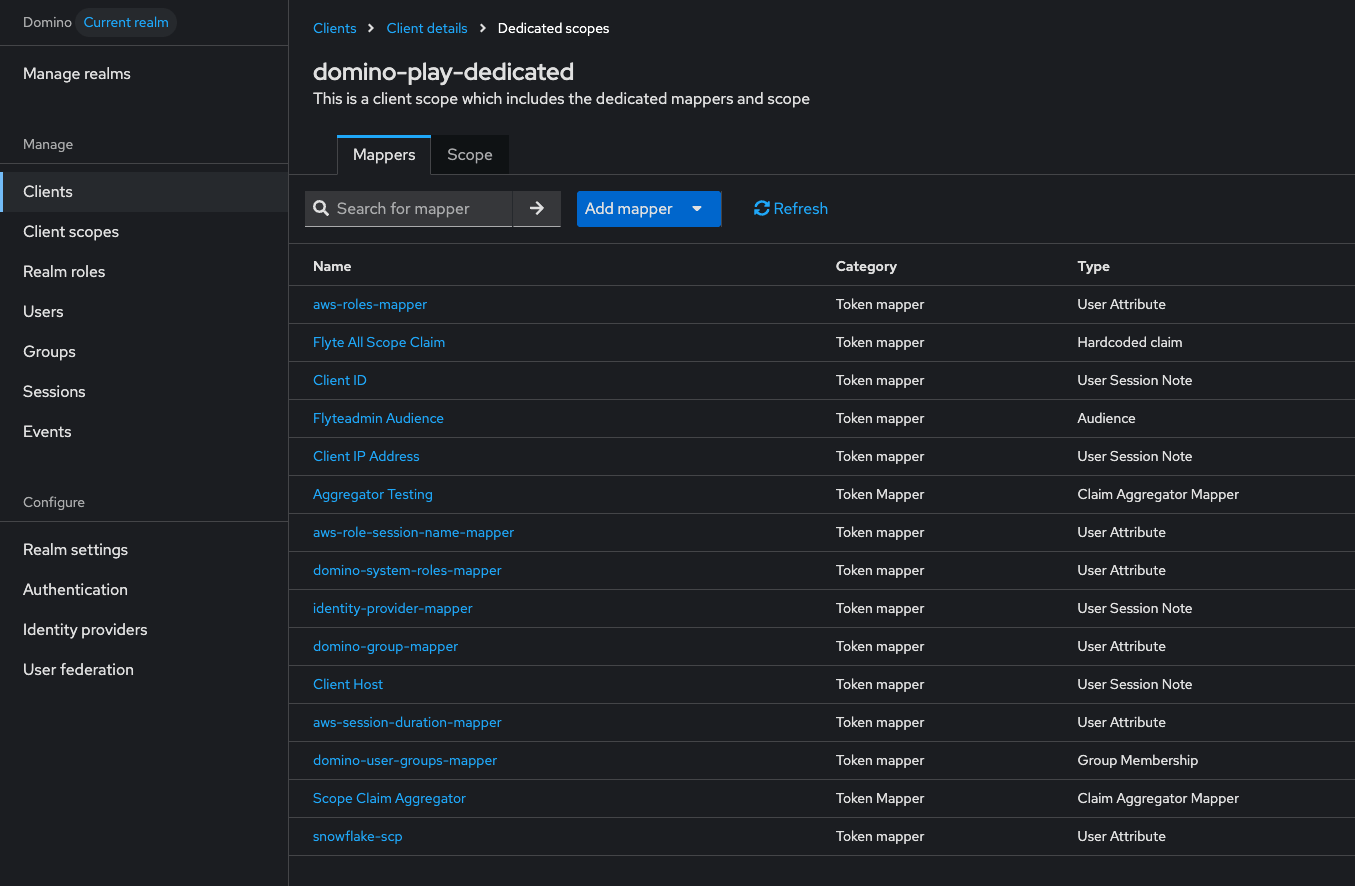 4. To add mappers, click **Mappers** > **Add mapper** > **By configuration**.
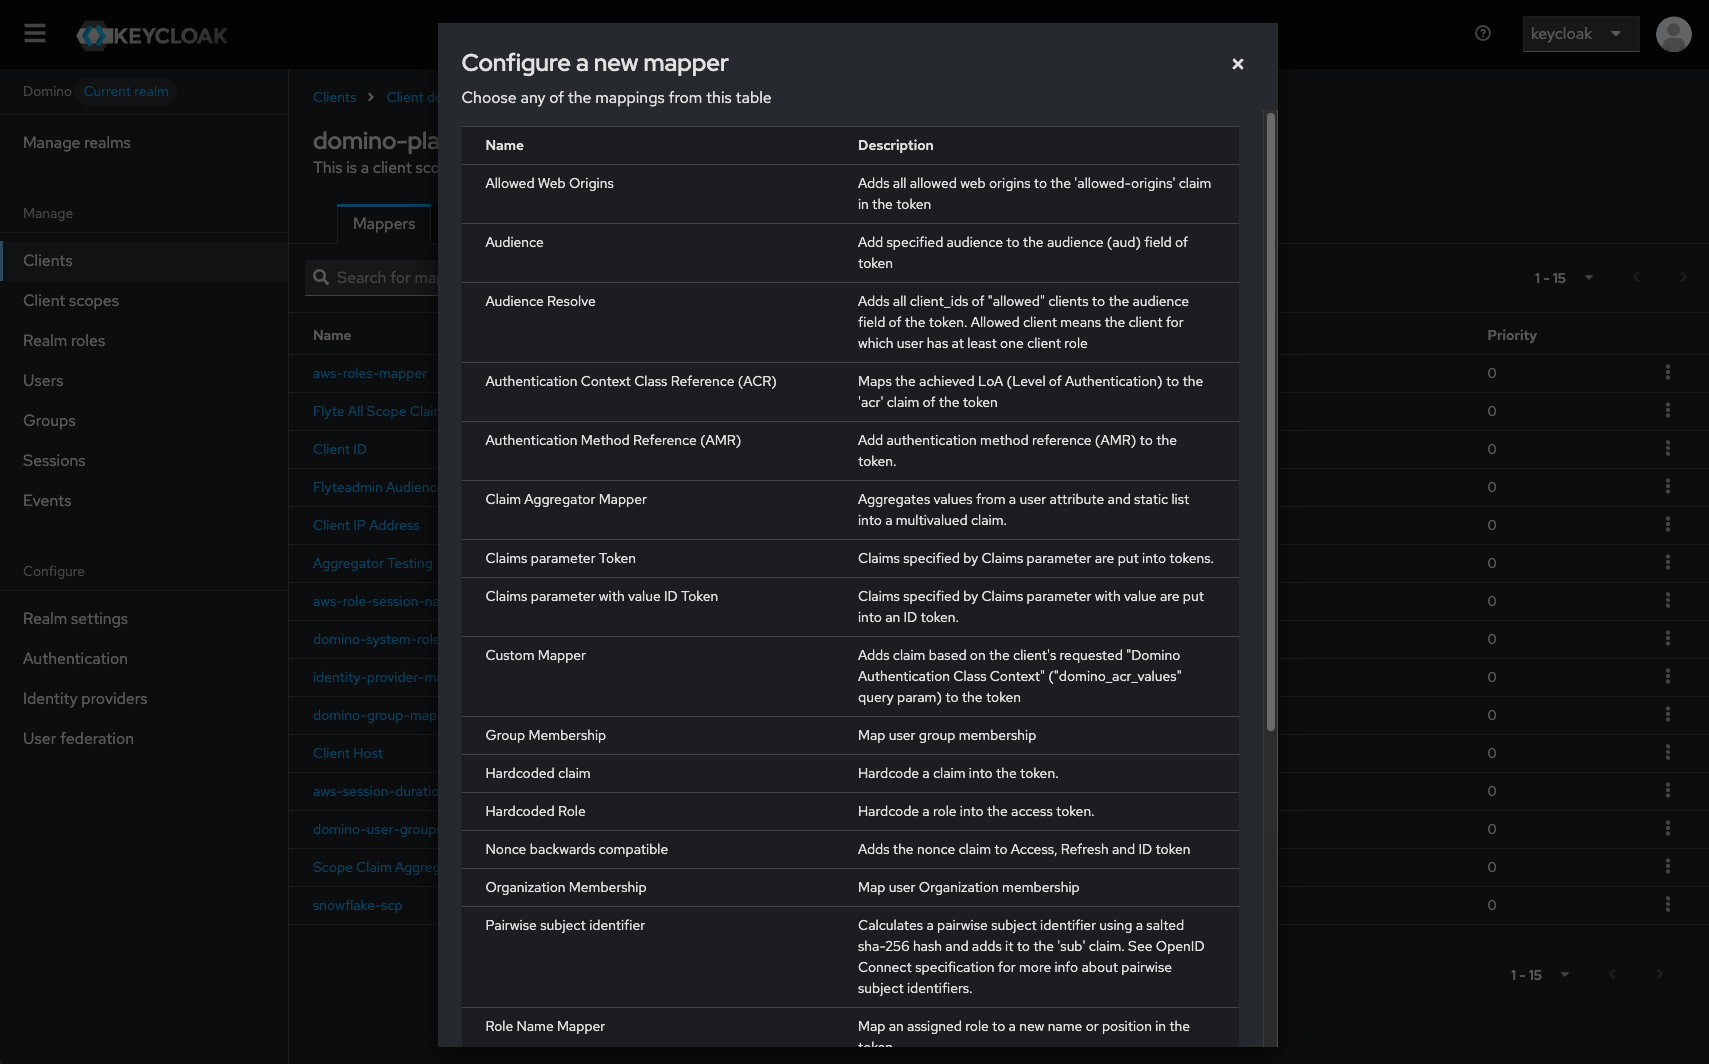
 5. Choose a mapper from the listed mappings and configure the new mapper.
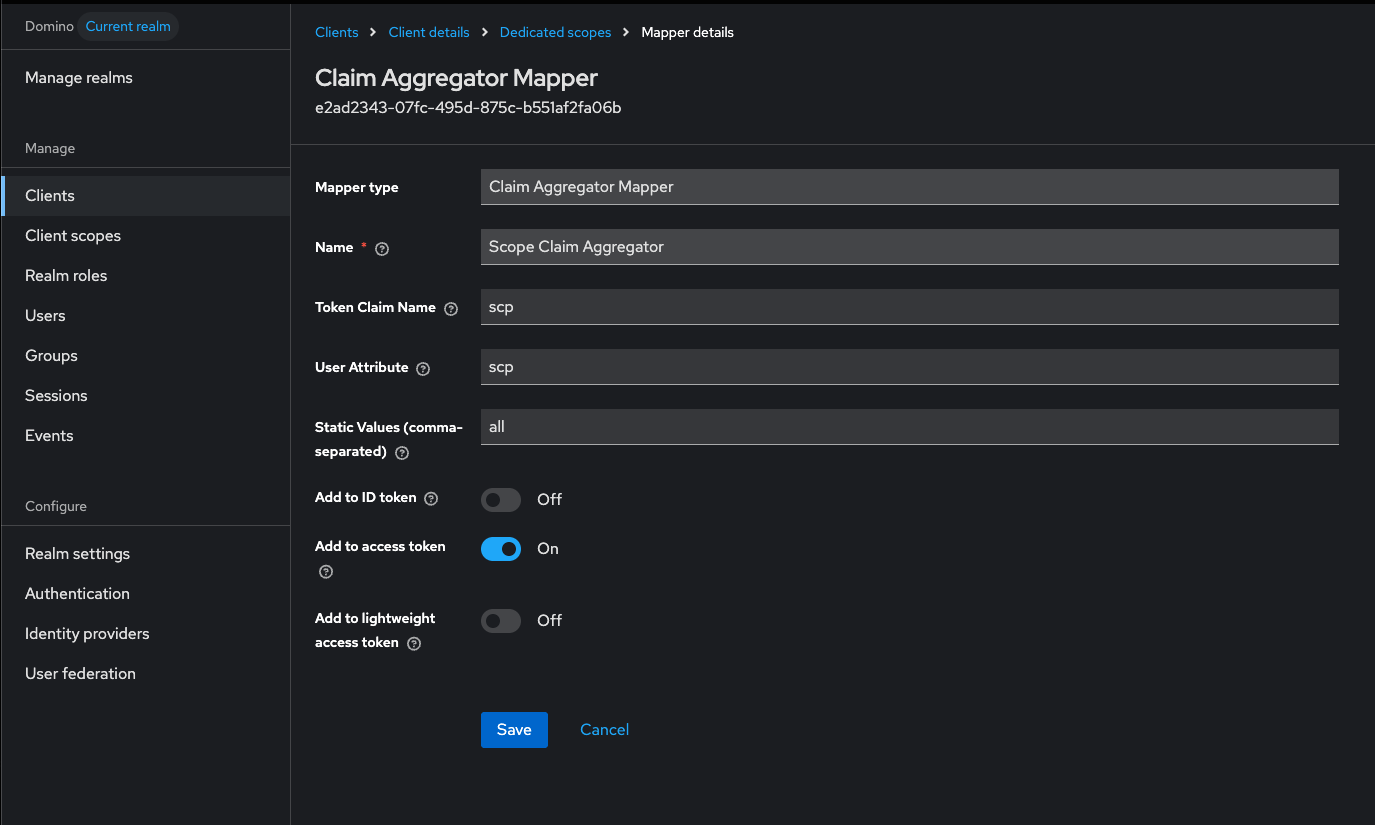
 The mappers are simple examples. For the `scp` claim specifically, it is highly recommended that you make use of the prepopulated "Scope Claim Aggregator" mapper. Otherwise you can write your mappers differently, as long as they conform to the Snowflake Security Integration’s requirements.
| SCP | |
|---|---|
Token Claim Name |
|
User Attribute |
The name of the user attribute containing the desired Snowflake scope name. |
Static Values (comma-separated) |
|
Add to access token |
|
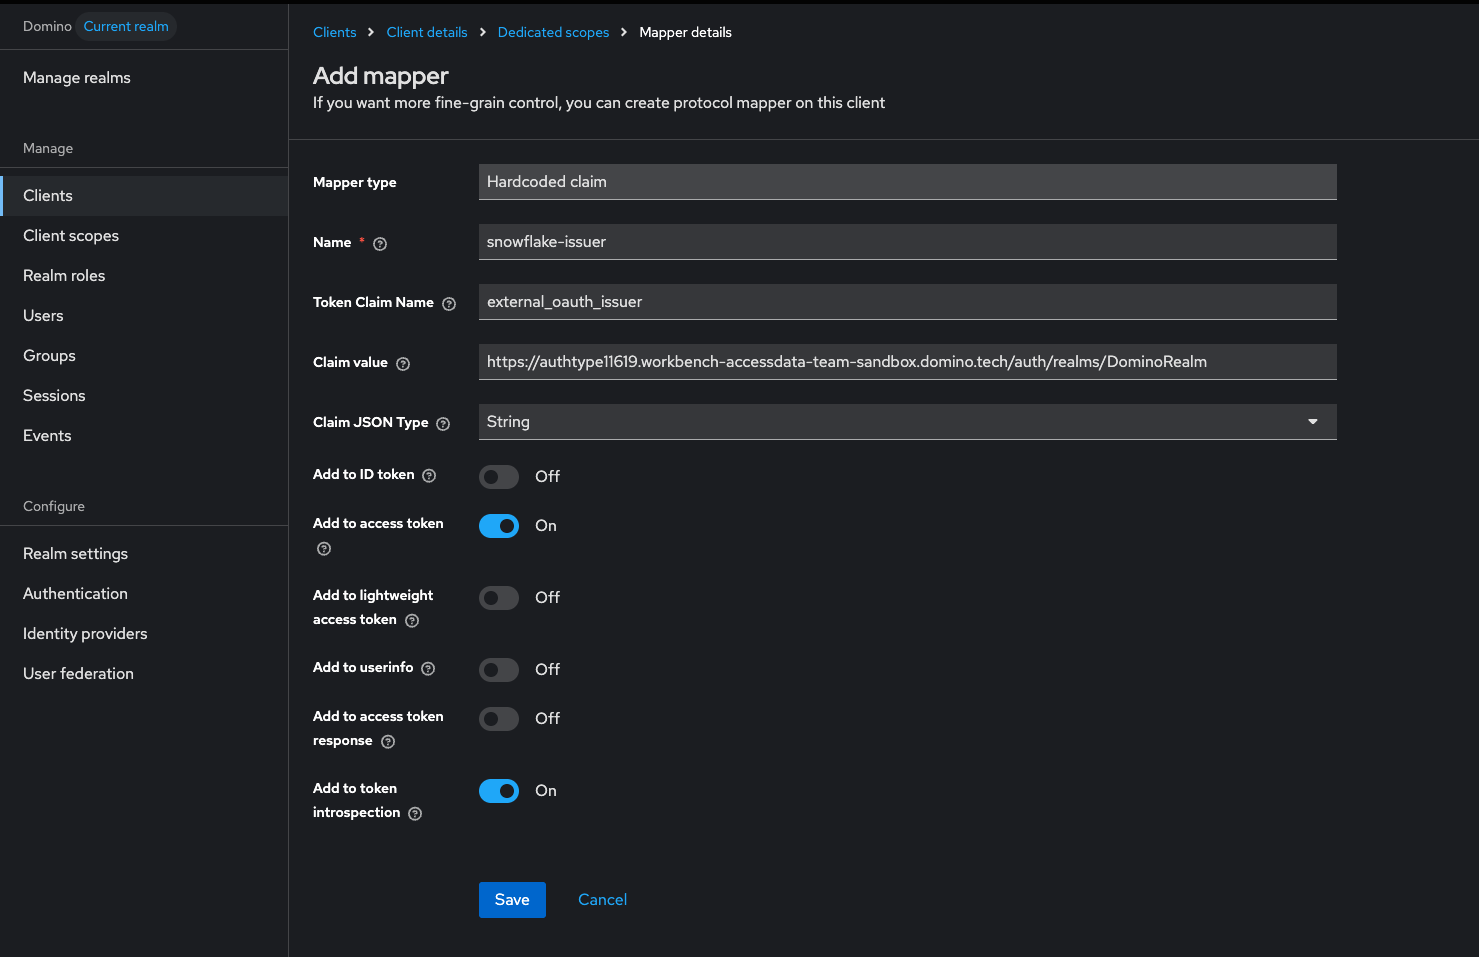
| Issuer | |
|---|---|
Token Claim Name |
|
Claim JSON Type |
|
Add to access token |
|
Claim value |
The name of your OpenID Endpoint Configuration issuer. You can find the value in Realm Settings > OpenID Endpoint Configuration > Issuer. |
| Audience | |
|---|---|
Token Claim Name |
|
Claim JSON Type |
|
Add to access token |
|
Multivalued |
|
Claim value |
This should be a list of audiences supported by the security integration. |
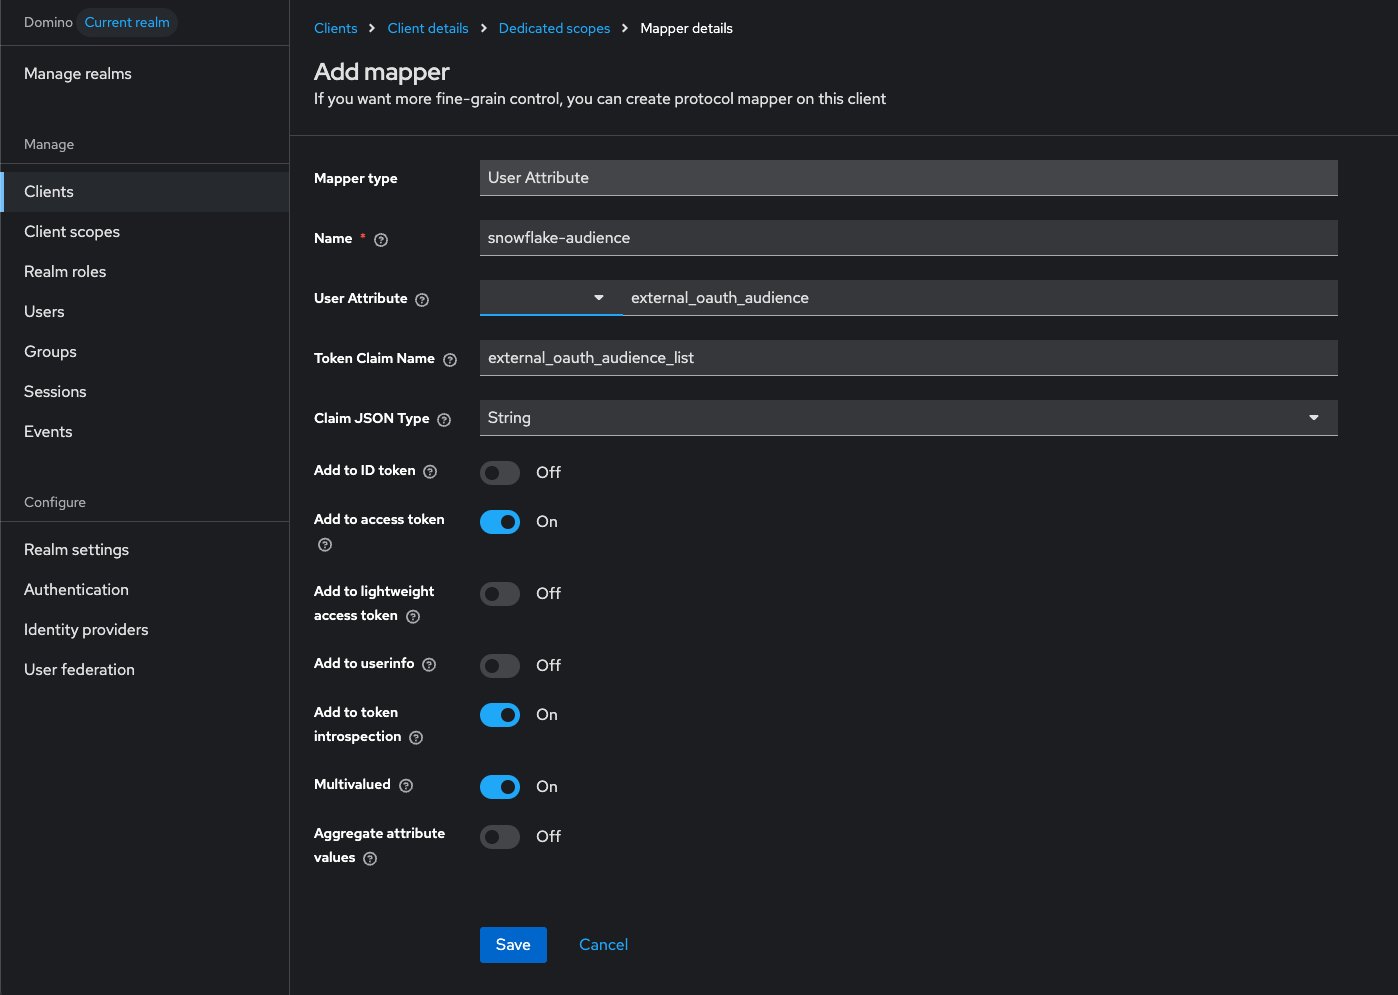
| User Mapping | |
|---|---|
Token Claim Name |
|
Claim JSON Type |
|
Add to access token |
|
Claim value |
This should represent the mapping between keycloak user and Snowflake user. |
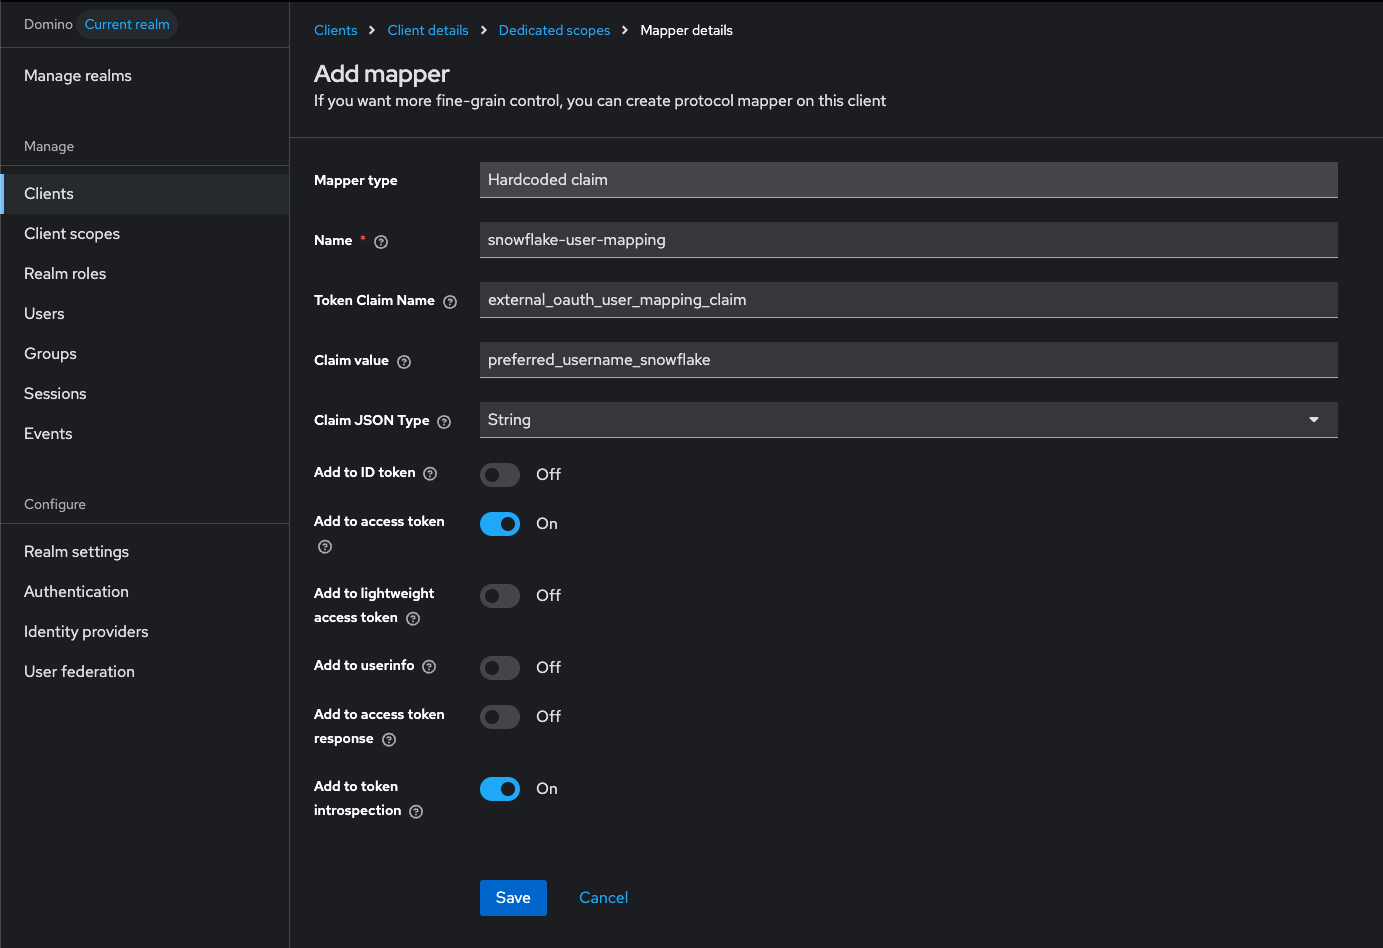
| External User Mapping Attribute | |
|---|---|
Token Claim Name |
|
Claim JSON Type |
|
Add to access token |
|
Claim value |
This is a mapper that goes with your custom security integration. Its value is the Snowflake username of the authenticating user. Note how in the Snowflake custom security integration, we specified |
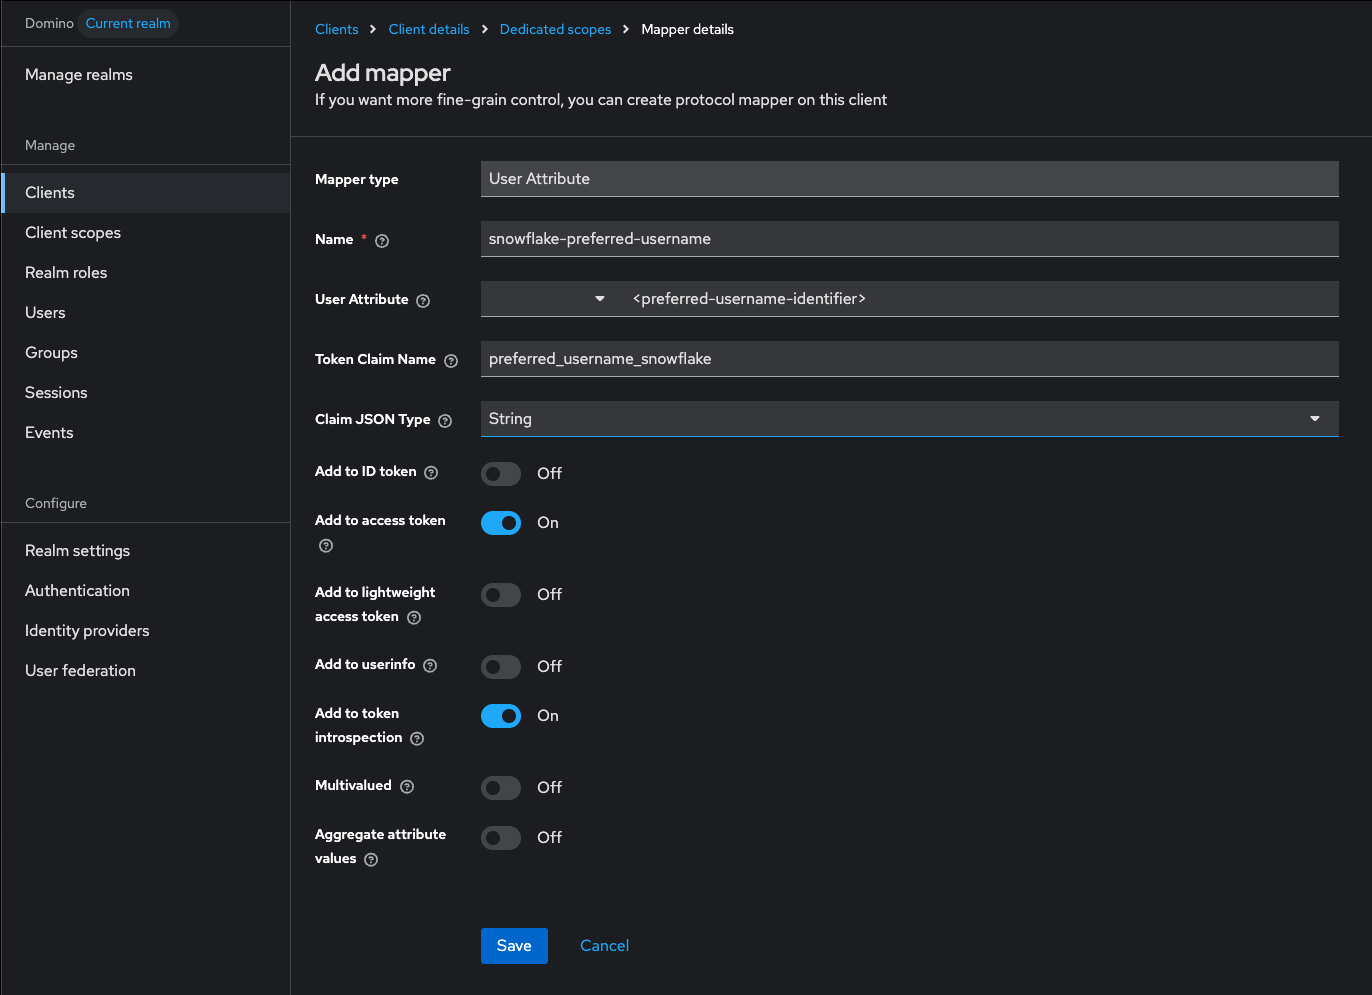
| RSA Public Key Value | |
|---|---|
Token Claim Name |
|
Claim JSON Type |
|
Add to access token |
|
Claim value |
This should be the name of your OpenID Endpoint Configuration issuer. You can find the value in Realm Settings > Keys > Public Key from RS256 |
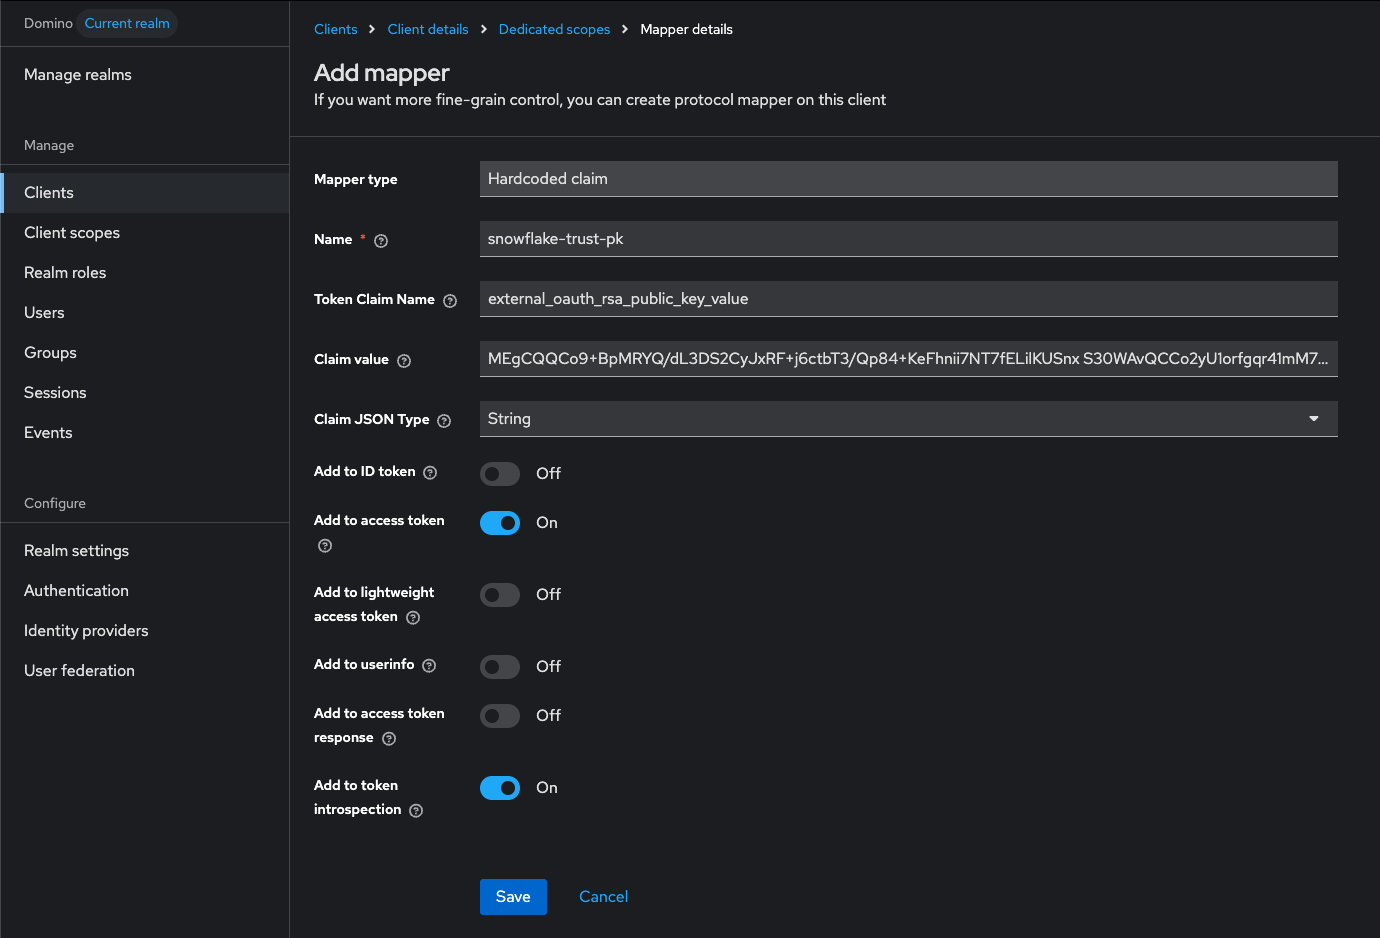
| External User Mapping Attribute | |
|---|---|
Token Claim Name |
|
Claim JSON Type |
|
Add to access token |
|
Claim value |
This is the attribute that is used to map the access token to a Snowflake user record. |
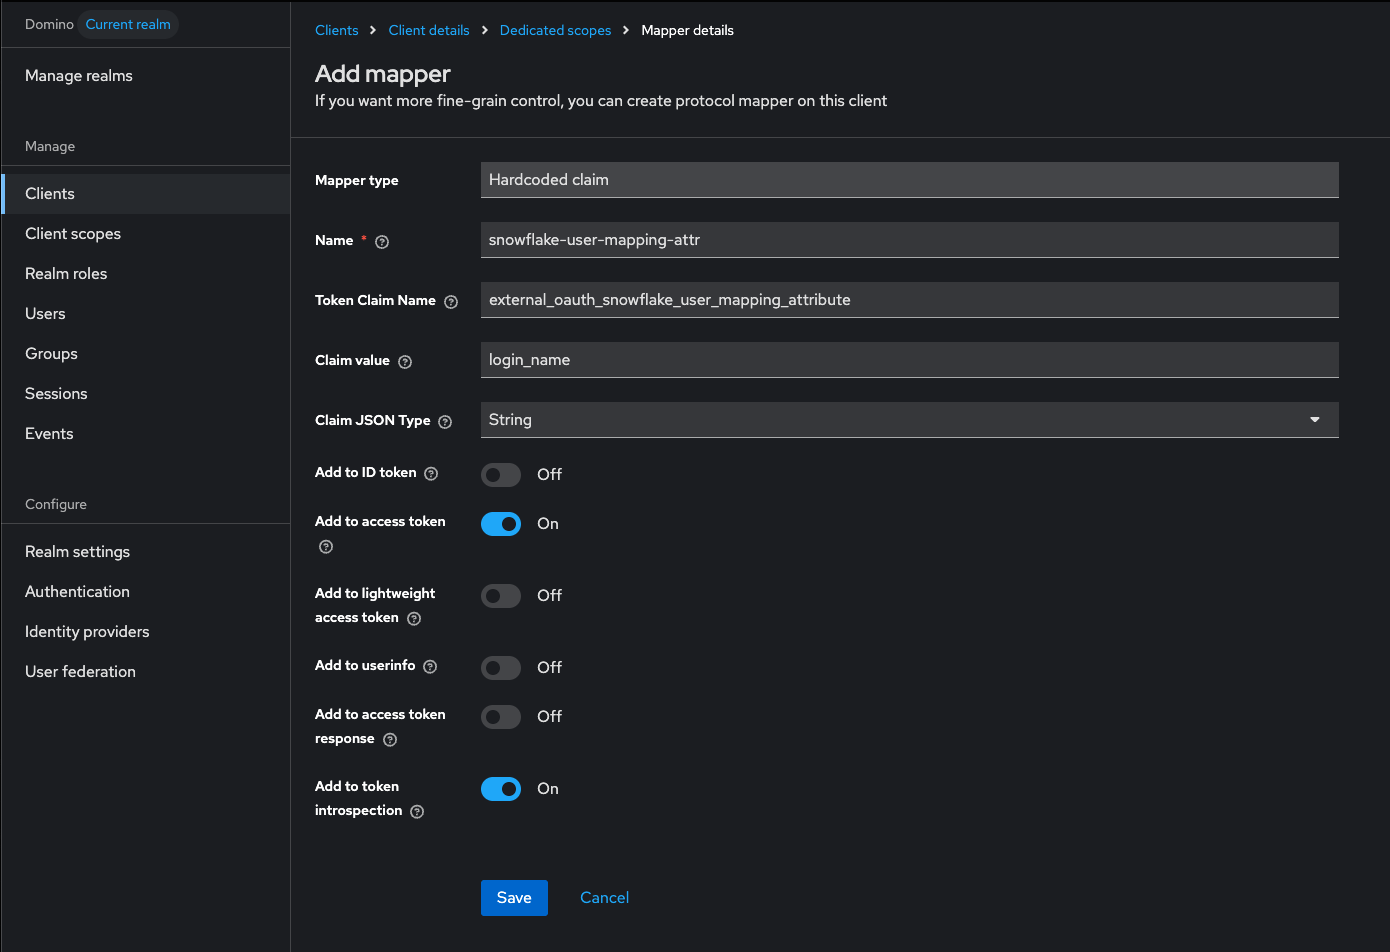 Keycloak propagates the values obtained by the mappers into the JWT token that is used to authenticate against the External OAuth Security Integration you created in Snowflake.
6. If you added a mapper that required a user attribute, add the proper user attribute at **Users** > **View All Users** > **\<user ID>** > **Attributes**.
You can also automate this to create further roles and mappers, as in this example user attribute:
Keycloak propagates the values obtained by the mappers into the JWT token that is used to authenticate against the External OAuth Security Integration you created in Snowflake.
6. If you added a mapper that required a user attribute, add the proper user attribute at **Users** > **View All Users** > **\<user ID>** > **Attributes**.
You can also automate this to create further roles and mappers, as in this example user attribute:
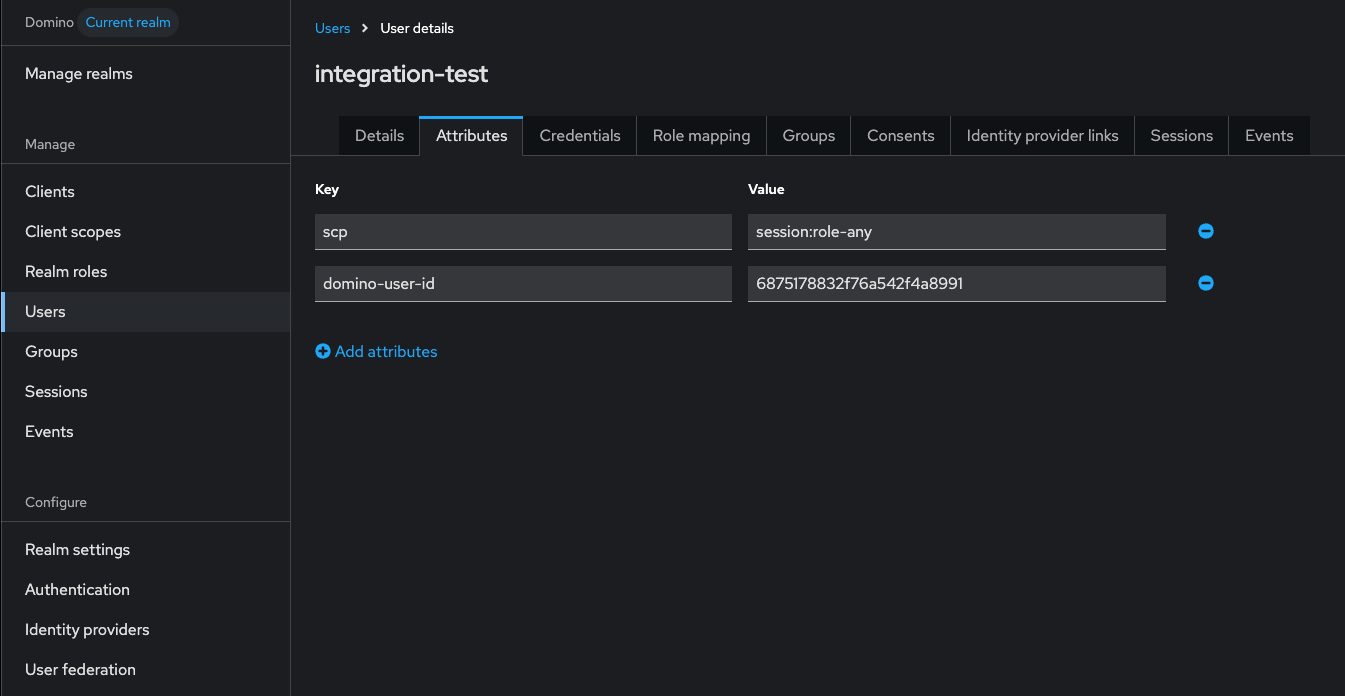 7. Add OAuth to the available authentication types for Snowflake:
1. Go to **Platform settings** > **Configuration records**.
2. Click **Add Record**.
3. Enter the `com.cerebro.domino.datasource.SnowflakeConfig.enabledAuthTypes` key with the value `OAuth` or `Basic, OAuth`. The order of the values matters, and the first value will be set as default authentication method for all users.
7. Add OAuth to the available authentication types for Snowflake:
1. Go to **Platform settings** > **Configuration records**.
2. Click **Add Record**.
3. Enter the `com.cerebro.domino.datasource.SnowflakeConfig.enabledAuthTypes` key with the value `OAuth` or `Basic, OAuth`. The order of the values matters, and the first value will be set as default authentication method for all users.
 8. Click **Create**.
## 3. Test the configuration
There are two ways to inject user attributes for testing (the user attributes `SCP`, `external_oauth_audience_list`, and `preferred_username_snowflake` must be present in the Domino user JWT token):
* Locally in Keycloak:\
For quick testing. User attributes can be manually added under the Keycloak user.
* Inject via SAML attributes:\
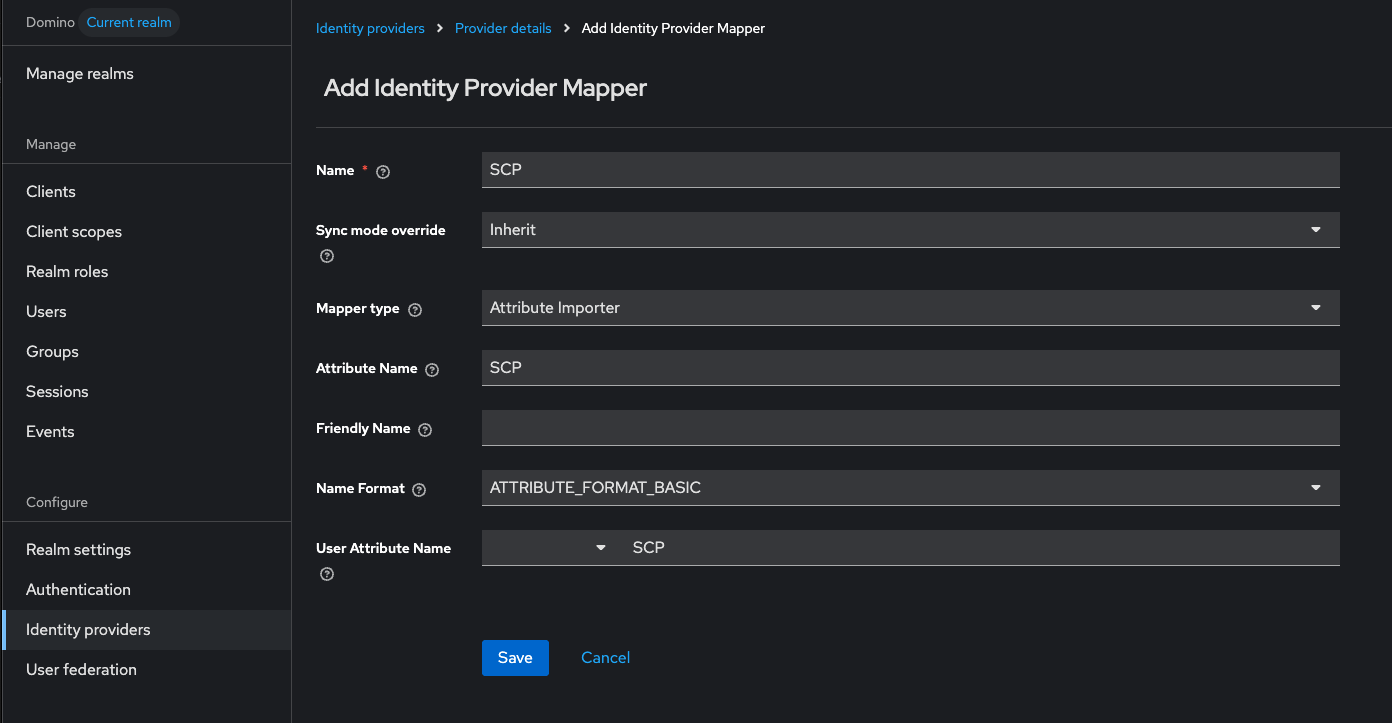
For enterprise-level implementations. The recommended way to pass the user attributes is from the Identity Provider as SAML attributes. When SAML attributes include the user attributes, additional mappers are needed to extract them and make them available for the Domino play client.
Three IDP user attribute mappers must be configured:
1. Go to **Domino realm** > **Identity providers** > **Identity provider** > **Mappers**.
2. For the **Mapper type**, select `Attribute importer`.
3. In the **Attribute Name** and **User Attribute Name** fields, add the user attributes to be passed to the Domino play client, for example, `SCP`, `external_oauth_audience_list`, and `preferred_username_snowflake`.
8. Click **Create**.
## 3. Test the configuration
There are two ways to inject user attributes for testing (the user attributes `SCP`, `external_oauth_audience_list`, and `preferred_username_snowflake` must be present in the Domino user JWT token):
* Locally in Keycloak:\
For quick testing. User attributes can be manually added under the Keycloak user.
* Inject via SAML attributes:\
For enterprise-level implementations. The recommended way to pass the user attributes is from the Identity Provider as SAML attributes. When SAML attributes include the user attributes, additional mappers are needed to extract them and make them available for the Domino play client.
Three IDP user attribute mappers must be configured:
1. Go to **Domino realm** > **Identity providers** > **Identity provider** > **Mappers**.
2. For the **Mapper type**, select `Attribute importer`.
3. In the **Attribute Name** and **User Attribute Name** fields, add the user attributes to be passed to the Domino play client, for example, `SCP`, `external_oauth_audience_list`, and `preferred_username_snowflake`.
 To test that OAuth is working with your Snowflake Data Source, follow these steps:
1. Register a Snowflake Data Source.
2. Select `OAuth` as the authentication type.
3. Open an execution.
4. Query data from the registered Data Source.
To test that OAuth is working with your Snowflake Data Source, follow these steps:
1. Register a Snowflake Data Source.
2. Select `OAuth` as the authentication type.
3. Open an execution.
4. Query data from the registered Data Source.