> ## Documentation Index
> Fetch the complete documentation index at: https://docs.domino.ai/llms.txt
> Use this file to discover all available pages before exploring further.
# Register External Data Volumes
[Remote data planes](/cloud/platform-capabilities/core-concepts/zones/domino-nexus) are needed to use EDVs in Domino Cloud.
Follow the instructions in this topic to register an external data volume (EDV) with Domino.
In a hybrid deployment, if you have a shared volume that can be accessed from multiple [data planes](/cloud/admin/platform-configuration/manage-data-planes), you can manage access to it using a single EDV across multiple data planes. Domino matches EDVs to PersistentVolumeClaims (PVCs) using the name of both the PVC and the underlying persistent volume (PV). Multiple data planes are automatically detected when registering the EDV.
If you see a PVC showing up in a data plane that you do not intend to use with an EDV, rename that PVC or PV so as not to match the PVC name of your EDV.
To register an EDV
1. From the Admin application, go to **Manage resources** > **External Data Volumes**.
2. Click **Register External Volume**. The Register an External Volume wizard opens.
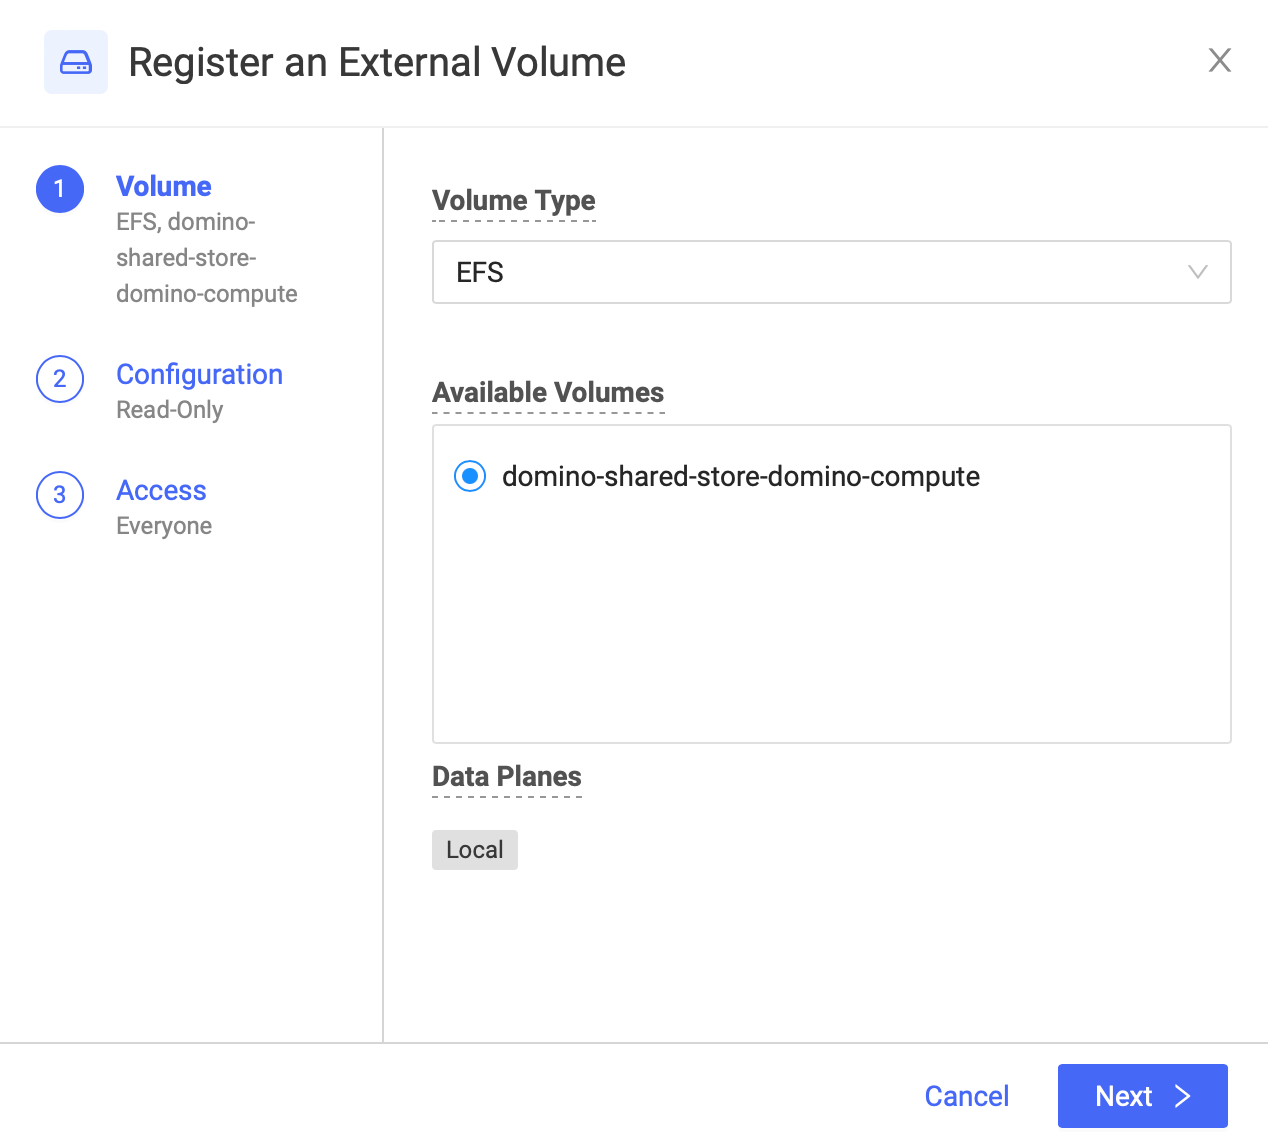
3. On the **Volume** page:
1. Select the volume type. The supported volume types are NFS, Windows Share(SMB), EFS, and Generic.
2. From **Available Volumes**, select a volume. The volume names are those of the backing Kubernetes [persistent volume claims](https://kubernetes.io/docs/concepts/storage/persistent-volumes/) (PVCs).
When you select a volume in a hybrid deployment, Domino displays a list of [data planes](/cloud/admin/platform-configuration/manage-data-planes) where that EDV can be used, such as "local" in the example below:
 4. Click **Next**
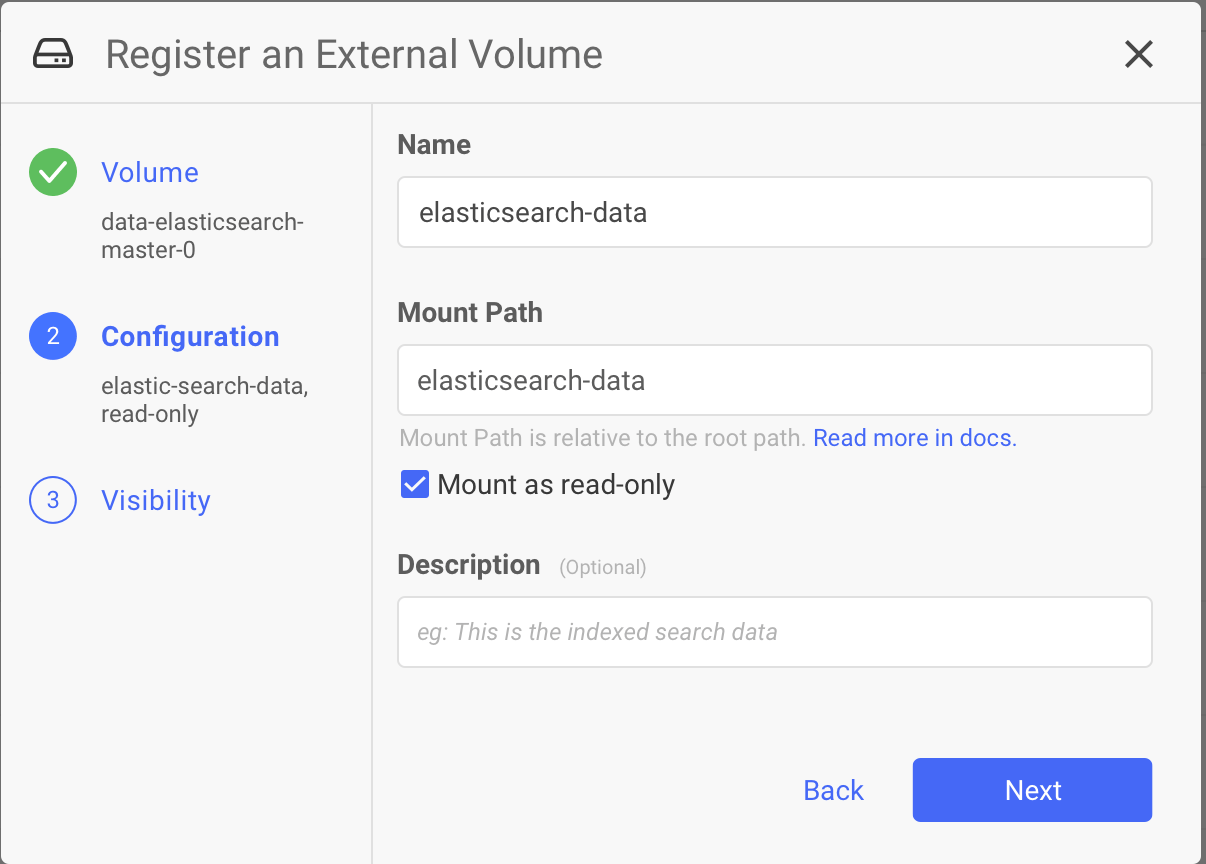
5. On the **Configuration** step:
1. Enter a **Name**. This field defaults to the selected PVC name but can be changed. Domino recommends that you name the EDV so that it is recognized by users based on the supporting use case or some organization-defined convention.
2. Enter a unique **Relative Mount Path** for the EDV for supported executions. This field defaults to the selected PVC name but can be changed. This field must be unique to all registered EDVs. There are a few reserved words.
3. Select **Mount as read-only** to set the EDV as read-only or clear the checkbox to make the EDV read-write. This is enforced at the Domino layer. More restrictive access controls at the Kubernetes or NFS layer overrule this setting. For example, if the PVC access mode is set to read-only, it does not matter if this field allows for read-write; the underlying permission of read-only will be enforced.
4. Enter a Description.
4. Click **Next**
5. On the **Configuration** step:
1. Enter a **Name**. This field defaults to the selected PVC name but can be changed. Domino recommends that you name the EDV so that it is recognized by users based on the supporting use case or some organization-defined convention.
2. Enter a unique **Relative Mount Path** for the EDV for supported executions. This field defaults to the selected PVC name but can be changed. This field must be unique to all registered EDVs. There are a few reserved words.
3. Select **Mount as read-only** to set the EDV as read-only or clear the checkbox to make the EDV read-write. This is enforced at the Domino layer. More restrictive access controls at the Kubernetes or NFS layer overrule this setting. For example, if the PVC access mode is set to read-only, it does not matter if this field allows for read-write; the underlying permission of read-only will be enforced.
4. Enter a Description.
 6. Click **Next**.
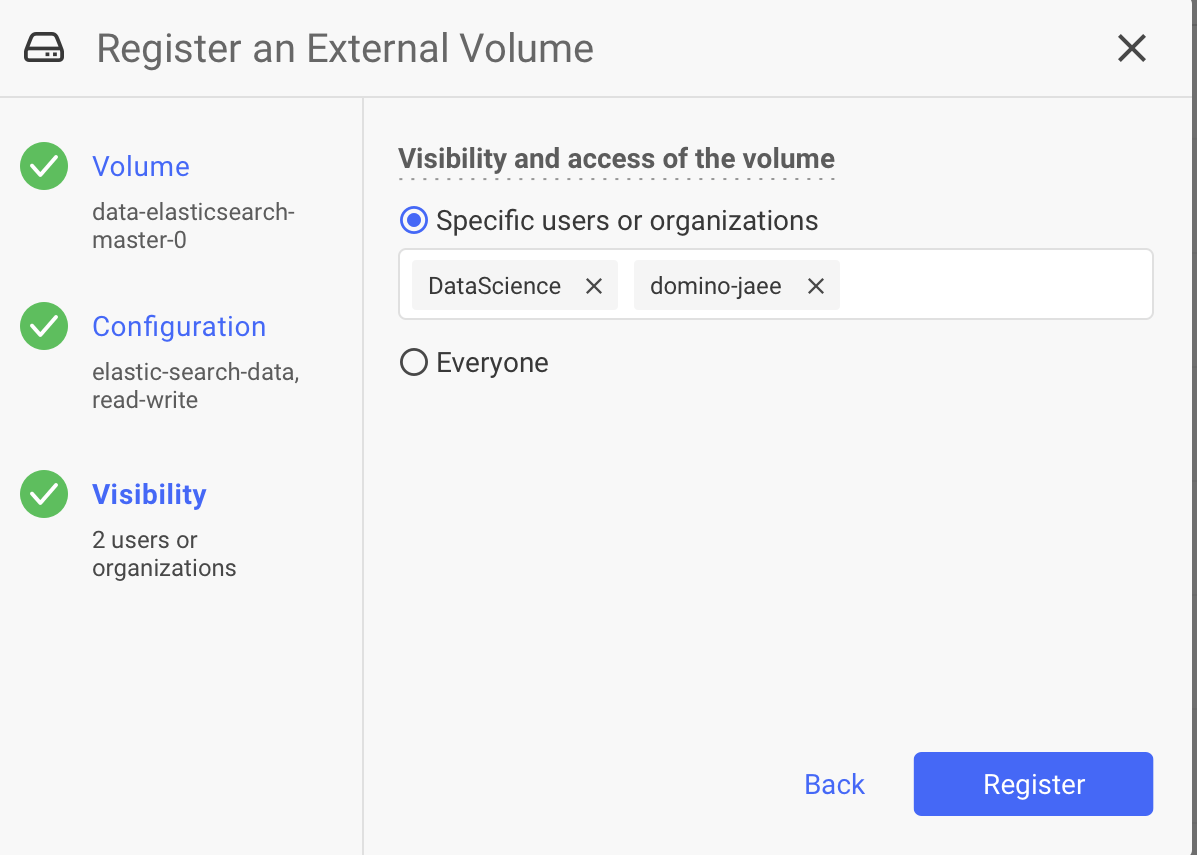
7. On the **Access** step:
1. Select the **Volume Access**:
* **Everyone**. Allow EDV access to all logged-in users.
* **Specific users or organizations**. Limit EDV access to specific users and organizations.
6. Click **Next**.
7. On the **Access** step:
1. Select the **Volume Access**:
* **Everyone**. Allow EDV access to all logged-in users.
* **Specific users or organizations**. Limit EDV access to specific users and organizations.
 Regardless of this setting, you (CloudAdmin) can always access any external data volume.
8. Click **Register**.
Regardless of this setting, you (CloudAdmin) can always access any external data volume.
8. Click **Register**.