> ## Documentation Index
> Fetch the complete documentation index at: https://docs.domino.ai/llms.txt
> Use this file to discover all available pages before exploring further.
# Launchers with MATLAB
Launchers are simple web forms that you can use to run templatized scripts. They are especially useful if your script has command line arguments that dynamically change the way the script executes. For heavily customized scripts, those command line arguments can quickly get complicated. Use Launchers to expose all that as a simple web form.
To do this with MATLAB, you will refactor the .m file used in your scheduled job as a function, and give Launcher users the ability to specify the following parameters:
* The NOAA station IDs are listed here: [GHCND Stations](https://www1.ncdc.noaa.gov/pub/data/ghcn/daily/ghcnd-stations.txt)
* A "hot day" temperature threshold
## Step 1: Update the scheduled Job code
1. Start a new MATLAB Workspace.
2. Open the file you previously created, `predictWeatherReport.m`, and save it as `predictWeatherReportLauncher.m`.
3. Copy and paste the following to the top of the script. This wraps the previous code with a `function` statement.
The `function` statement requires an `end` statement. You will add this in the last step of this procedure.
```matlab theme={null}
function result = predictWeatherReport(weatherStationId, hotDayThreshold)
```
4. Copy and paste the following over lines in the **Initial setup** section in the existing script to refactor the code:
```matlab theme={null}
result = struct;
%% Download data file
baseUrlString = "https://www.ncei.noaa.gov/data/global-historical-climatology-network-daily/access/";
% compose the URL for the NOAA station ID specified as an input parameter
urlString = sprintf("%s%s%s", baseUrlString, weatherStationId, ".csv");
% save the data into the /data subfolder
savedFileName = sprintf("%s%s%s%s", "data", filesep, weatherStationId, ".csv");
websave(savedFileName, urlString);
```
The next section of code remains unchanged. For reference, the code is as follows:
```matlab theme={null}
%% Read the downloaded file
opts = detectImportOptions(savedFileName);
opts.SelectedVariableNames = {'DATE', 'PRCP', 'TMIN', 'TMAX'};
opts = setvartype(opts, {'DATE','PRCP','TMIN','TMAX'},{'datetime','double', 'double', 'double'});
stationWeatherTbl = readtable(savedFileName, opts);
%%
[stationWeatherTbl.year, stationWeatherTbl.month, stationWeatherTbl.day] = ymd(stationWeatherTbl.DATE);
% MATLAB strength
stationWeatherTbl = stationWeatherTbl(stationWeatherTbl.year > 1999 & stationWeatherTbl.year < max(stationWeatherTbl.year), :);
stationWeatherTbl.TMAX = stationWeatherTbl.TMAX/10;
stationWeatherTbl.TMIN = stationWeatherTbl.TMIN/10;
stationWeatherTbl = fillmissing(stationWeatherTbl, 'linear');
%% check if there is enough data for prediction
dataRows = size(stationWeatherTbl, 1);
if dataRows < 1000
disp('Not enough data for prediction')
result.error = 'Not enough data for prediction';
return;
end
```
5. Because those using Launcher will be able to request predictions for *any* weather station, copy and paste the following code to verify whether a model for the station exists.
If the training model (`trainRegressionModel.m`) does not exist in your **Current Folder**, return to the previous step where you [trained the model](/cloud/getting-started/for-modelers-and-builders/get-started-matlab/6-develop-your-model).
```matlab theme={null}
%% Check if we have a model for this weather station
modelFileName = sprintf("%s%s%s%s", "models", filesep, ...
weatherStationId, ".mat");
% make sure we have a folder for the models
if ~isfolder('models')
mkdir('models')
end
if ~isfile(modelFileName)
disp('Training model for weather station...')
cv = cvpartition(stationWeatherTbl.year, 'Holdout', 0.3);
dataTrain = stationWeatherTbl(cv.training, :);
[weatherModel, validationRMSE] = trainRegressionModel(dataTrain);
% display prediction precision
doneMessage = sprintf('%s%d', "Done. Model RMSE:", validationRMSE);
disp(doneMessage);
save(modelFileName, 'weatherModel');
else
load(modelFileName, 'weatherModel');
end
```
The following code already exists to create the data table to drive the prediction model.
```matlab theme={null}
%% Create table for future date prediction
todayDate = datetime('today');
daysIntoFuture = 365;
endDate = todayDate + days(daysIntoFuture);
predictedMaxTemps = table('Size', [daysIntoFuture+1 7], 'VariableTypes', ...
{'datetime', 'double', 'double', 'double', 'double', 'double', 'double'}, ...
'VariableNames', stationWeatherTbl.Properties.VariableNames);
x=1;
for i=todayDate:endDate
% get the average perception and minimum temps on this date
[y, m, d] = ymd(i);
minTemps = stationWeatherTbl.TMIN(stationWeatherTbl.month == m & stationWeatherTbl.day == d);
prcps = stationWeatherTbl.PRCP(stationWeatherTbl.month == m & stationWeatherTbl.day == d);
curMinTemp = NaN;
[historicalRowCount z] = size(minTemps);
randomRow = randi([1 historicalRowCount]);
curMinTemp = minTemps(randomRow);
predictedMaxTemps.TMIN(x) = curMinTemp;
randomRow = randi([1 historicalRowCount]);
predictedMaxTemps.PRCP(x) = prcps(randomRow);
predictedMaxTemps.DATE(x) = i;
predictedMaxTemps.year(x) = y;
predictedMaxTemps.month(x) = m;
predictedMaxTemps.day(x) = d;
predictedMaxTemps.TMAX(x) = 0;
x = x+1;
end
```
Leave the rest of the file as-is. The following is the code for reference:
```matlab theme={null}
%% run model with future data
yFit = weatherModel.predictFcn(predictedMaxTemps);
predResult = table(predictedMaxTemps.DATE, yFit, 'VariableNames', {'Date', 'Predicted TMAX'});
result.predictedTemps = predResult;
hotWeatherDaysIdx = predResult(predResult.("Predicted TMAX") > hotDayThreshold, :);
result.hotDayCountPrediction = height(hotWeatherDaysIdx);
%% save data to file
dominoRunId = getenv('DOMINO_RUN_NUMBER');
outputFileName = sprintf('%s%s%s', 'results', filesep, 'predictData_', string(dominoRunId));
save(outputFileName, 'result');
%% publish to report
pub_options.format = 'pdf';
pub_options.showCode = false;
pub_options.outputDir = sprintf('%s%s%s', 'results', filesep, dominoRunId);
doc = publish('predictWeatherReportTemplate.m', pub_options);
```
6. Add the `end` statement for the function.
```matlab theme={null}
%% Function end
end % This is the end of the function
```
7. Click the **Save** and then **Sync All Changes** to save your work. Stop the workspace.
## Step 2: Set up the shell script for the Launcher
1. Close the workspace tab in your browser.
2. In the navigation pane, go to **Files** to create a shell script that will tell the Launcher which MATLAB script to run. The shell script will also identify the parameters to pass to the script from the launcher.
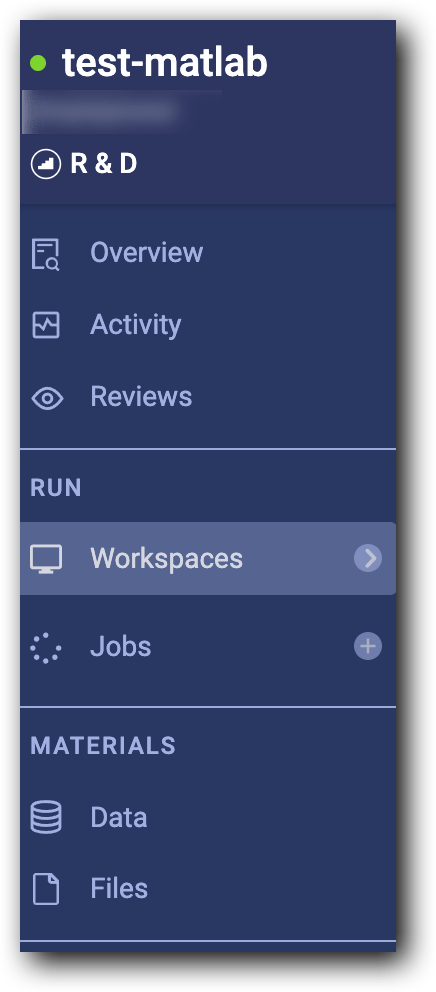 3. Click the new file icon to create a new file. Name the file **weather\_launcher.sh**.
 4. Add the following code starting on line 1 of the file:
```matlab theme={null}
matlab -nodisplay -nodesktop -nosplash -r " predictWeatherReportLauncher('$1', $2)"
```
This line of code instructs Domino to run MATLAB from the command line and execute the **predictWeatherReportLauncher** script with two arguments. MATLAB will look for the function in an .m file with the same name as the function.
5. Click **Save**.
## Step 3: Create the Launcher
1. From the navigation pane, click **Launchers**, then click **New Launcher**.
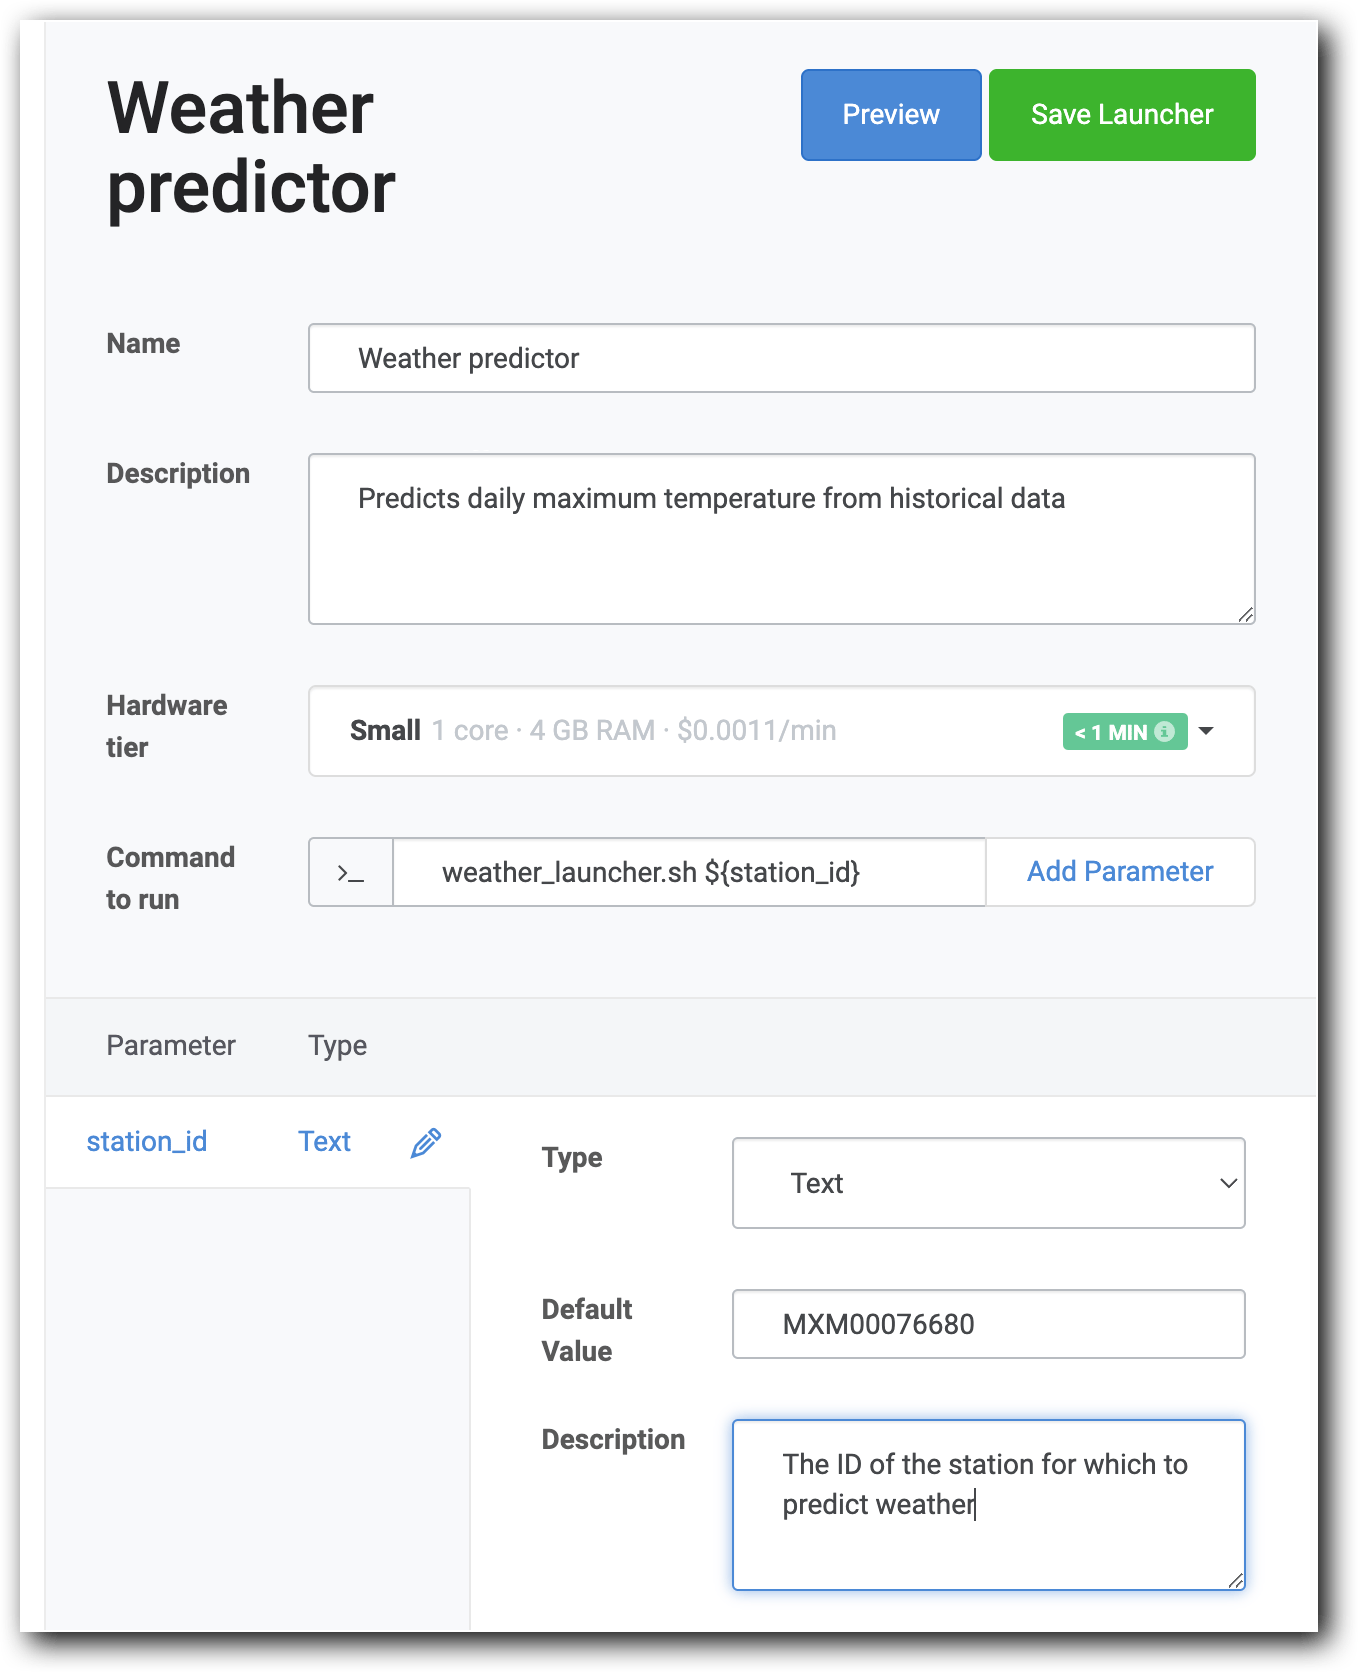
2. Type a descriptive title (for example, Weather Predictor), a description, and select a hardware tier. In the **Command to run** section, enter `weather_launcher.sh`.
4. Add the following code starting on line 1 of the file:
```matlab theme={null}
matlab -nodisplay -nodesktop -nosplash -r " predictWeatherReportLauncher('$1', $2)"
```
This line of code instructs Domino to run MATLAB from the command line and execute the **predictWeatherReportLauncher** script with two arguments. MATLAB will look for the function in an .m file with the same name as the function.
5. Click **Save**.
## Step 3: Create the Launcher
1. From the navigation pane, click **Launchers**, then click **New Launcher**.
2. Type a descriptive title (for example, Weather Predictor), a description, and select a hardware tier. In the **Command to run** section, enter `weather_launcher.sh`.
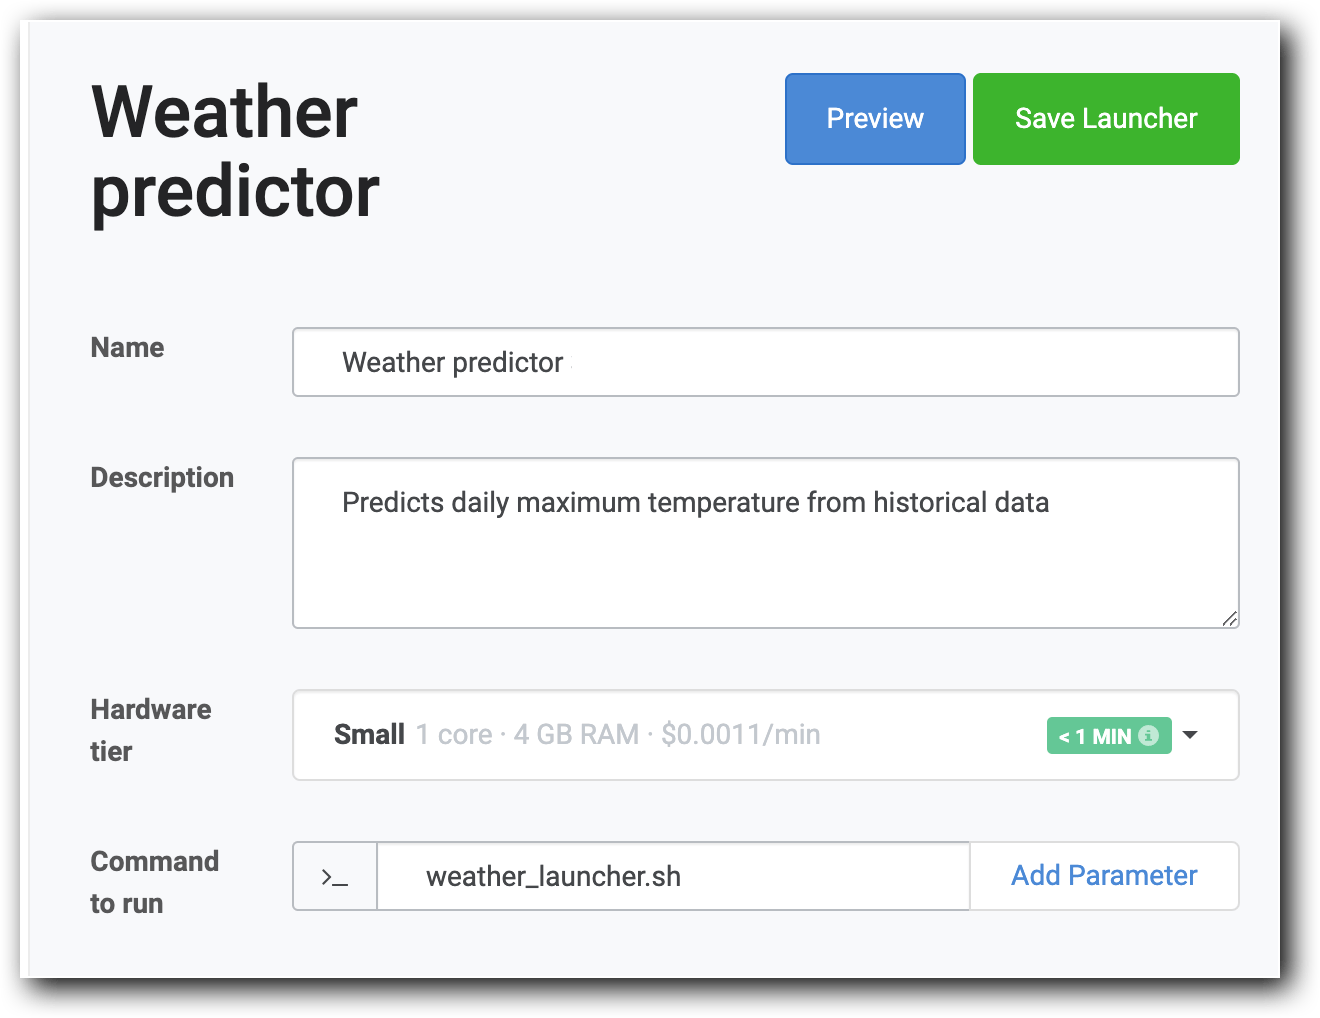 3. Click **Add Parameter**. The parameter options open.
4. In the "Command to run" field, replace `parameter1` with `station_id`. You’ll notice the parameter’s name updates in the form. Confirm that the parameter name remains enclosed within `${}`, such that the parameter is formatted as such: `${name_of_the_parameter}`.
3. Click **Add Parameter**. The parameter options open.
4. In the "Command to run" field, replace `parameter1` with `station_id`. You’ll notice the parameter’s name updates in the form. Confirm that the parameter name remains enclosed within `${}`, such that the parameter is formatted as such: `${name_of_the_parameter}`.
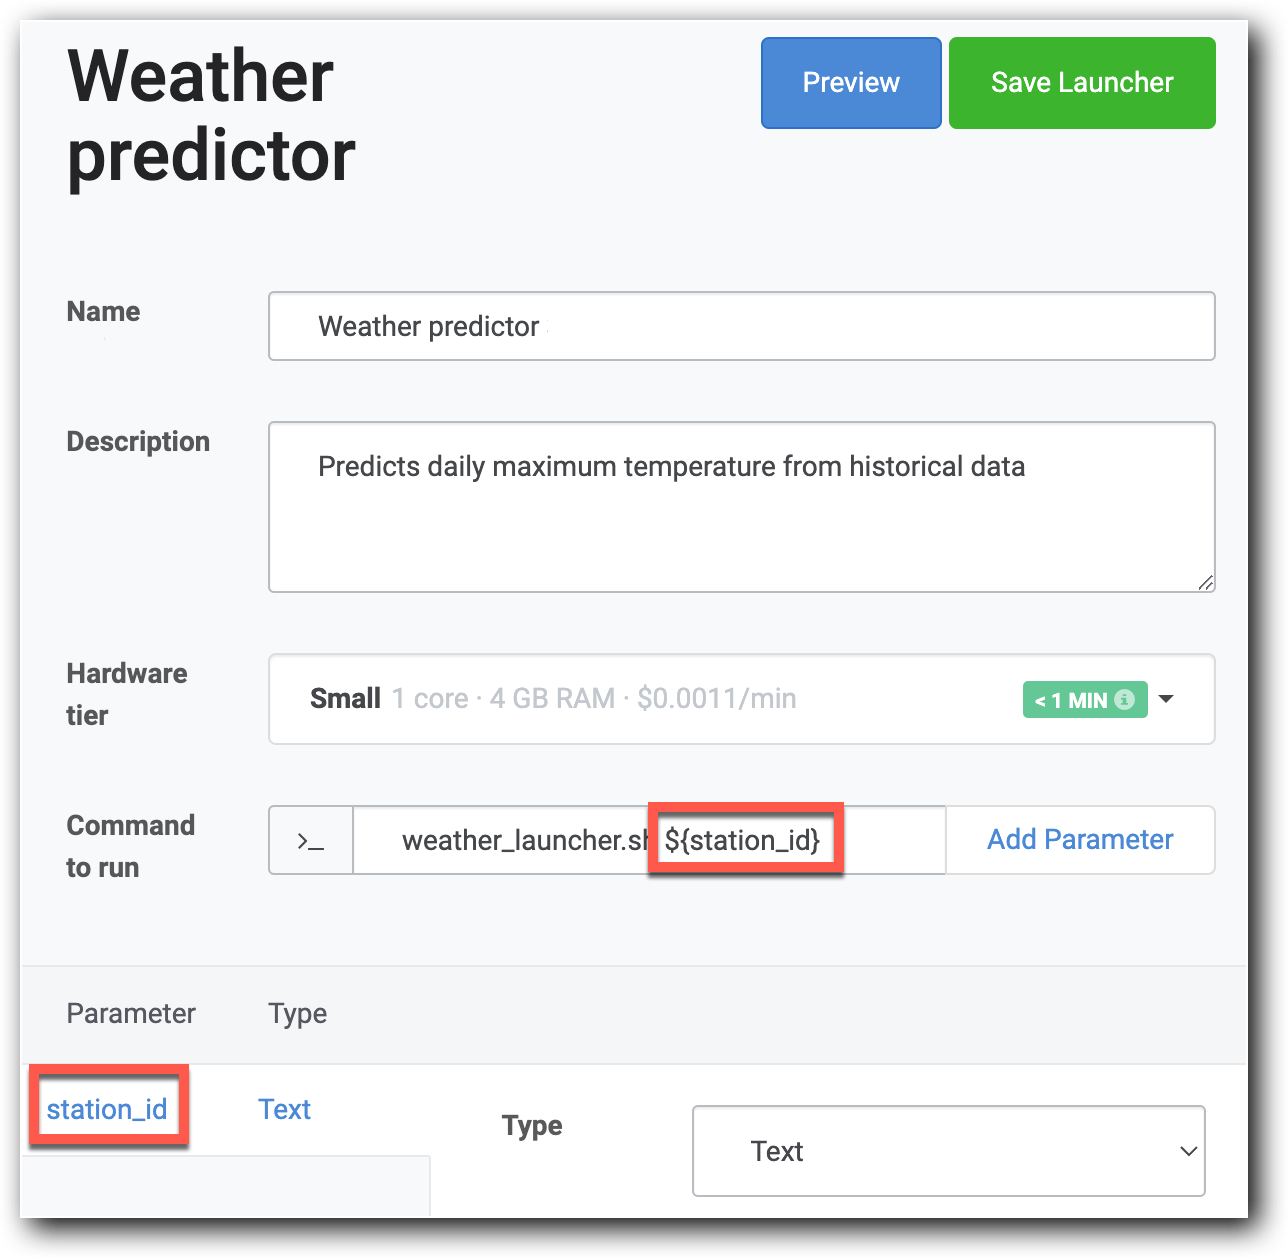 5. Give the parameter a default value of `MXM00076680` (for Mexico City) for the station ID. The default value will be used if the user doesn’t enter a value in the Launcher form. In the description, enter "The ID of the station for which to predict weather".
 6. Click **Add Parameter**.
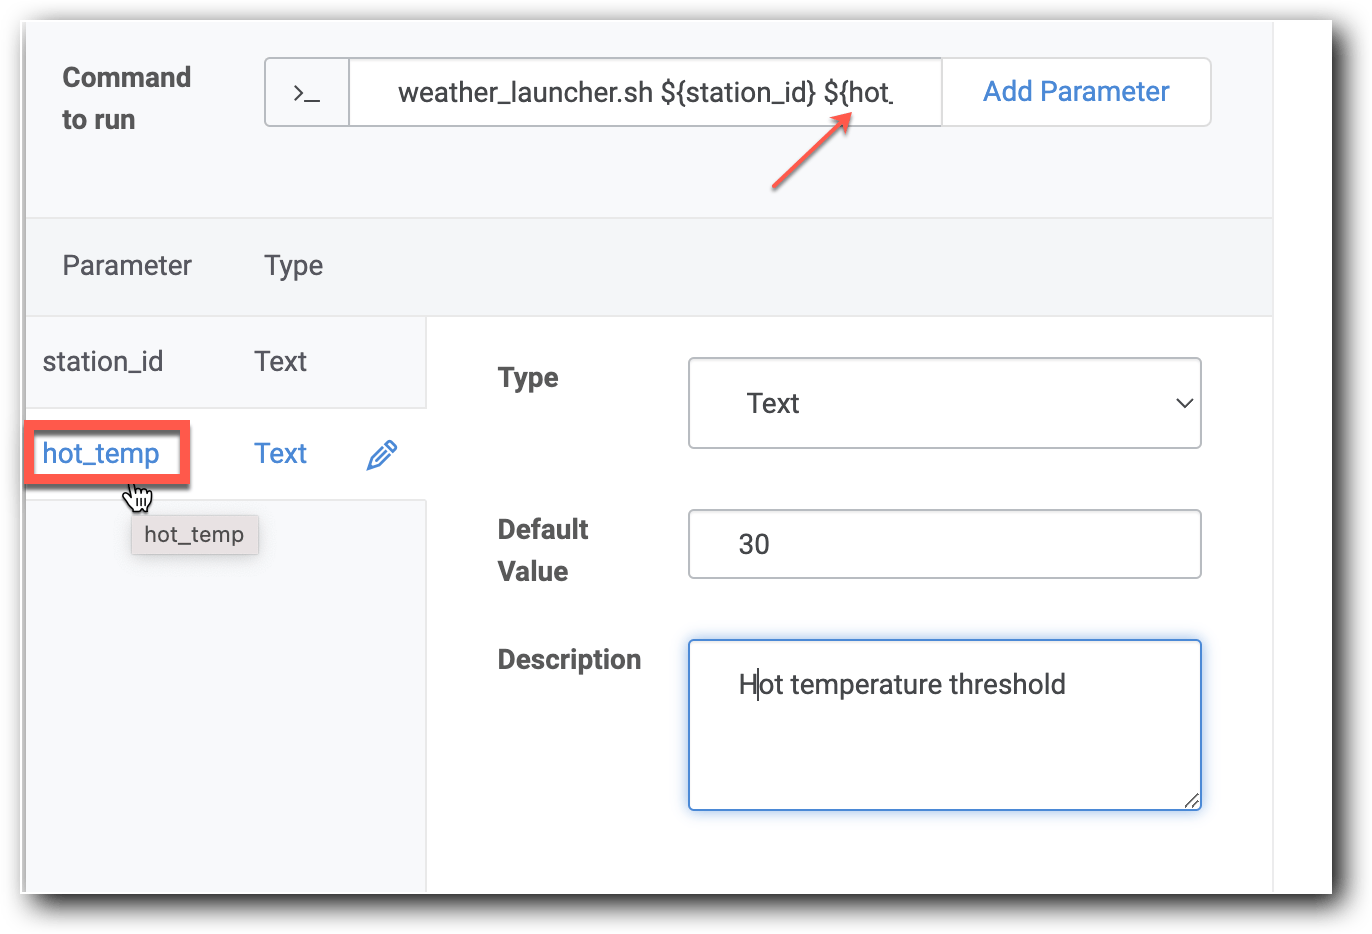
7. In the **Command to run** field, enter `hot_temp` as the parameter’s name between the curly braces \{}. This parameter represents the hot temperature threshold.
8. Click `hot_temp` in the table. Leave the parameter’s type as Text and enter a default value (for example, `30`) and a description for the parameter.
6. Click **Add Parameter**.
7. In the **Command to run** field, enter `hot_temp` as the parameter’s name between the curly braces \{}. This parameter represents the hot temperature threshold.
8. Click `hot_temp` in the table. Leave the parameter’s type as Text and enter a default value (for example, `30`) and a description for the parameter.
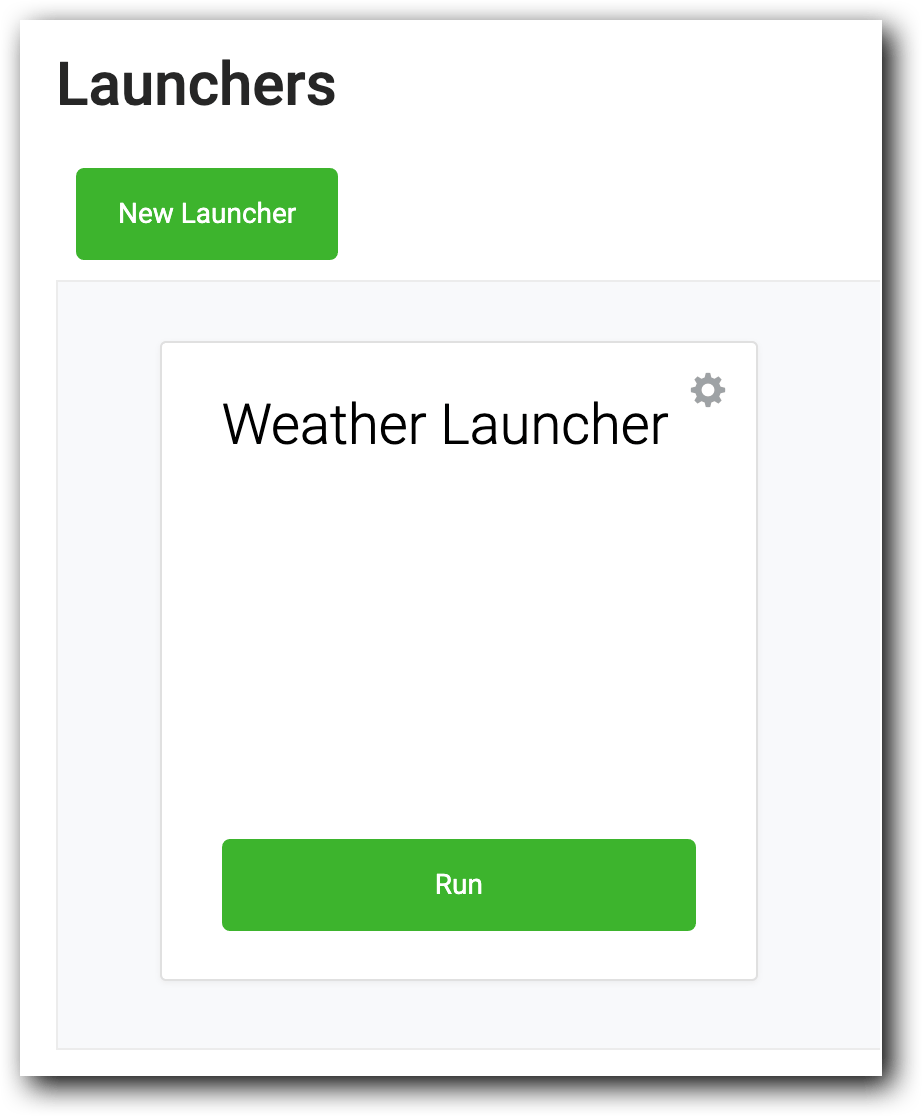
 9. Click **Save Launcher**, then click **Back to Launchers**. The new launcher is listed.
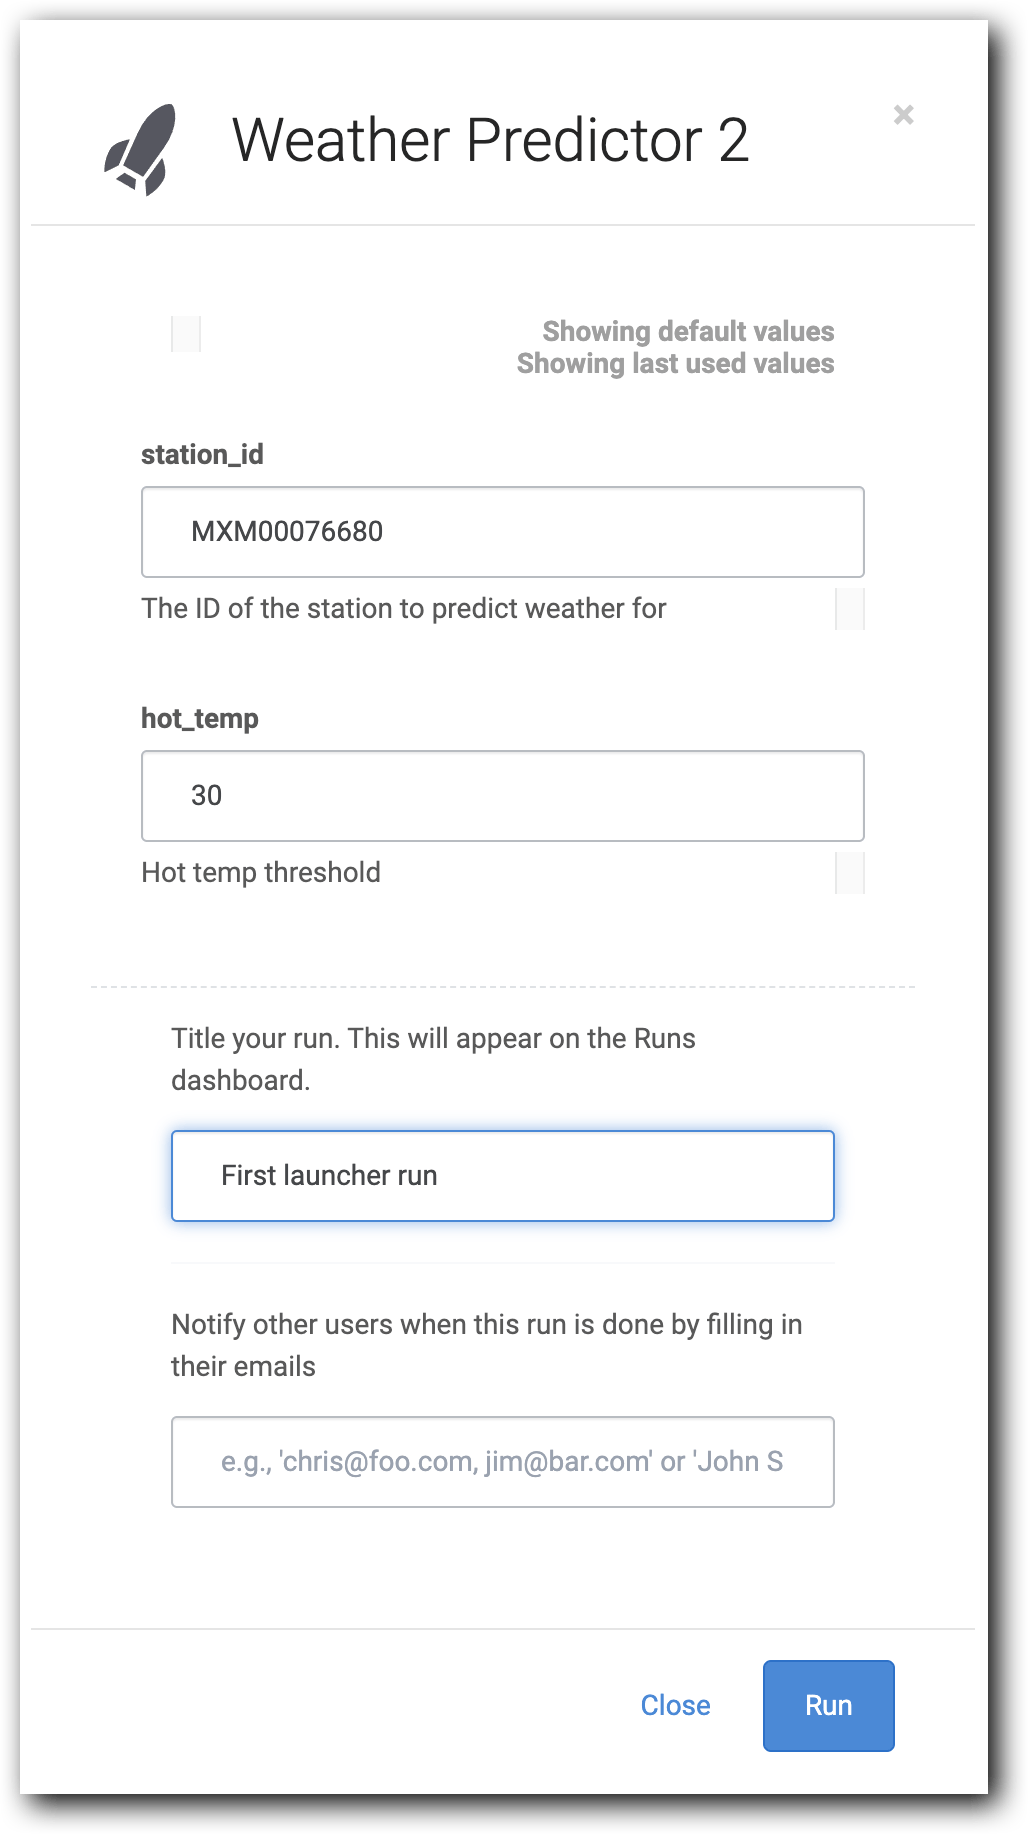
 10. Click **Run**. The launcher form opens. Type a title for your run (for example, "First launcher run") and click **Run**.
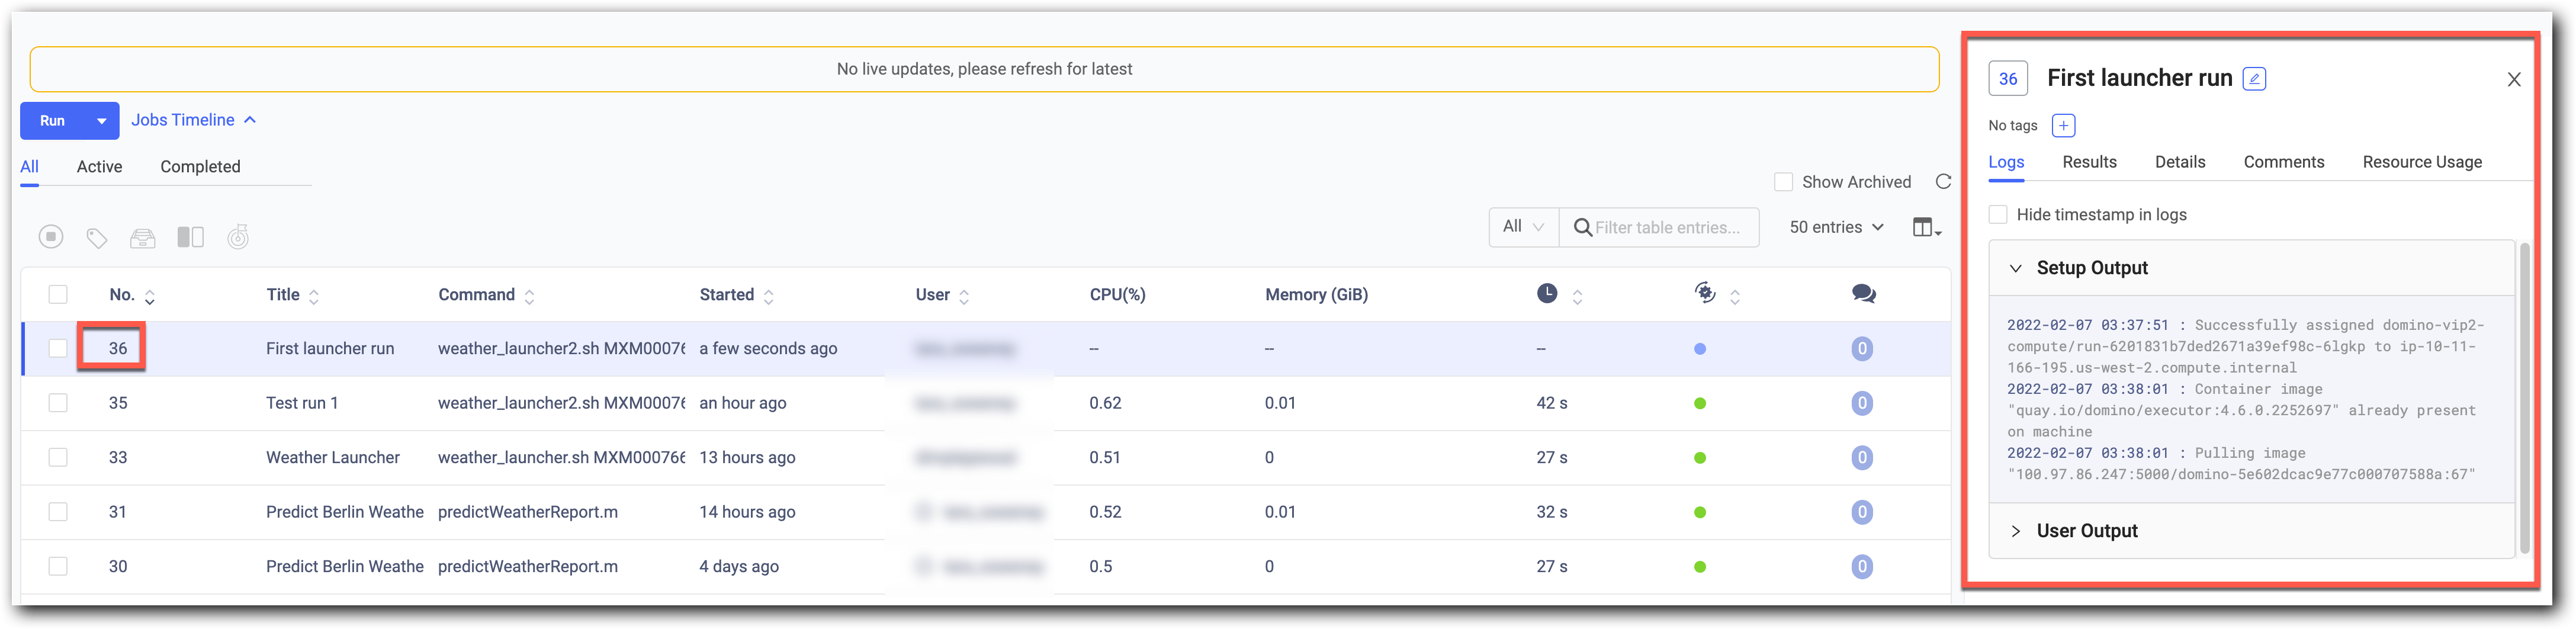
 11. The Jobs view opens while your launcher executes the job. The job number is listed in the No. column. Double-click the row to see the results as Domino runs the job.
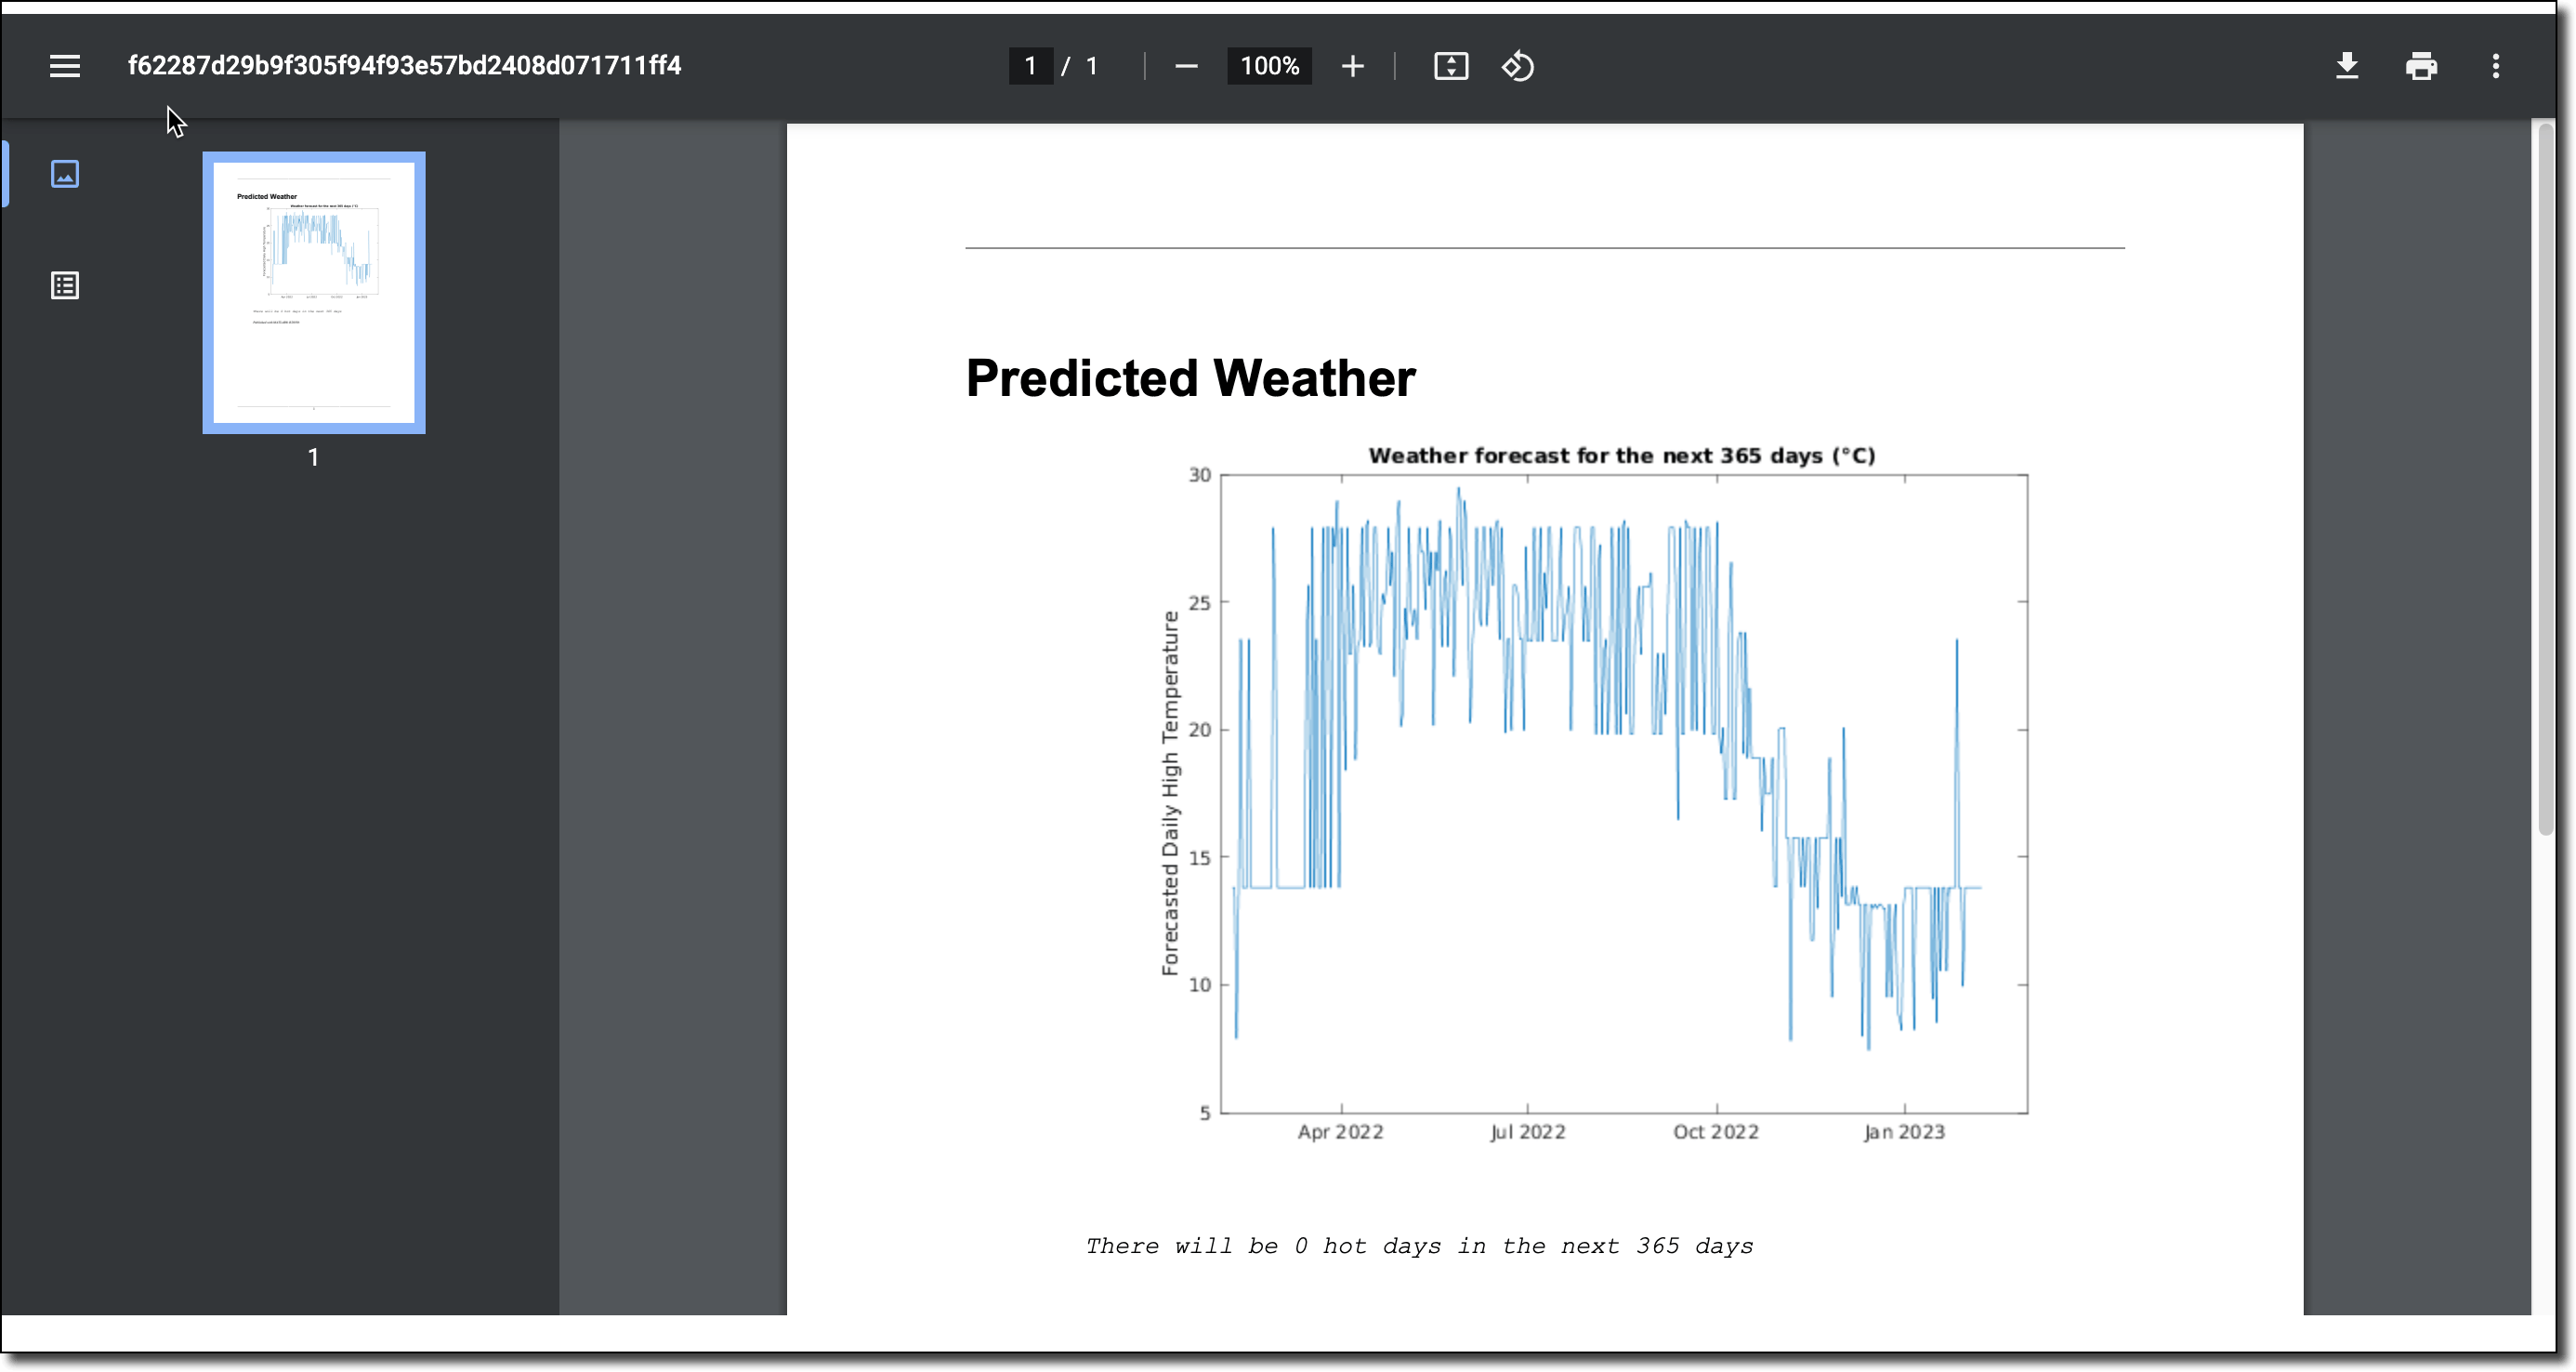
 12. The job produces a PDF report. To access the PDF report:
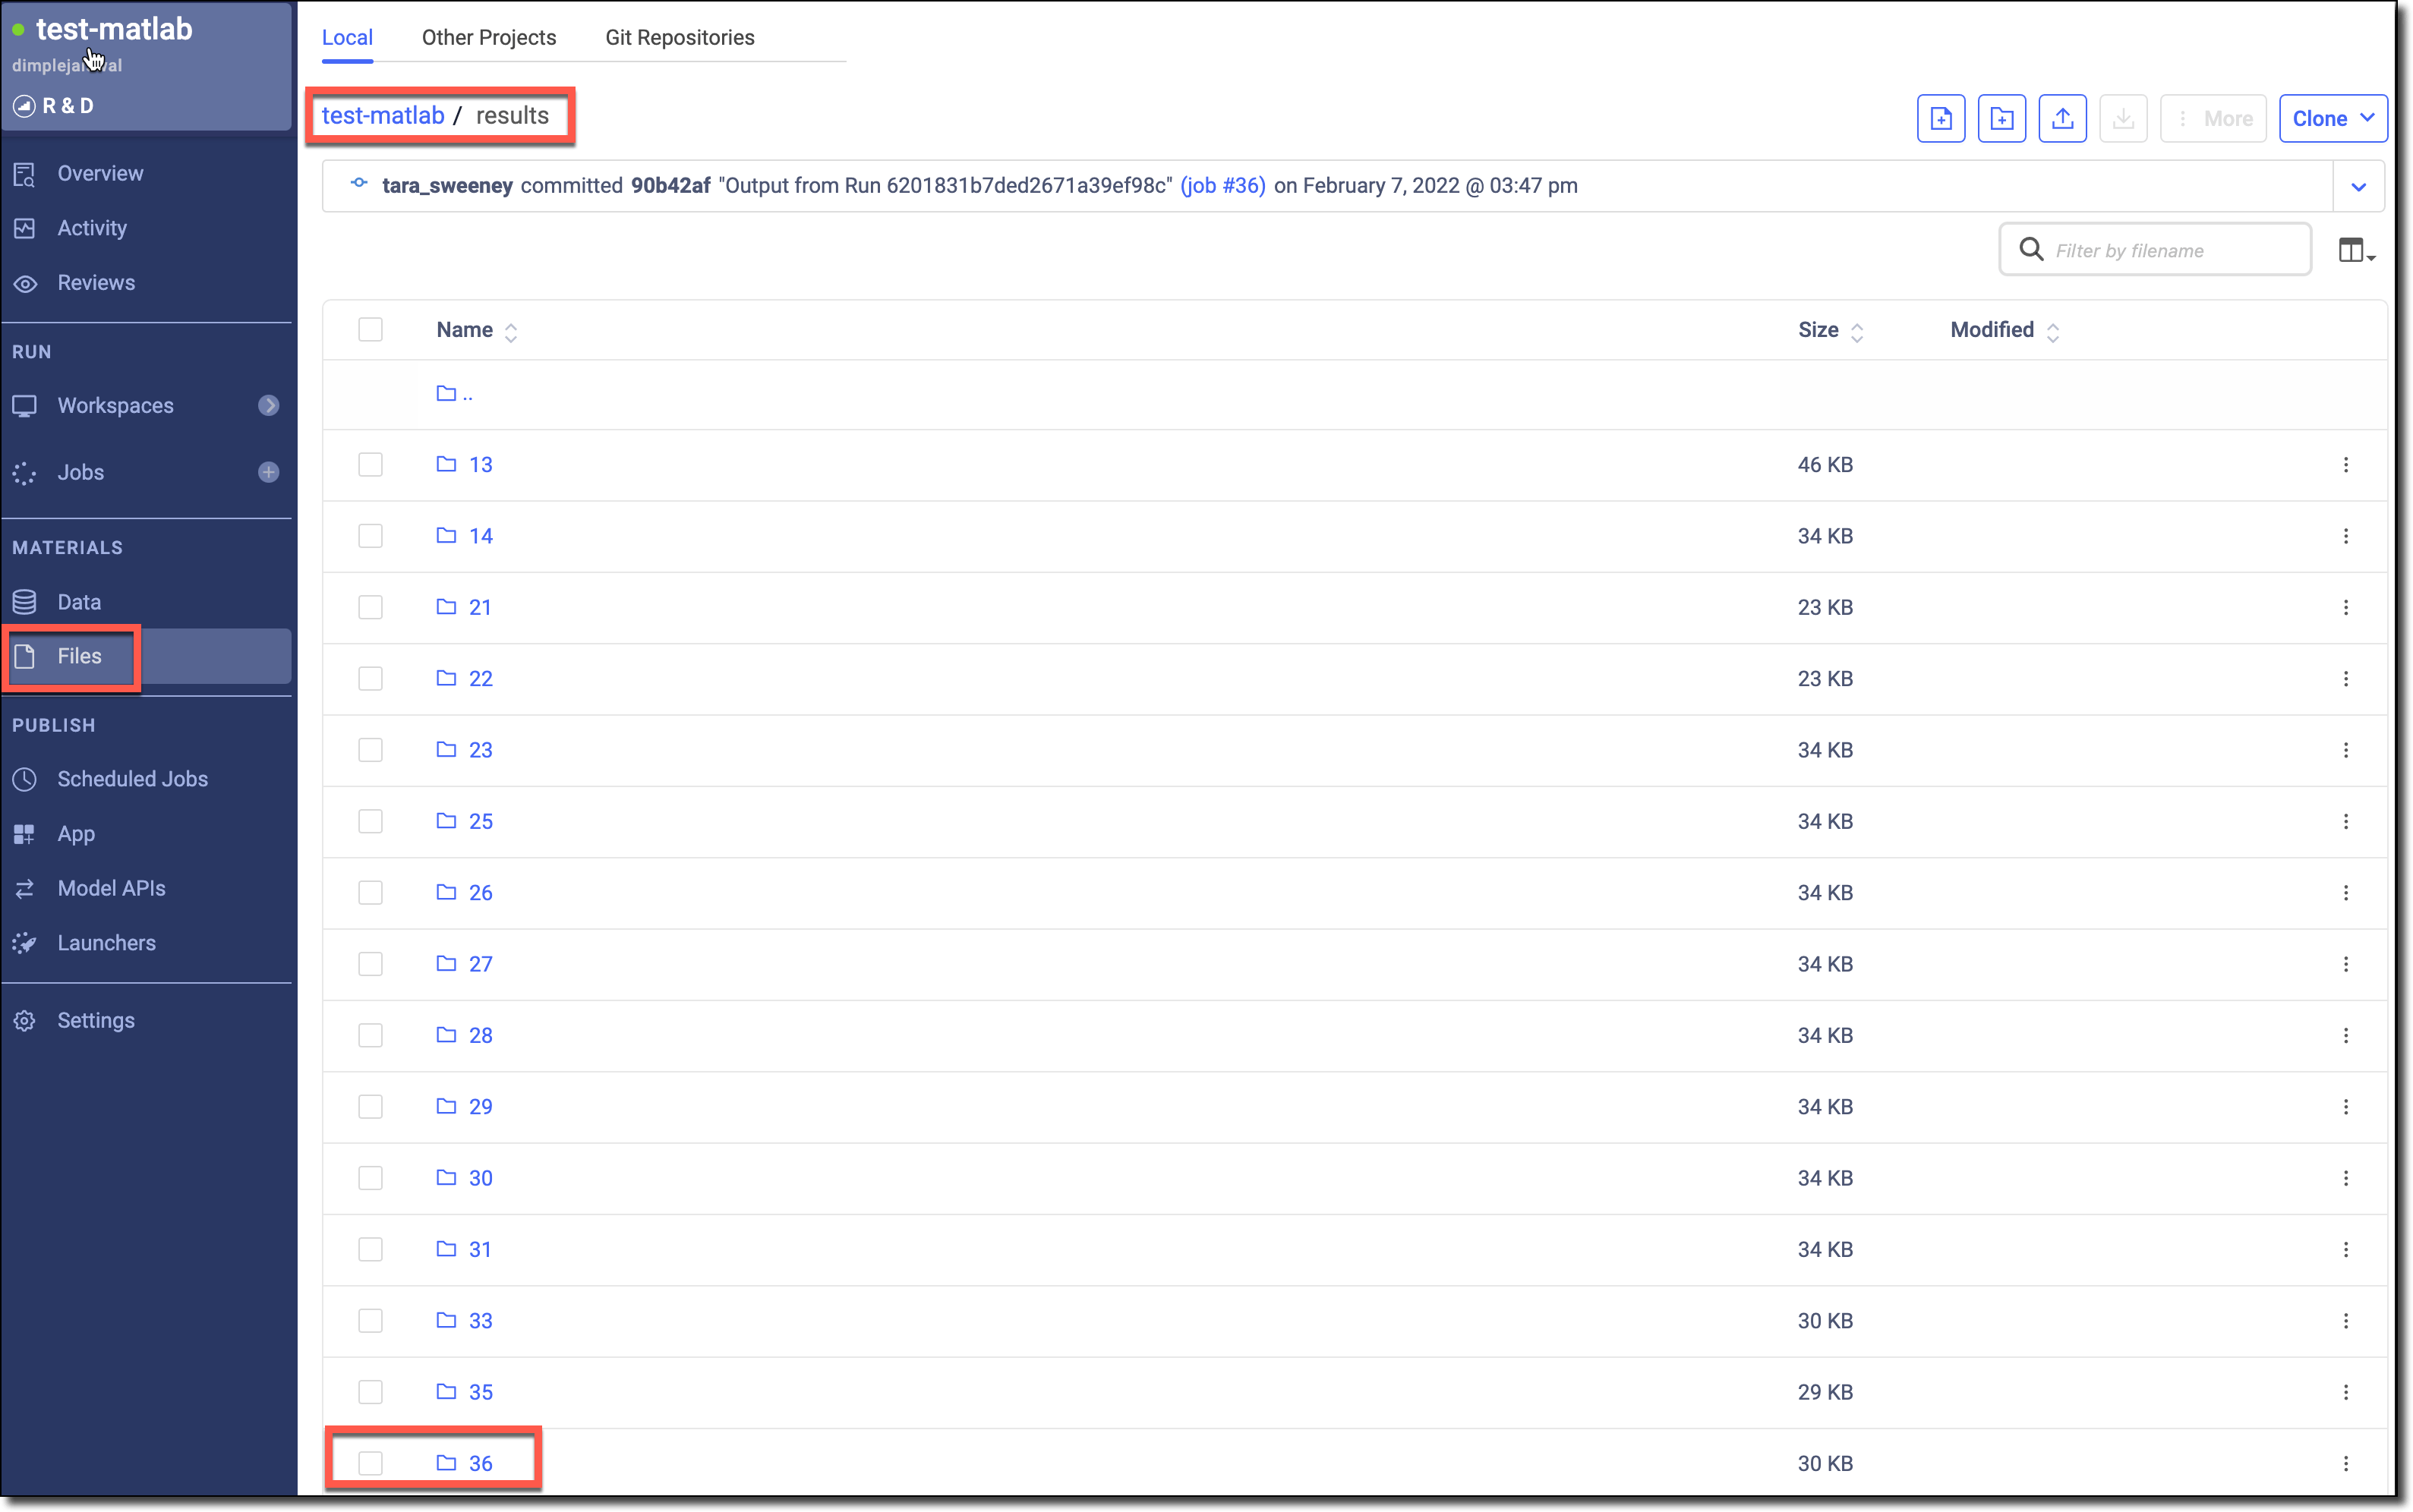
* Go to the navigation pane and click **Files**.
* Open the **results** folder and open the folder created by your job (in this example, it is folder **36/**).
12. The job produces a PDF report. To access the PDF report:
* Go to the navigation pane and click **Files**.
* Open the **results** folder and open the folder created by your job (in this example, it is folder **36/**).
 13. Click the PDF file to open it.