> ## Documentation Index
> Fetch the complete documentation index at: https://docs.domino.ai/llms.txt
> Use this file to discover all available pages before exploring further.
# Connect to Impala
This topic describes how to connect directly to Apache Impala from Domino. You must have network connectivity between Impala and your Domino deployment.
Domino does not officially support this method. We provide this information as a courtesy.
## Use Impala ODBC Connector for Cloudera Enterprise with pyodbc
Domino recommends using the Impala ODBC Connector for Cloudera Enterprise in concert with the pyodbc library for interacting with Impala from Python.
### Environment setup
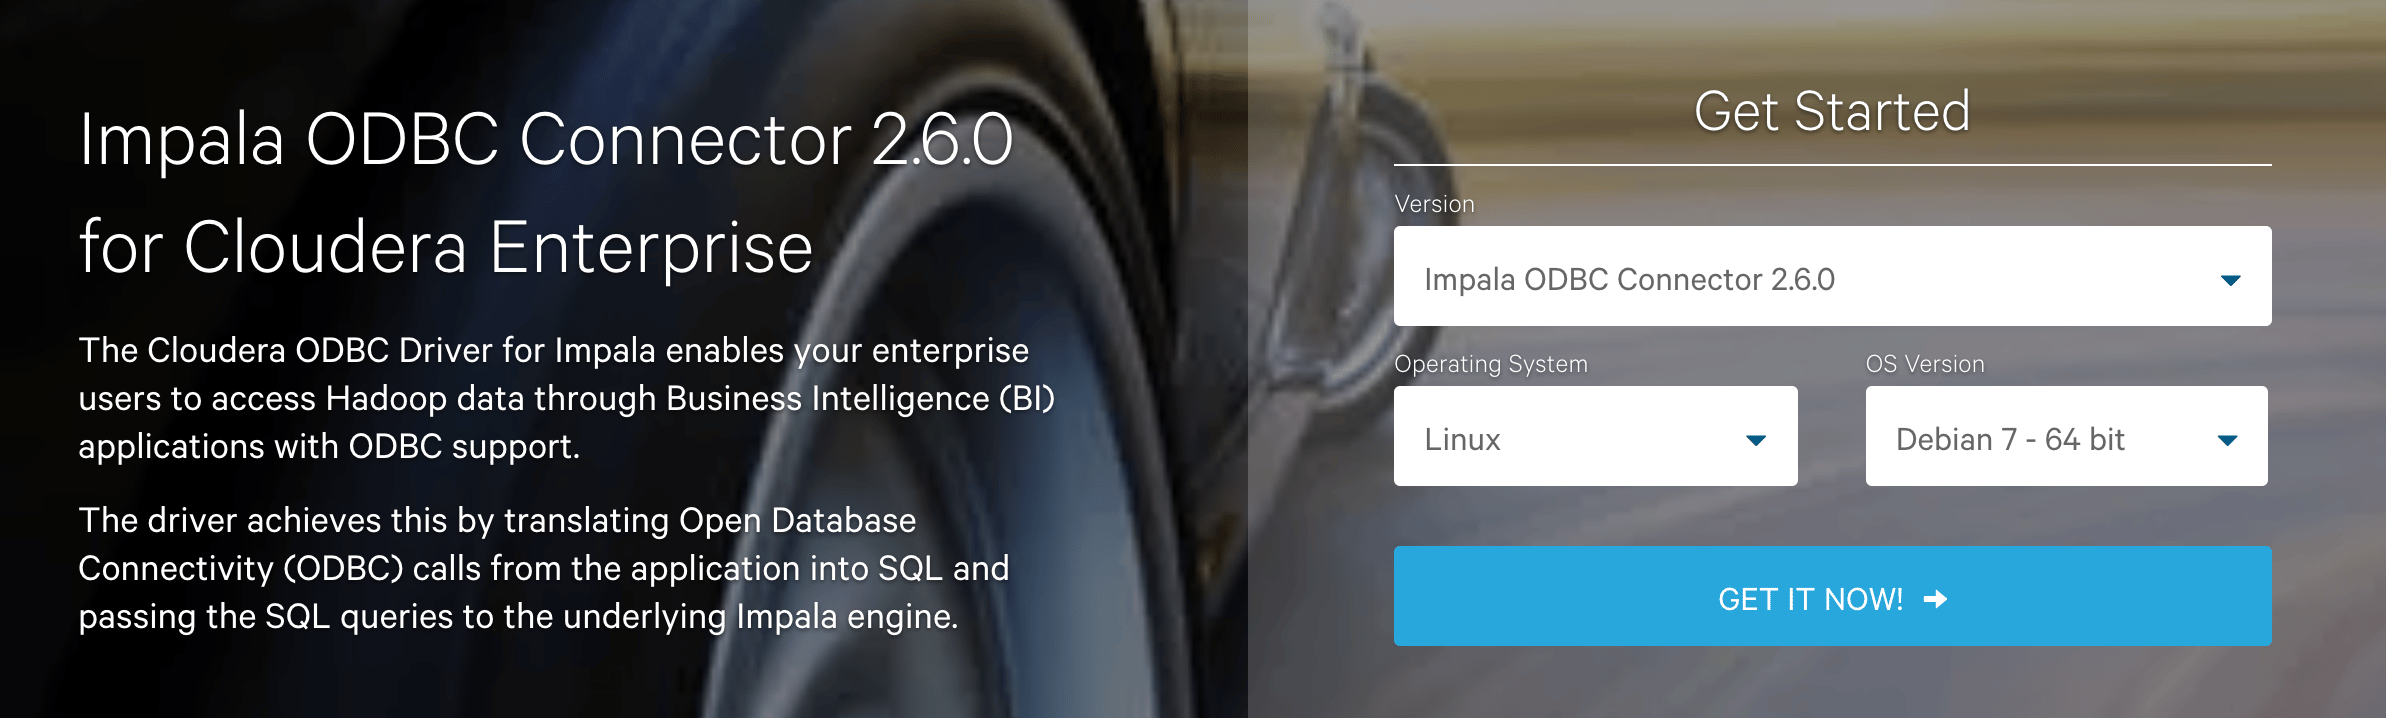
1. Visit the Cloudera downloads page to download the Impala ODBC Connector for Cloudera Enterprise to your local machine. For default Domino images of Ubuntu 16.04, download the 64-bit Debian package. Keep track of where you save this file, as you will need it in a later step.
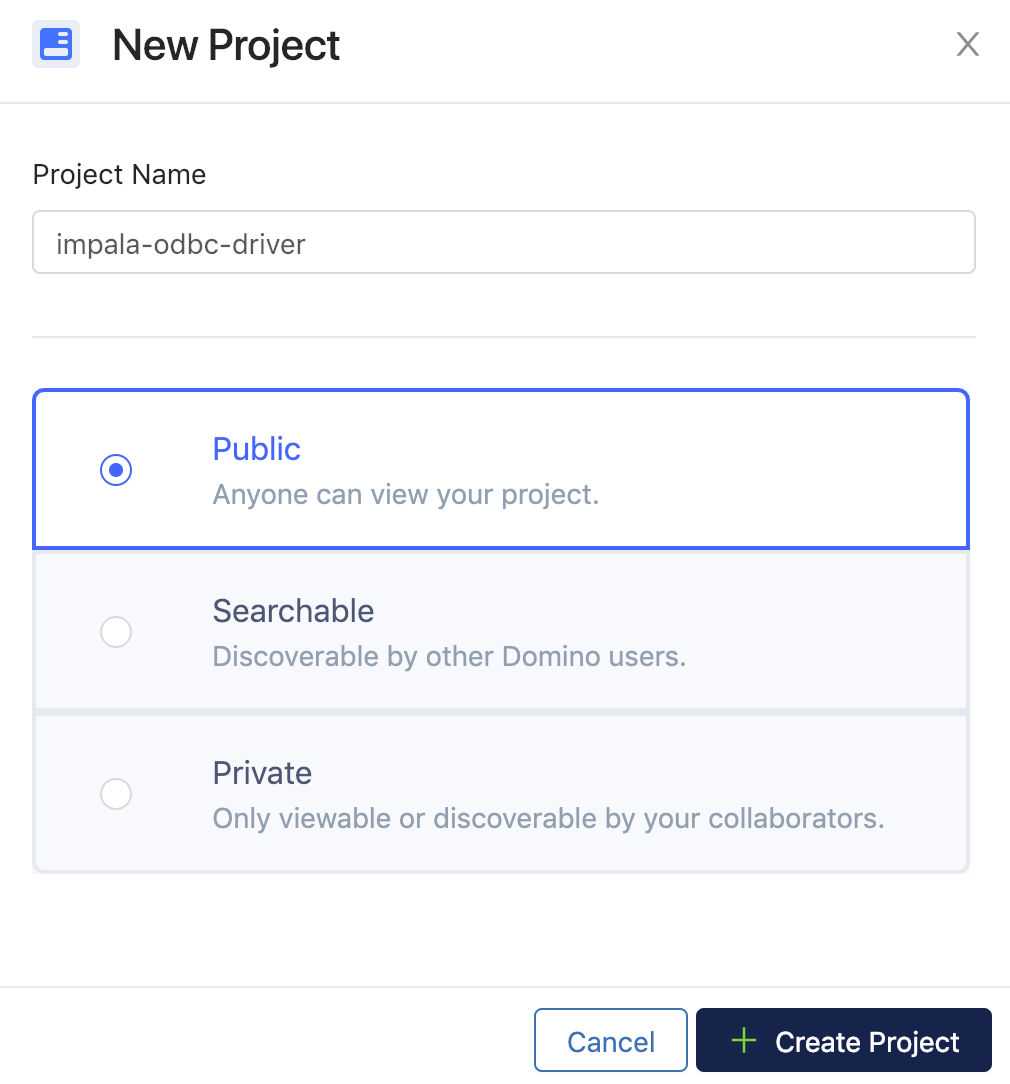
 2. Create a new *public* project in your Domino instance to host the driver files for use in Domino environments.
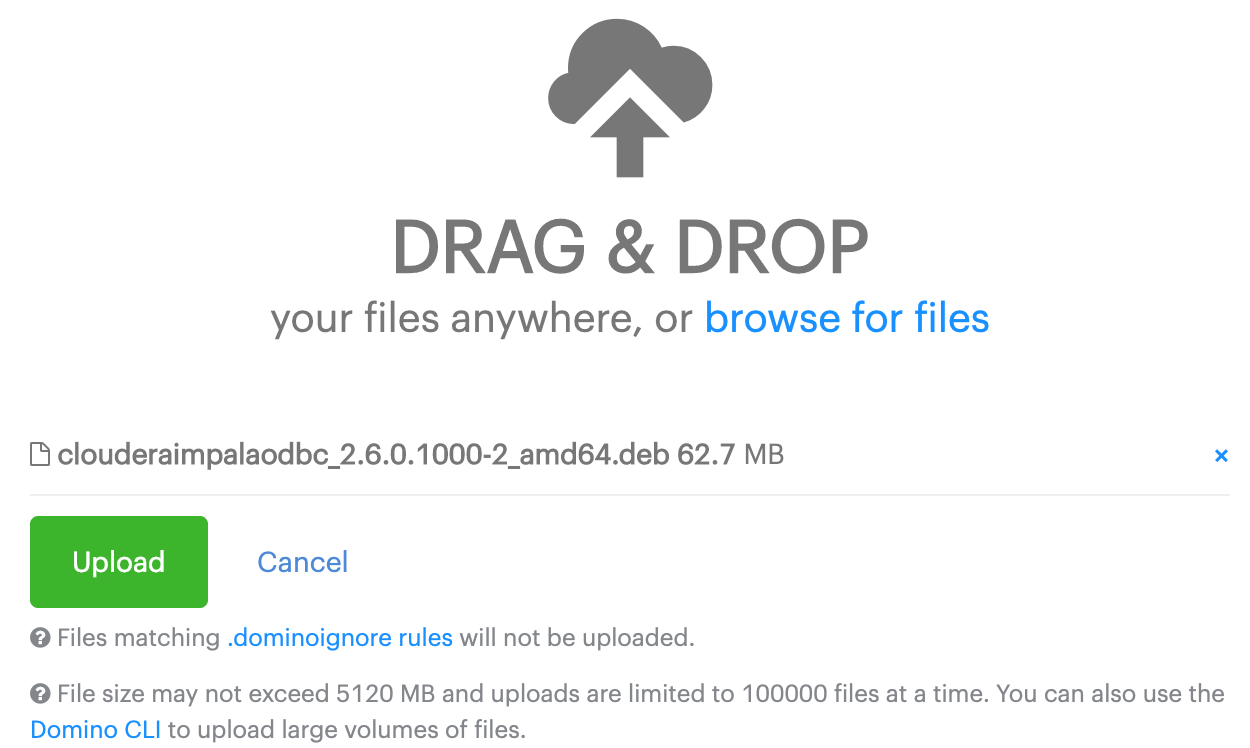
 3. In the new project, click **browse for files** and select the driver file you downloaded earlier to queue it for upload. Click **Upload** to add it to the project.
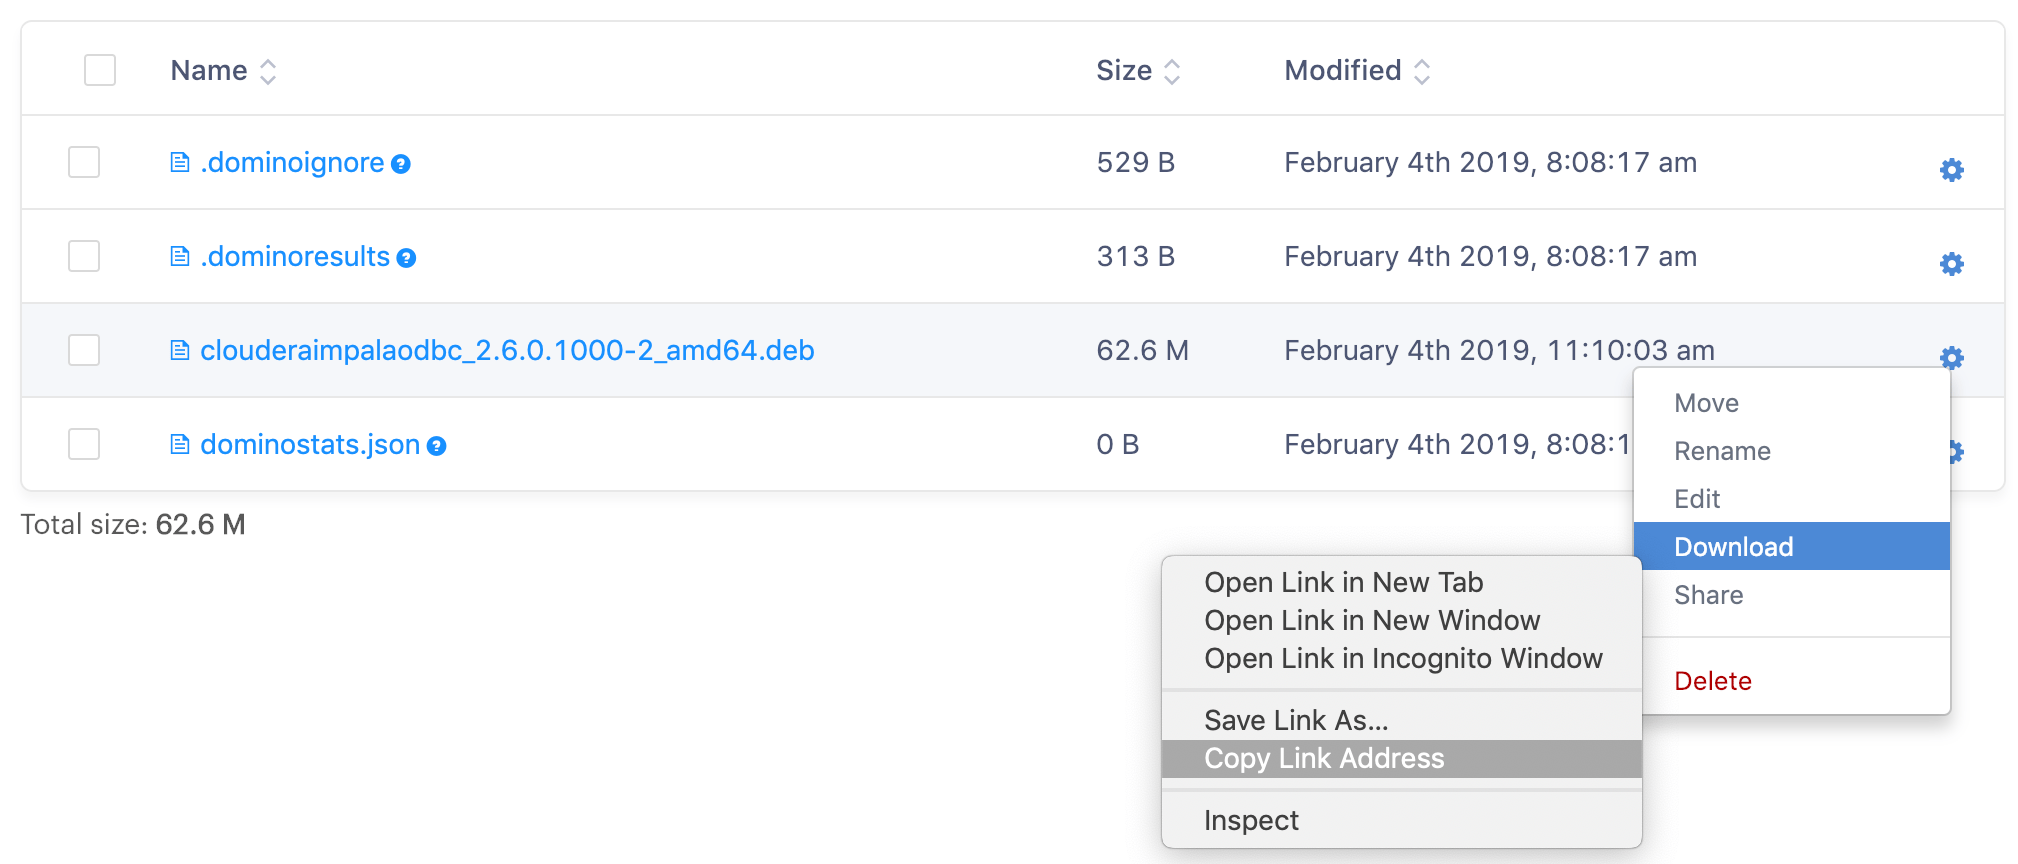
 4. After the driver file has been added to your project files, click the gear next to it in the files list, then right-click **Download** and click **Copy link address**. Save this address as you will need it when setting up your environment.
 5. Add the following Dockerfile instructions to install the driver and pyodbc in your environment, pasting the URL you copied earlier where indicated on line 5.
```highlight theme={null}
USER root
# download the driver from your project
RUN mkdir /ref_files
RUN
cd /ref_files &&
wget --no-check-certificate [paste-download-url-from-previous-step-here] &&
gzip -d clouderaimpalaodbc_2.6.0.1000-2_amd64.deb.gz
# install the driver
RUN gdebi /ref_files/clouderaimpalaodbc_2.6.0.1000-2_amd64.deb --n
# update odbc.ini file for impala driver
RUN
echo "
[Cloudera ODBC Driver for Impala]
Driver=/opt/cloudera/impalaodbc/lib/64/libclouderaimpalaodbc64.so
KrbFQDN=_HOST
KrbServiceName=impala
" >> /etc/odbcinst.ini
# set up impala libraries
RUN export LD_LIBRARY_PATH=$LD_LIBRARY_PATH:/opt/cloudera/impalaodbc/lib/64
RUN ldd /opt/cloudera/impalaodbc/lib/64/libclouderaimpalaodbc64.so
# install pyodbc
RUN pip install pyodbc
USER ubuntu
```
### Credential setup
Set up the following Domino environment variables to store secure information about your Impala connection.
* `IMPALA_HOST`
Hostname where your Impala service is running. Make sure your Impala service and network firewall are configured to accept connections from Domino.
* `IMPALA_PORT`
The port your Impala service is configured to accept connections on.
* `IMPALA_KERB_HOST`
Hostname of your Kerberos authentication service.
* `IMPALA_KERB_REALM`
The name of the Kerberos realm used by the Impala service.
See [Store Project credentials](/cloud/platform-capabilities/core-concepts/projects/configure-projects/store-project-credentials) to learn more about Domino environment variables.
### Usage
See the pyodbc documentation for detailed information about how to use the package to interact with a database. The following are some examples for how to set up a connection.
```highlight theme={null}
import pyodbc
import os
# fetch values from environment variables
hostname = os.environ['IMPALA_HOST']
service_port = os.environ['IMPALA_PORT']
kerb_host = os.environ['IMPALA_KERB_HOST']
kerb_realm = os.environ['IMPALA_KERB_REALM']
# create connection object
conn = pyodbc.connect('Host=hostname;'
+'DRIVER={Cloudera ODBC Driver for Impala};'
+'PORT=service_port;'
+'KrbRealm=kerb_realm;'
+'KrbFQDN=kerb_host;'
+'KrbServiceName=impala;'
+'AUTHMECH=1',autocommit=True)
# if you see:
# 'Error! Filename not specified'
# while querying Impala using the connection object,
# add the following configuration line:
#
# conn.setencoding(encoding='utf-8', ctype=pyodbc.SQL_CHAR)
# if your Impala uses SSL, add SSL=1 to the connection string
# conn = pyodbc.connect('Host=hostname;'
# +'DRIVER={Cloudera ODBC Driver for Impala};'
# +'PORT=service_port;'
# +'KrbRealm=kerb_realm;'
# +'KrbFQDN=kerb_host;'
# +'KrbServiceName=impala;'
# +'AUTHMECH=1;'
# +'SSL=1;'
# +'AllowSelfSignedServerCert=1', autocommit=True)
```
## Next steps
* After connecting to your Data Source, learn how to [Use Data Sources](/cloud/platform-capabilities/core-concepts/data/data-source-connectors/use-data-sources).
* [Share this Data Source](/cloud/platform-capabilities/core-concepts/data/sharing-and-security/share-data-sources) with your collaborators.
5. Add the following Dockerfile instructions to install the driver and pyodbc in your environment, pasting the URL you copied earlier where indicated on line 5.
```highlight theme={null}
USER root
# download the driver from your project
RUN mkdir /ref_files
RUN
cd /ref_files &&
wget --no-check-certificate [paste-download-url-from-previous-step-here] &&
gzip -d clouderaimpalaodbc_2.6.0.1000-2_amd64.deb.gz
# install the driver
RUN gdebi /ref_files/clouderaimpalaodbc_2.6.0.1000-2_amd64.deb --n
# update odbc.ini file for impala driver
RUN
echo "
[Cloudera ODBC Driver for Impala]
Driver=/opt/cloudera/impalaodbc/lib/64/libclouderaimpalaodbc64.so
KrbFQDN=_HOST
KrbServiceName=impala
" >> /etc/odbcinst.ini
# set up impala libraries
RUN export LD_LIBRARY_PATH=$LD_LIBRARY_PATH:/opt/cloudera/impalaodbc/lib/64
RUN ldd /opt/cloudera/impalaodbc/lib/64/libclouderaimpalaodbc64.so
# install pyodbc
RUN pip install pyodbc
USER ubuntu
```
### Credential setup
Set up the following Domino environment variables to store secure information about your Impala connection.
* `IMPALA_HOST`
Hostname where your Impala service is running. Make sure your Impala service and network firewall are configured to accept connections from Domino.
* `IMPALA_PORT`
The port your Impala service is configured to accept connections on.
* `IMPALA_KERB_HOST`
Hostname of your Kerberos authentication service.
* `IMPALA_KERB_REALM`
The name of the Kerberos realm used by the Impala service.
See [Store Project credentials](/cloud/platform-capabilities/core-concepts/projects/configure-projects/store-project-credentials) to learn more about Domino environment variables.
### Usage
See the pyodbc documentation for detailed information about how to use the package to interact with a database. The following are some examples for how to set up a connection.
```highlight theme={null}
import pyodbc
import os
# fetch values from environment variables
hostname = os.environ['IMPALA_HOST']
service_port = os.environ['IMPALA_PORT']
kerb_host = os.environ['IMPALA_KERB_HOST']
kerb_realm = os.environ['IMPALA_KERB_REALM']
# create connection object
conn = pyodbc.connect('Host=hostname;'
+'DRIVER={Cloudera ODBC Driver for Impala};'
+'PORT=service_port;'
+'KrbRealm=kerb_realm;'
+'KrbFQDN=kerb_host;'
+'KrbServiceName=impala;'
+'AUTHMECH=1',autocommit=True)
# if you see:
# 'Error! Filename not specified'
# while querying Impala using the connection object,
# add the following configuration line:
#
# conn.setencoding(encoding='utf-8', ctype=pyodbc.SQL_CHAR)
# if your Impala uses SSL, add SSL=1 to the connection string
# conn = pyodbc.connect('Host=hostname;'
# +'DRIVER={Cloudera ODBC Driver for Impala};'
# +'PORT=service_port;'
# +'KrbRealm=kerb_realm;'
# +'KrbFQDN=kerb_host;'
# +'KrbServiceName=impala;'
# +'AUTHMECH=1;'
# +'SSL=1;'
# +'AllowSelfSignedServerCert=1', autocommit=True)
```
## Next steps
* After connecting to your Data Source, learn how to [Use Data Sources](/cloud/platform-capabilities/core-concepts/data/data-source-connectors/use-data-sources).
* [Share this Data Source](/cloud/platform-capabilities/core-concepts/data/sharing-and-security/share-data-sources) with your collaborators.