> ## Documentation Index
> Fetch the complete documentation index at: https://docs.domino.ai/llms.txt
> Use this file to discover all available pages before exploring further.
# Deploy agentic systems
After experimenting and identifying a promising configuration, you can deploy your agentic system to production.
Agents use the same hosting infrastructure as Domino Apps. Deploying as an agent mainly affects the dashboard and how traces and evaluations are associated.
## Instrument your production app
Your production app code must include the `@add_tracing` decorator on the function that handles user requests. This enables Domino to capture traces from live interactions once the agent is running.
A typical production agent is a web app, such as FastAPI, where each request passes through a function decorated with `@add_tracing`:
```python theme={null}
from domino.agents.tracing import add_tracing
from your_agent import create_agent
@add_tracing(name="single_question_agent", autolog_frameworks=["pydantic_ai"])
async def ask_agent(question):
agent = create_agent()
result = await agent.run(question)
return result
@app.post("/chat")
async def chat(request: ChatMessage):
result = await ask_agent(request.message)
return {"response": result.output}
```
The [simple\_domino\_agent](https://github.com/dominodatalab/simple_domino_agent) repository has a complete production app with a chat UI in [chat\_app.py](https://github.com/dominodatalab/simple_domino_agent/blob/main/chat_app.py).
`DominoAgentContext` is required during [development](/cloud/platform-capabilities/features/genai/agent-development-lifecycle/develop-agentic-systems) to group traces into agent versions, but it is optional in production agent code. The `@add_tracing` decorator alone is sufficient to capture production traces.
## Deploy an agent
You can deploy an agent in two ways:
After comparing evaluation runs and identifying a configuration you want to deploy:
1. In your project, from the left navigation, click **Experiments**.
2. Choose the experiment with the agent configurations you’re evaluating.
3. Select the agent version you want to launch.
4. Click the **Deploy Agent** button:
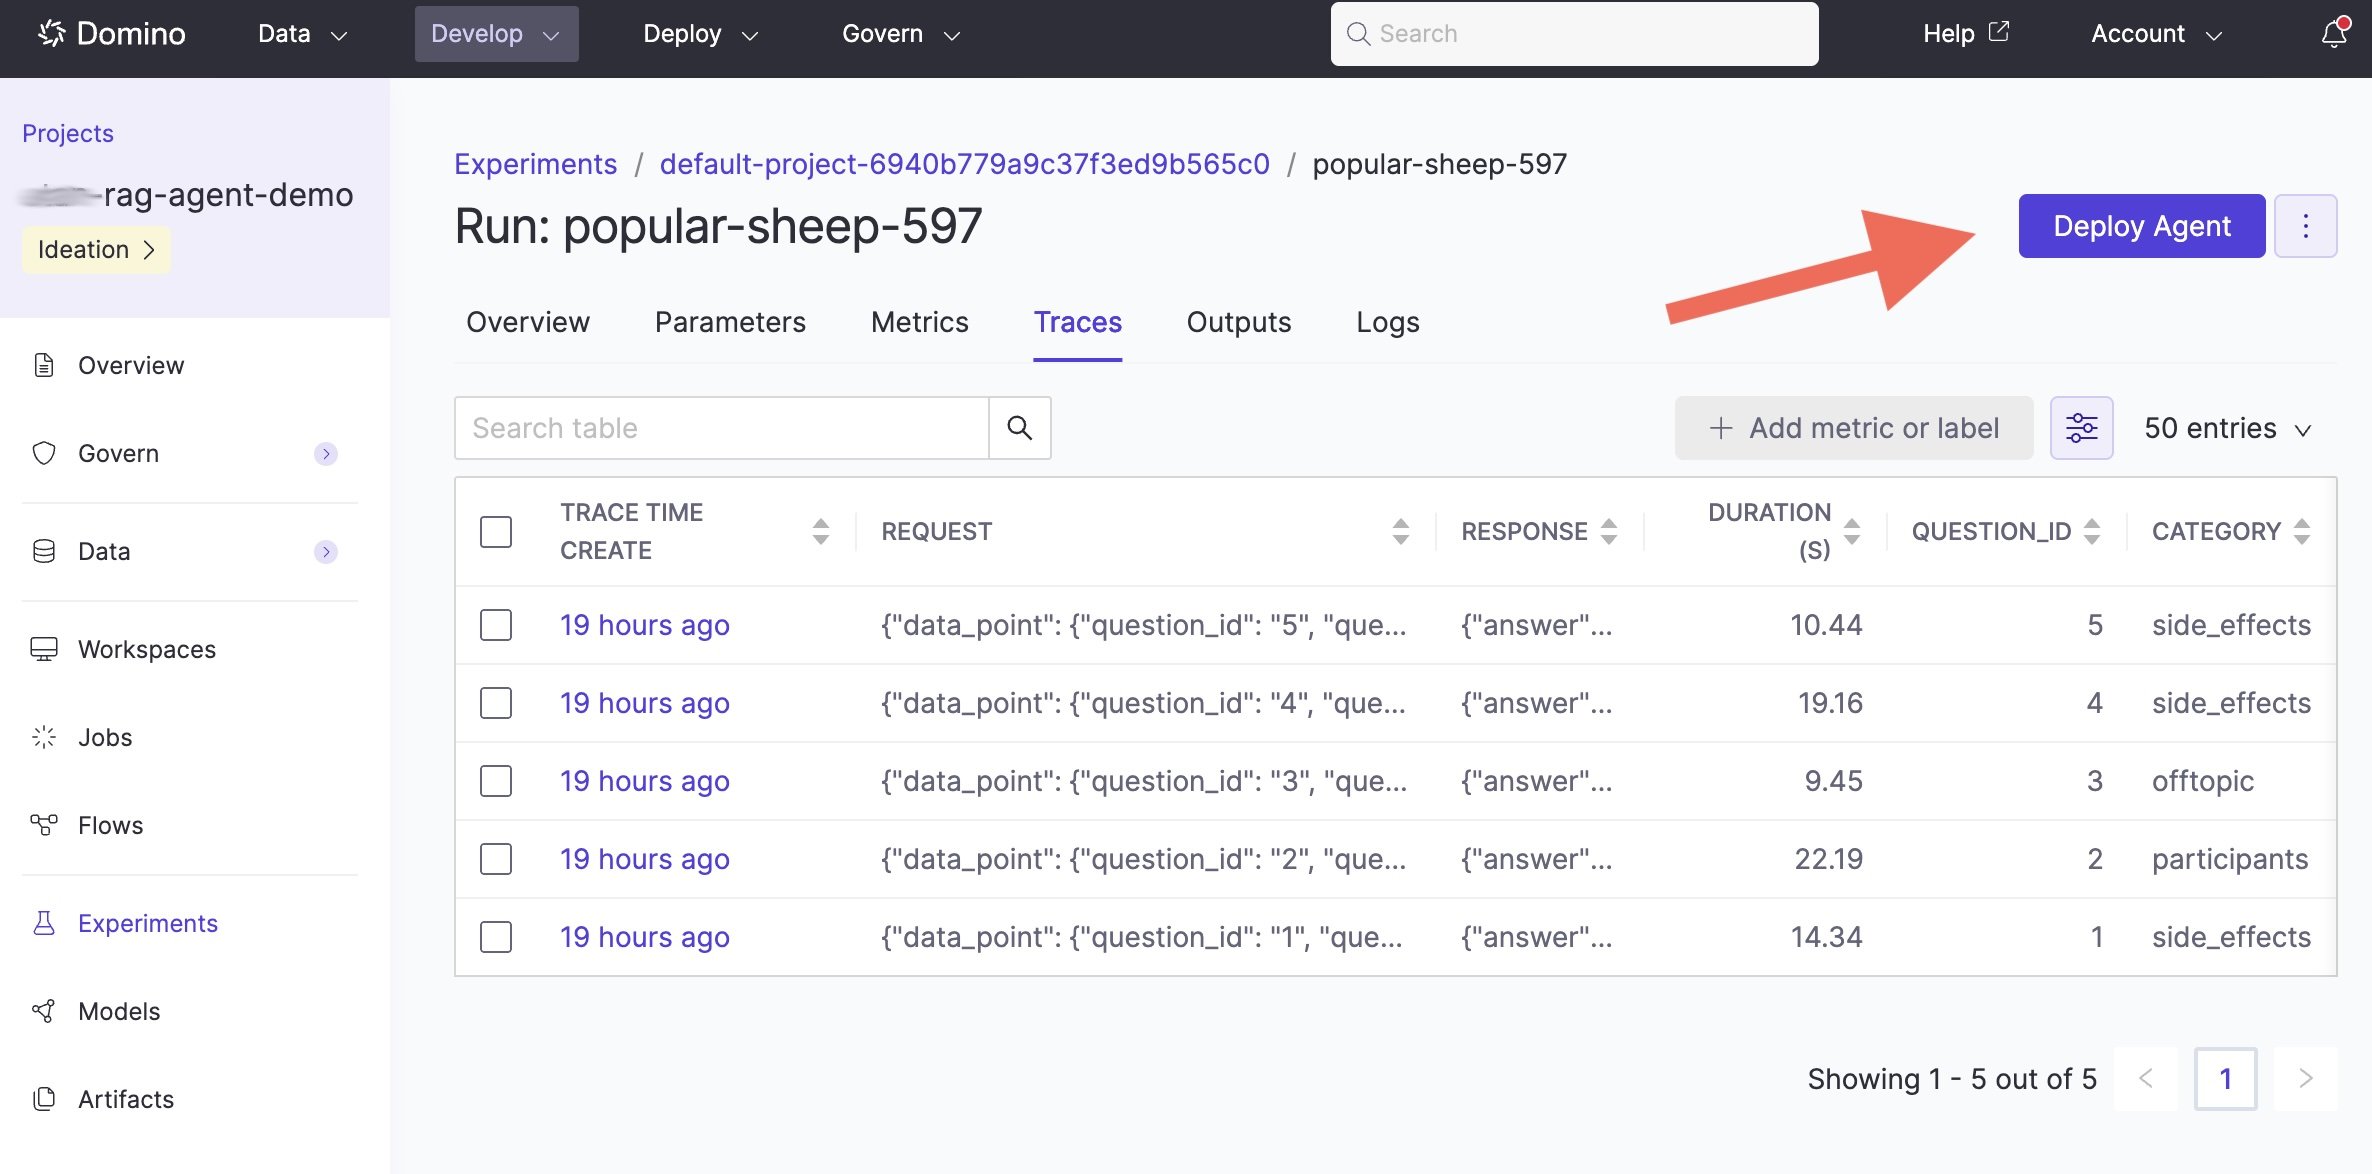 5. A deployment wizard opens, similar to the Apps deployment flow. The wizard pre-fills the code commit from the selected run and prompts you to specify the entrypoint for your agent.
Deploy directly from the Apps view in your project.
This follows the standard [Publish and share an App](/cloud/platform-capabilities/core-concepts/products/apps/publish-an-app) workflow, with configuration options specific to agentic workloads.
Once deployed, production traces flow automatically into the agent’s [monitoring dashboard](/cloud/platform-capabilities/features/genai/agent-development-lifecycle/monitor-agentic-systems). This is the same trace data you saw during development, now captured from real user interactions.
## Next steps
* [Monitor agentic systems](/cloud/platform-capabilities/features/genai/agent-development-lifecycle/monitor-agentic-systems): Track production performance and run evaluations.
* [Experiment tracking and traces](/cloud/platform-capabilities/features/genai/agent-development-lifecycle/experiment-with-agentic-systems): Compare more configurations before deploying.
5. A deployment wizard opens, similar to the Apps deployment flow. The wizard pre-fills the code commit from the selected run and prompts you to specify the entrypoint for your agent.
Deploy directly from the Apps view in your project.
This follows the standard [Publish and share an App](/cloud/platform-capabilities/core-concepts/products/apps/publish-an-app) workflow, with configuration options specific to agentic workloads.
Once deployed, production traces flow automatically into the agent’s [monitoring dashboard](/cloud/platform-capabilities/features/genai/agent-development-lifecycle/monitor-agentic-systems). This is the same trace data you saw during development, now captured from real user interactions.
## Next steps
* [Monitor agentic systems](/cloud/platform-capabilities/features/genai/agent-development-lifecycle/monitor-agentic-systems): Track production performance and run evaluations.
* [Experiment tracking and traces](/cloud/platform-capabilities/features/genai/agent-development-lifecycle/experiment-with-agentic-systems): Compare more configurations before deploying.