> ## Documentation Index
> Fetch the complete documentation index at: https://docs.domino.ai/llms.txt
> Use this file to discover all available pages before exploring further.
# Get started with AI coding assistants
You can launch a Domino workspace and start using a coding assistant in under five minutes without any environment customization or manual extension installs.
## Prerequisites
Before you can start to use coding assistants in your workspace, you need:
* A Domino account with access to create workspaces.
* A subscription to at least one coding agent provider (Anthropic for Claude Code, GitHub for Copilot, or OpenAI for Codex).
## Step 1: Launch a workspace
1. Open your Domino project (or create a new one).
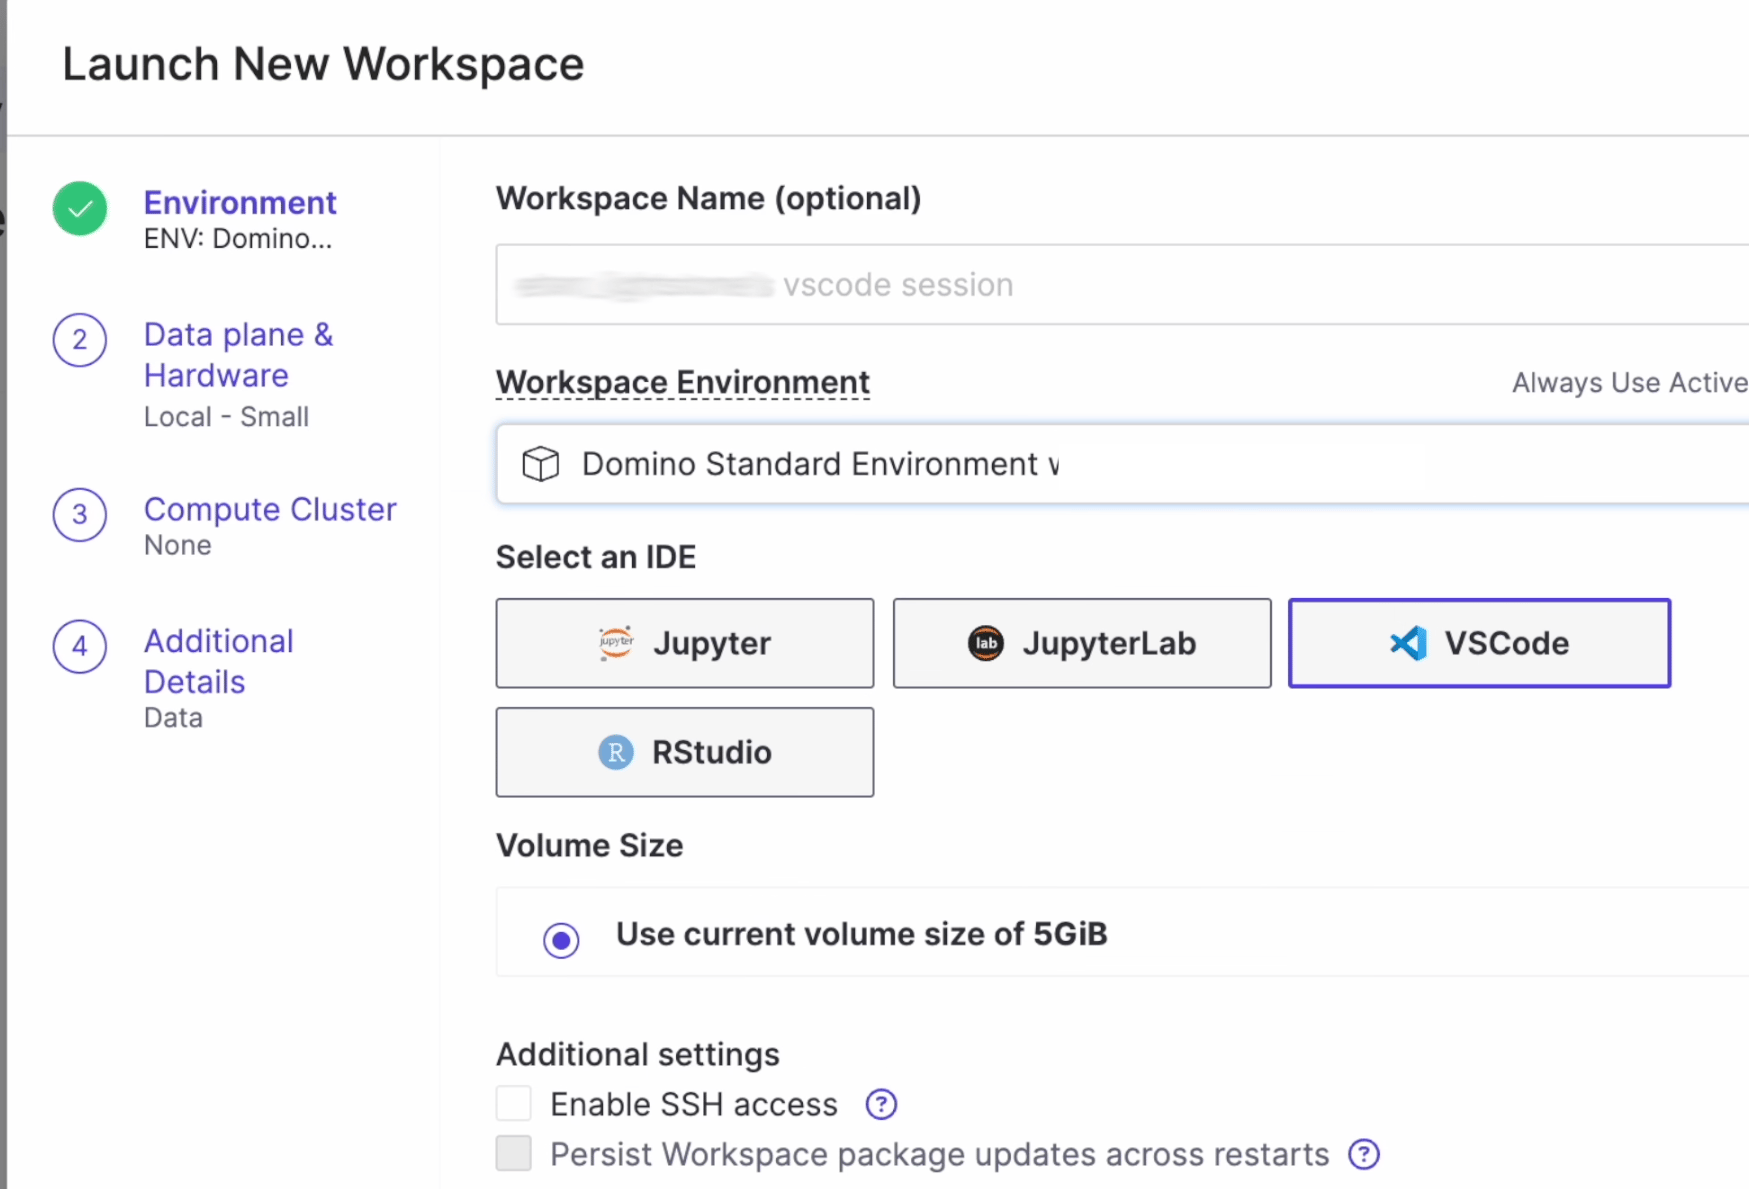
2. Go to **Workspaces** and click **Create New Workspace**.
3. Select the **Domino Standard Environment**, which includes all coding assistant tooling.
4. Choose your IDE, such as VS Code, JupyterLab, RStudio, or Jupyter. In VS Code, all three agents come as extensions. For other IDEs, Claude Code and Codex work as CLI tools.
5. Click **Launch**.
 ## Step 2: Authenticate your coding agent
Each coding agent requires a one-time authentication with your provider account. Below are the steps for each agent:
1. Click the Claude Code icon (the orange asterisk) in the VS Code sidebar to open the **Claude Code** panel.
2. Choose your authentication method: **Claude.ai Subscription**, **Anthropic Console**, or **Vertex or Bedrock**.
## Step 2: Authenticate your coding agent
Each coding agent requires a one-time authentication with your provider account. Below are the steps for each agent:
1. Click the Claude Code icon (the orange asterisk) in the VS Code sidebar to open the **Claude Code** panel.
2. Choose your authentication method: **Claude.ai Subscription**, **Anthropic Console**, or **Vertex or Bedrock**.
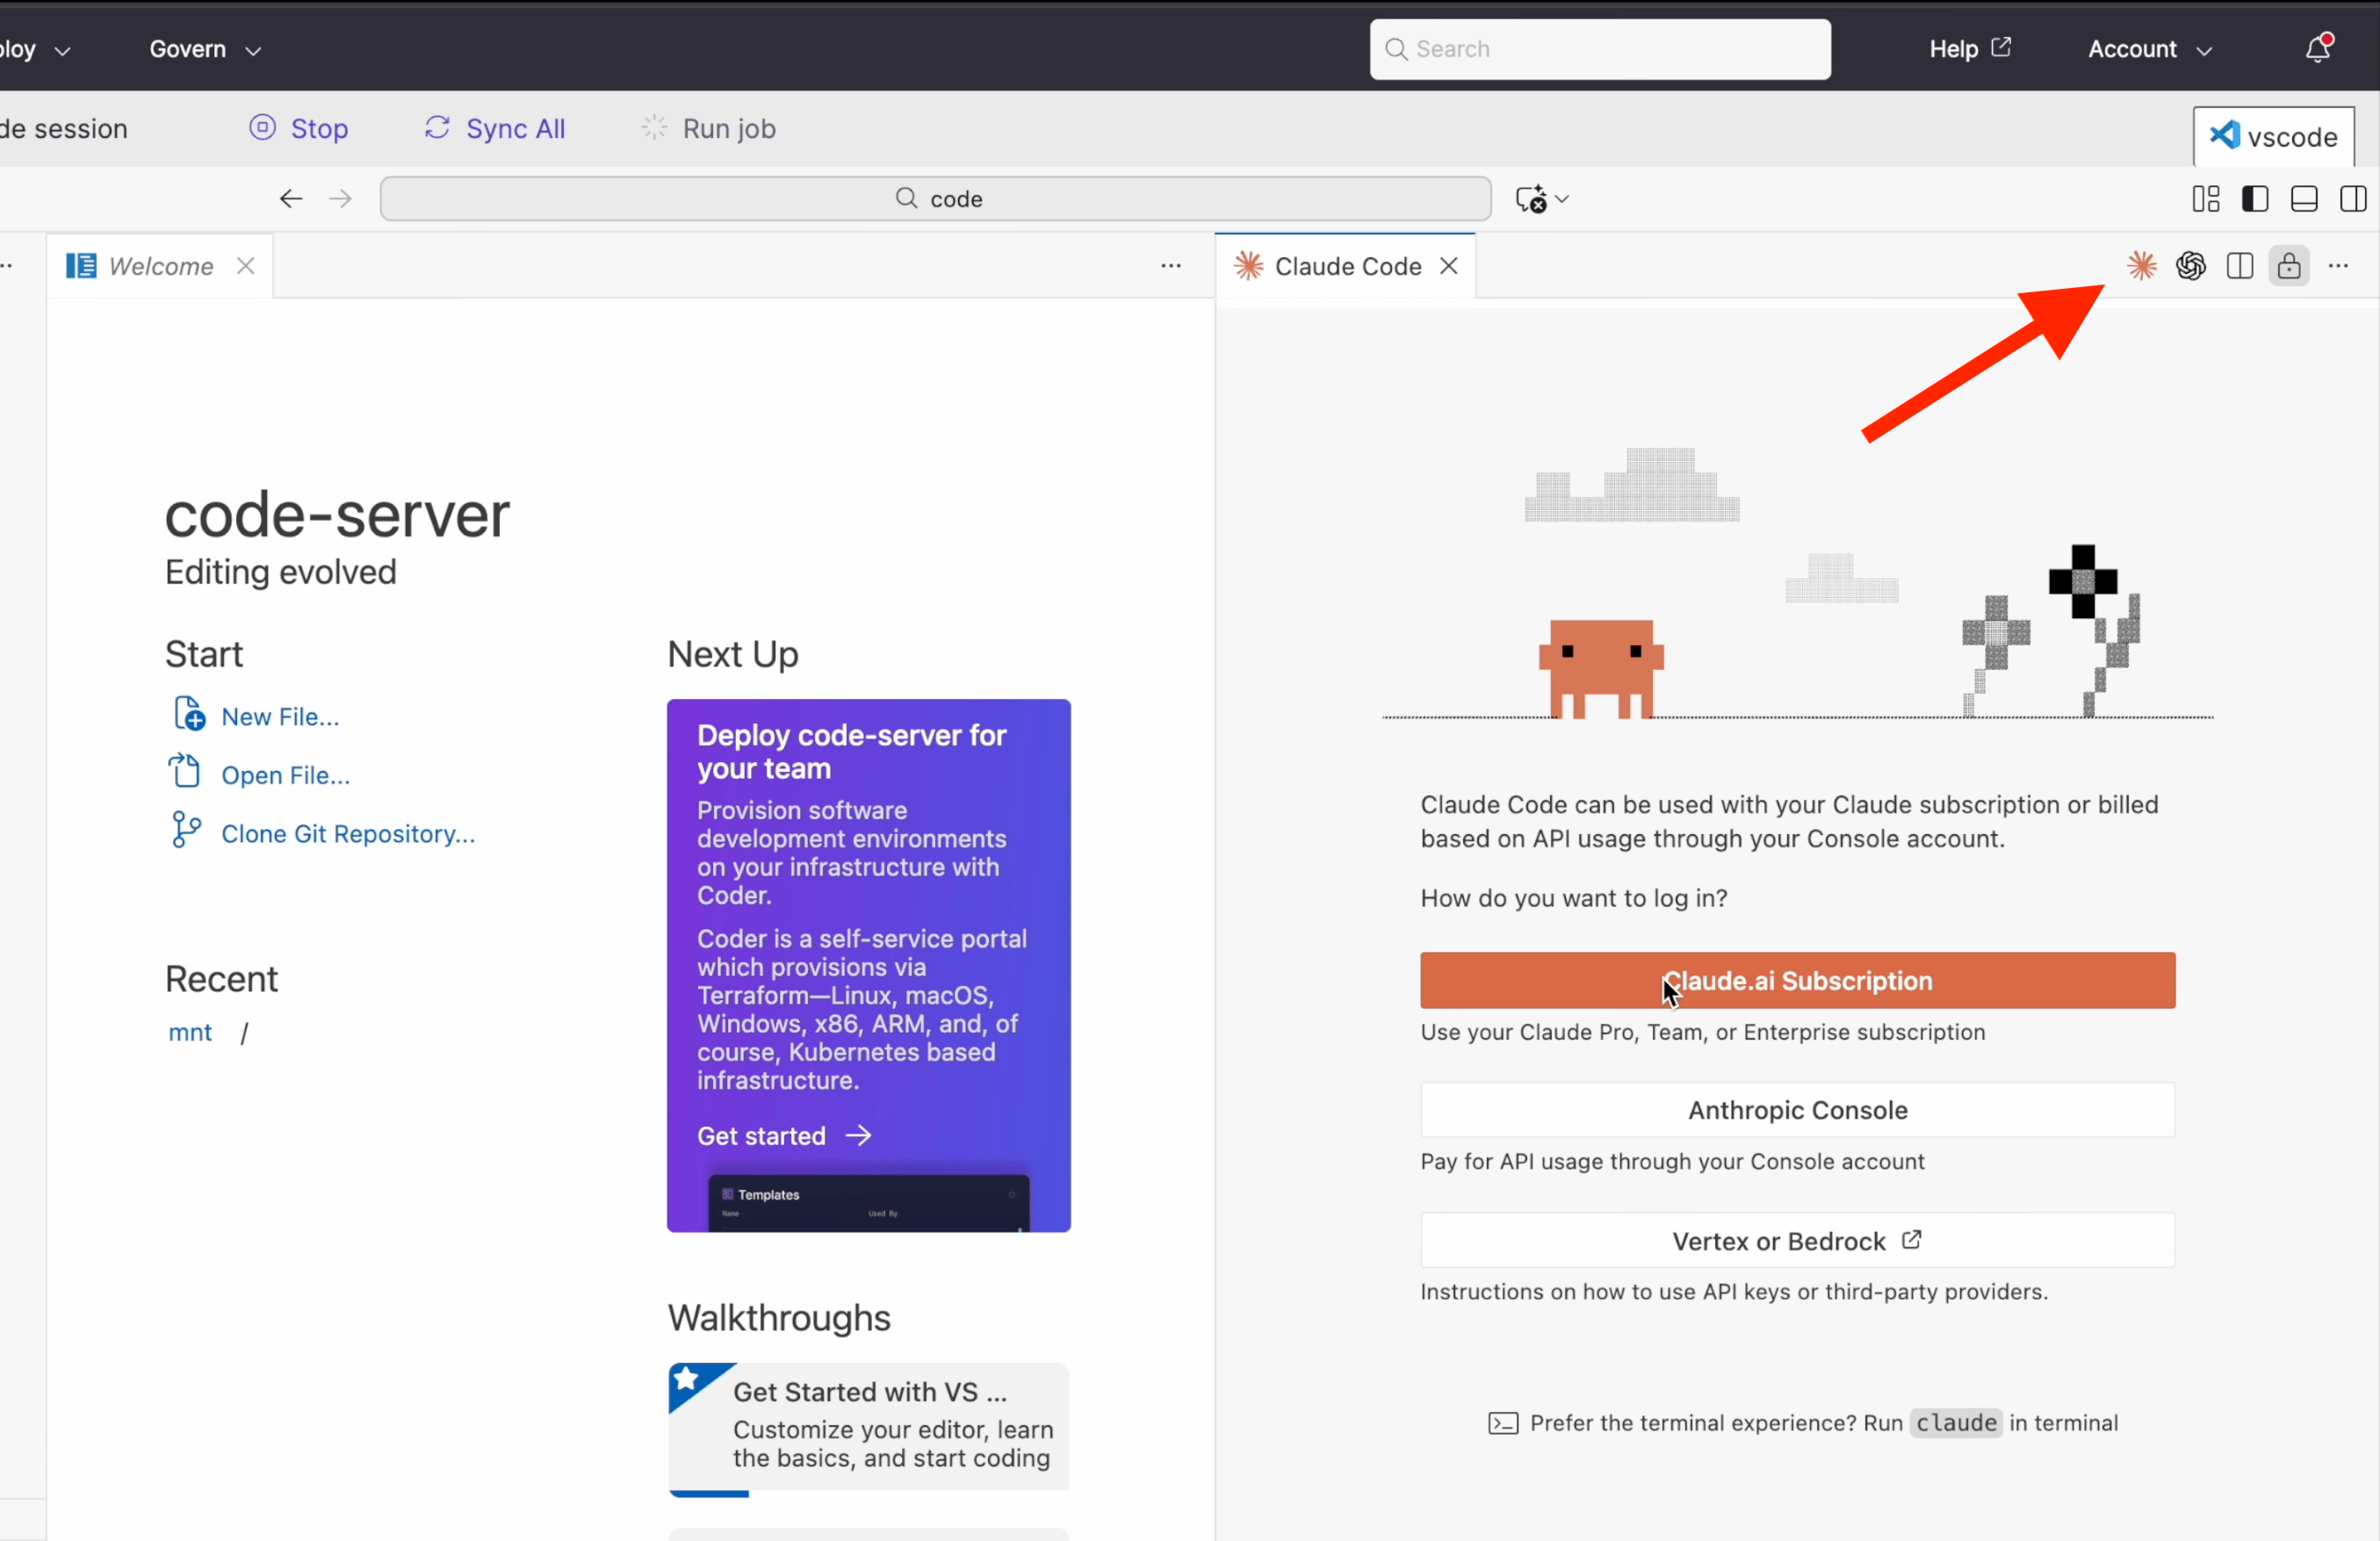 3. The panel displays a URL. Copy the URL and open the link in your browser to complete the OAuth flow.
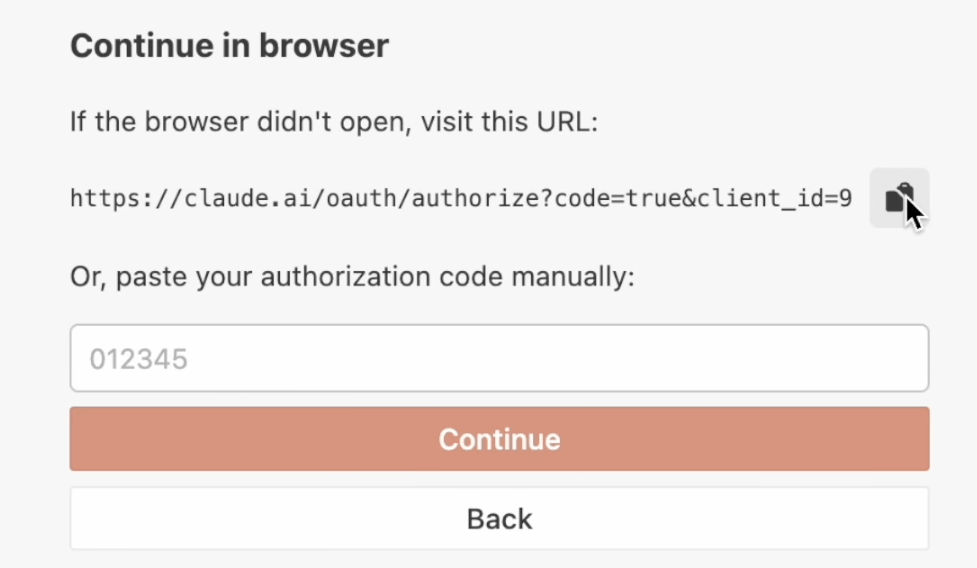 4. After you’ve authenticated in the browser, return to your workspace. Claude Code is now ready to use.
**Known issues**
* The clickable link in the pop-up dialog does not work when you authenticate for the first time. Copy the URL manually and paste the link in a new browser tab.
* If the Claude Code extension panel appears blank, refresh your browser. The panel renders correctly after a page reload.
1. Open the **Chat** panel in the VS Code sidebar and type a message in the chat input.
4. After you’ve authenticated in the browser, return to your workspace. Claude Code is now ready to use.
**Known issues**
* The clickable link in the pop-up dialog does not work when you authenticate for the first time. Copy the URL manually and paste the link in a new browser tab.
* If the Claude Code extension panel appears blank, refresh your browser. The panel renders correctly after a page reload.
1. Open the **Chat** panel in the VS Code sidebar and type a message in the chat input.
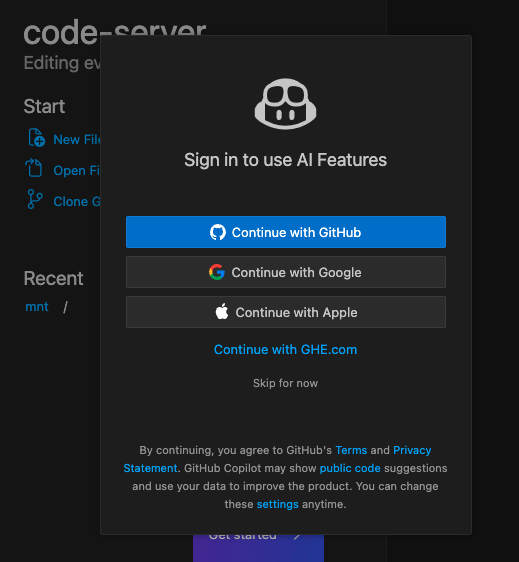
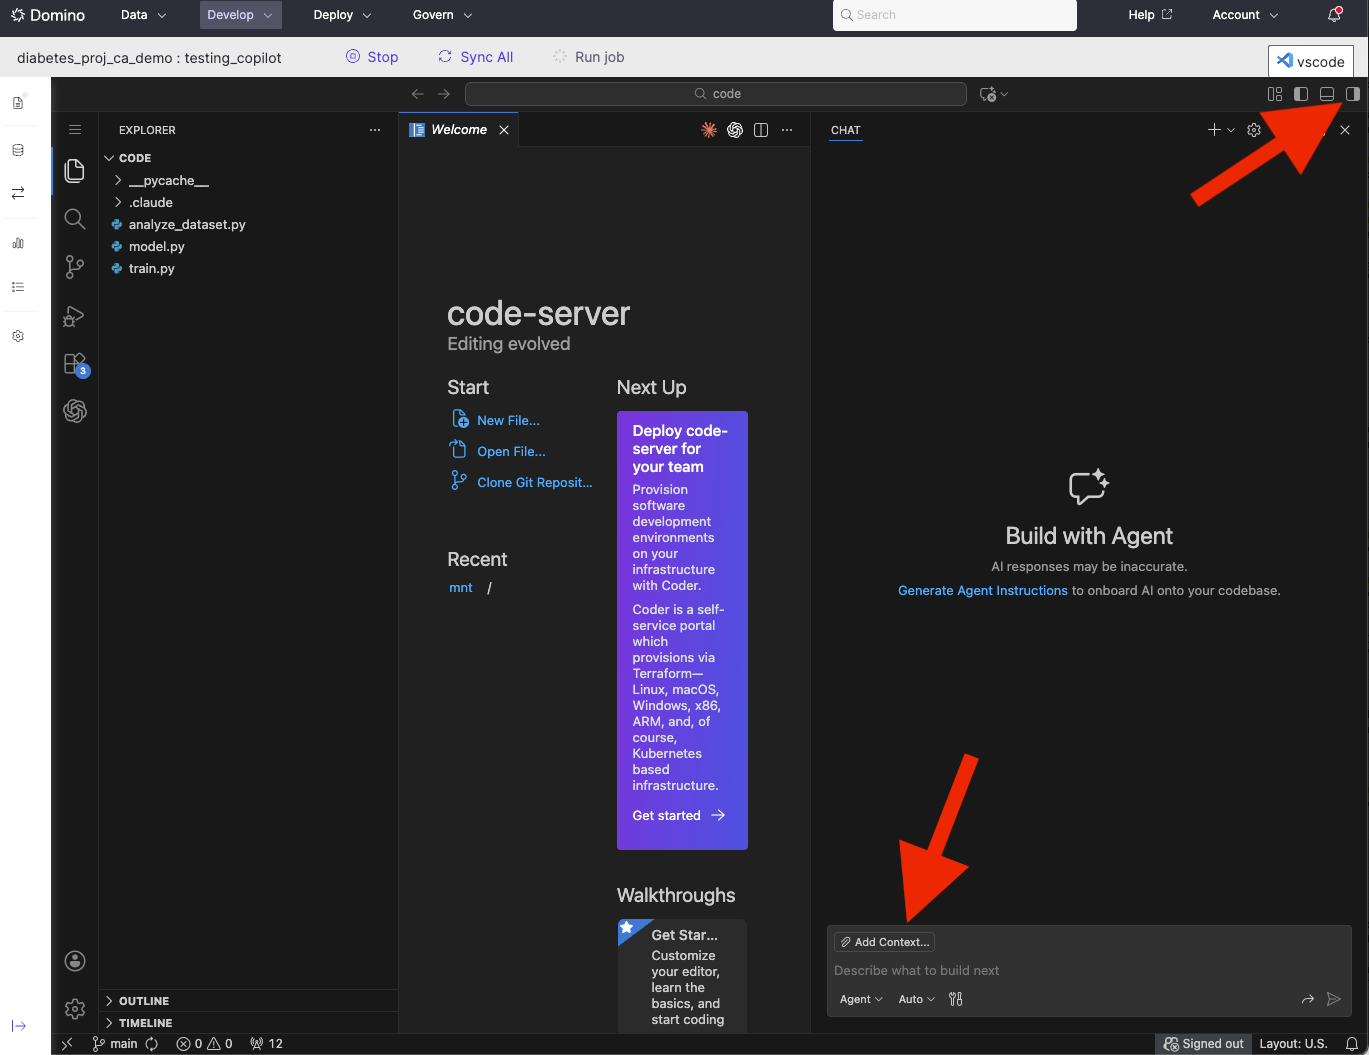 2. The **Sign in to use AI Features** dialog appears. Choose your authentication method (GitHub, Google, Apple, or GHE.com).
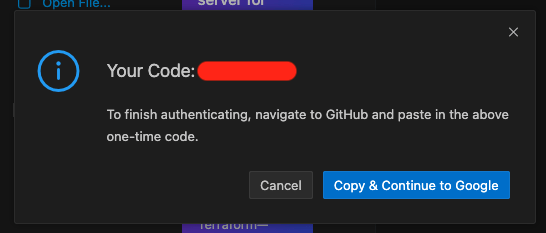
 3. The dialog displays your one-time device code. Click **Copy & Continue to Google** to open the authentication page in a new window, then paste the code to complete the sign-in.
 4. Return to your workspace. Copilot is now ready to use.
You must authenticate Codex through the terminal first. The VS Code extension will not work until you have completed the CLI sign-in flow.
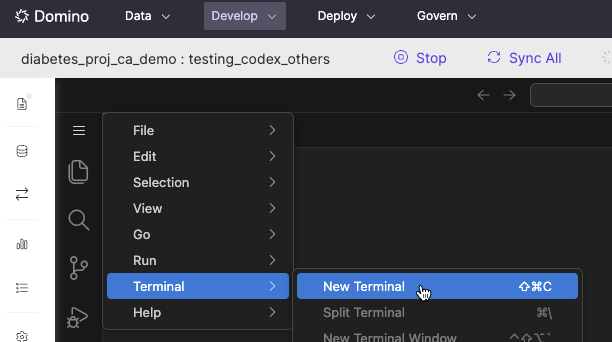
1. Open a terminal in your workspace by selecting **Terminal** > **New Terminal** from the menu bar.
4. Return to your workspace. Copilot is now ready to use.
You must authenticate Codex through the terminal first. The VS Code extension will not work until you have completed the CLI sign-in flow.
1. Open a terminal in your workspace by selecting **Terminal** > **New Terminal** from the menu bar.
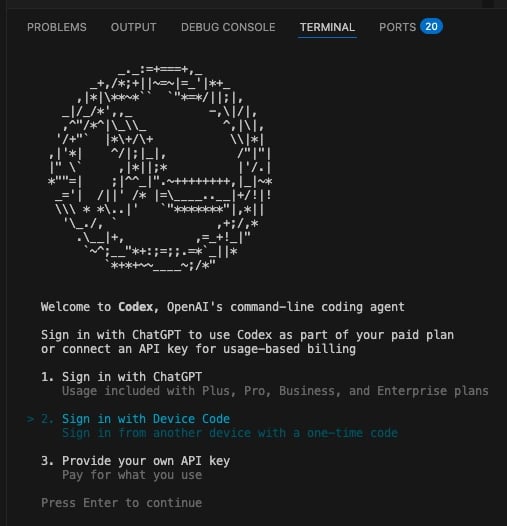
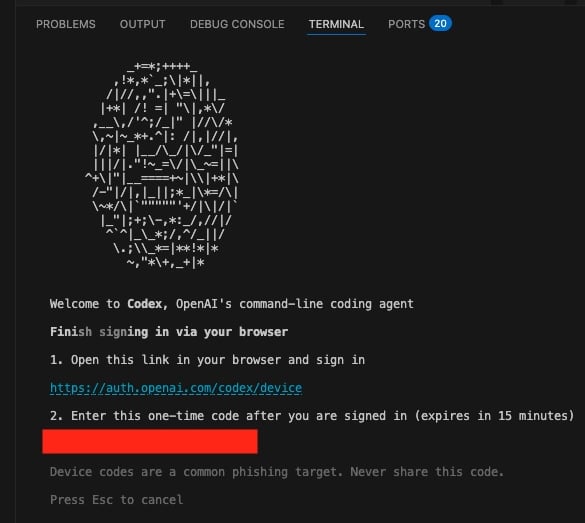
 2. Run `codex` in the terminal. The Codex CLI displays authentication options. Select **Sign in with Device Code** to authenticate via your browser.
 3. The CLI displays a URL and a one-time device code. Open the link in your browser, sign in with your OpenAI account, and enter the device code when prompted.
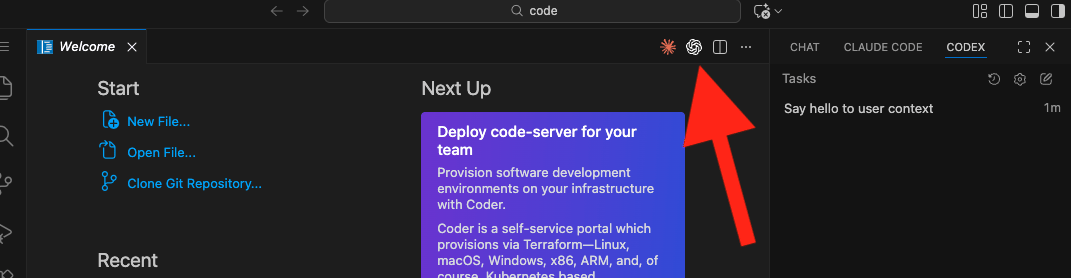
 4. After you’ve authenticated, **refresh** your browser to activate the Codex VS Code extension. Open the **Codex** tab in the sidebar panel to start using the extension.
 ## Step 3: Start to code
Your coding assistant is now Domino-aware and has access to [Domino Skills](/cloud/solution-guides/coding-assistants/domino-skills) for running jobs, registering models, tracking experiments, and more.
Try asking your agent to explore the project files, analyze a dataset, or train a model.
The [modeling assistant walkthrough](/cloud/solution-guides/coding-assistants/modeling-assistant) has a full example.
## Next steps
* [Domino Skills](/cloud/solution-guides/coding-assistants/domino-skills): See the full list of Domino-specific actions your agent has access to.
* [Modeling assistant walkthrough](/cloud/solution-guides/coding-assistants/modeling-assistant): An end-to-end demo of data analysis, model training, and comparison.
## Step 3: Start to code
Your coding assistant is now Domino-aware and has access to [Domino Skills](/cloud/solution-guides/coding-assistants/domino-skills) for running jobs, registering models, tracking experiments, and more.
Try asking your agent to explore the project files, analyze a dataset, or train a model.
The [modeling assistant walkthrough](/cloud/solution-guides/coding-assistants/modeling-assistant) has a full example.
## Next steps
* [Domino Skills](/cloud/solution-guides/coding-assistants/domino-skills): See the full list of Domino-specific actions your agent has access to.
* [Modeling assistant walkthrough](/cloud/solution-guides/coding-assistants/modeling-assistant): An end-to-end demo of data analysis, model training, and comparison.