

Register a Filesystem
Once a Filesystem is registered, the UI also enables viewing, auditing, and managing individual NetApp Volumes, streamlining volume lifecycle operations from creation to snapshot tracking.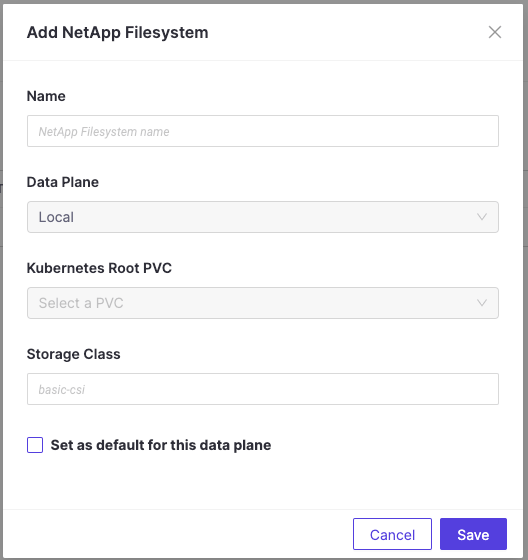
- In the admin panel, go to Manage Resources > NetApp Volumes.
- Click Add Filesystem to create a new Filesystem.
-
Provide the following information:
- Name: 1–250 characters; can include letters, digits, underscores, hyphens, and spaces
- Data Plane: Select from existing data planes; defines where the data will reside
- Kubernetes Root PVC: Name of the Root PVC (must exist in the selected dataplane)
- Storage Class: Kubernetes storage class name that uses Trident as the provisioner
- Click Save.
View all NetApp Volumes
To view all existing NetApp Volumes in Domino, navigate to Admin Panel > Manage Resources > NetApp Volumes, then select the Volumes tab. This gives you a comprehensive list of all configured volumes along with key details for each one:| Column | Description |
|---|---|
| Name | The name of the NetApp Volume as registered in Domino. |
| Owner Name | The user or project that owns the volume. |
| ONTAP Filesystem | The ONTAP Filesystem in which this volume resides. |
| Status | The current lifecycle state of the volume (e.g., Active, Deleted, Error). |
| Permissions | Access level settings for the volume (e.g., read/write access by owner or project). |
| Size | The allocated capacity of the volume. |
| Number of Snapshots | Total count of saved snapshots for this volume. |
Next steps
- Setup NetApp Volumes to get Domino Volumes for NetApp ONTAP ready for use.
- Create and configure NetApp Volumes from Domino or within a specific project.