- Scheduled reports
- Launchers
- Web applications
- Domino endpoints
Compute Environments
In our previous section, Step 5, we installed the Prophet package in Rstudio in order to train the model. In Domino, any package installed in one work session will not persist to another. In order to avoid having to re-install Prophet each time we need it, you can add it to a custom compute environment.-
Create a new compute environment.
- Go to the Environments page in Domino.
- Click Create Environment.
- Click Edit Definition.
-
In the Dockerfile Instructions section, enter the following:
- Scroll to the bottom of the page and click Build. This will start the creation of your new compute environment. These added packages will now be permanently installed into your environment and be ready whenever you start a job or workspace session with this environment selected.
- Go back to your project page and go to the Settings page.
- Select your newly created environment from the Compute Environments menu.
Scheduled reports
The Scheduled Jobs feature in Domino allows you to run a script on a regular basis. In Domino, using the R package knitr, you can blend text, code, and plots in an RMarkdown to create attractive HTML or pdf reports automatically. In our case, we can imagine that each day we receive new data on power usage and want to email out a visualization of the latest data daily.- Start a new Rstudio session.
-
Create a new Rmarkdown file named
power_report.Rmdand select HTML as our desired output. -
Rstudio automatically creates a sample Rmarkdown file for you, but you can replace it entirely with the following which reuses code from our
power.Rscript from step 5.R Markdown Combining R Markdown, Knitr and Domino allows you to create attractive scheduled reports that mix text, code and plots.Including Plots You can also embed plots, for example: - With your new Rmarkdown file, you can “knit” this into an html file and preview it directly in Domino by hitting the “Knit” button.
-
To create a repeatable report, you must create a script that you can schedule that will automatically render your Rmarkdown file to html. Start by creating a new R script named
render.Rwith the following code: - Save your files and *Stop and Commit() your workspace.
- Go to the Scheduled Jobs page.
-
Enter the file that you want to run. This will be the
render.Rscript you created earlier. - Select how often and when to run the file.
- Enter emails of people to send the resulting file(s) to.
- Click Schedule.
Launchers
Launchers are simple web forms that allow users to run templatized scripts. They are especially useful if your script has command line arguments that dynamically change the way the script executes. For heavily customized script, those command line arguments can quickly get complicated. Launcher allows you to expose all of that as a simple web form. Typically, we parameterize script files (that is, files that end in.py, .R, or .sh). Since we have been working with an R script until now, we will parameterize and reuse our R script that we created when we developed the R model.
To do so, we will insert a few new lines of code into a copy of the R script, and configure a Launcher.
-
Parameterize your R script by setting it to take command line arguments:
- Start an Rstudio session.
-
Create script named
Power_for_Launcher.Rwith the following: -
Notice the lines in our script that define an object from a command line arguments
- Save the files and Stop and Commit the workspace session.
-
Configure the Launcher.
- Go to the Launcher page. It is under the Publish menu on the project page.
- Click New Launcher.
- Name the launcher “Power Generation Forecast Data”.
-
Copy and paste the following into the field “Command to run”:
You should see the following parameters:
- Select the fuel_type parameter and change the type to Select (Drop-down menu).
-
Copy and paste the following into the Allowed Values field:
- Click Save Launcher.
-
Try out the Launcher.
- Go back to the main Launcher page.
- Click Run for the “Power Generation Forecast Trainer” launcher.
- Select a fuel type from the dropdown.
- Click Run. This will execute the parameterized R script with the parameters that you selected. In this particular launcher, your dataset is filtered based on your input parameter with the results returned as a csv. When the run has been completed, an email will be sent to you and others that you optionally specified in the launcher with the resulting files. See Set Custom Execution Notifications to learn how to customize the resulting email.
Domino endpoints
If you want your model to serve another application, you will want to serve it in the form of an API endpoint. Domino endpoints are scalable REST APIs that can create an endpoint from any function in a Python or R script. The Domino endpoints are commonly used when you need an API to query your model in near real-time. For example, we created a model to forecast power generation of combined cycle gas turbines in the UK. In this section, we will deploy an API that uses the previously trained model to predict the generated power given a date in the future. To do so, we will create a new compute environment to install necessary packages, create a new file with the function we want to expose as an API, and finally deploy the API.-
Create a new file with the function we want to expose as an API.
- From the Files page of your project, click Add File.
-
Name your file
forecast_predictor.R. -
Enter the following contents:
- Click Save.
-
Deploy the API.
- Go to the Publish/Domino endpoints page in your project.
- Click New endpoint.
- Name your model, provide a description, and click Next.
- Enter the name of the file that you created in the previous step.
- Enter the name of the function that you want to expose as an API.
- Click Create endpoint.
-
Test the API.
- Wait for the Domino endpoint status to turn to Running. This might take a few minutes.
- Click the Overview tab.
-
Enter the following into the tester:
- Click Send. If successful, you will see the response on the right panel.
Web applications
When experiments in Domino yield interesting results that you want to share with your colleagues, you can easily do so with a Domino App. Domino supports hosting Apps built with many popular frameworks, including Flask, Shiny, and Dash. While Apps can be significantly more sophisticated and provide far more functionality than a Launcher, they also require significantly more code and knowledge in at least one framework. In this section, we will convert some code that we developed when we developed the model and create a Shiny app.-
Add the
app.Rfile, which will describe the app in Shiny, to the project: -
Add an
app.shfile to the project, which provides the commands to instantiate the app: -
Publish the App.
- Go to the App page under the Publish menu of your project.
- Enter a title and a description for your app.
- Click Publish.
- After your app starts successfully, which might take a few minutes, you can click View App to open it.
-
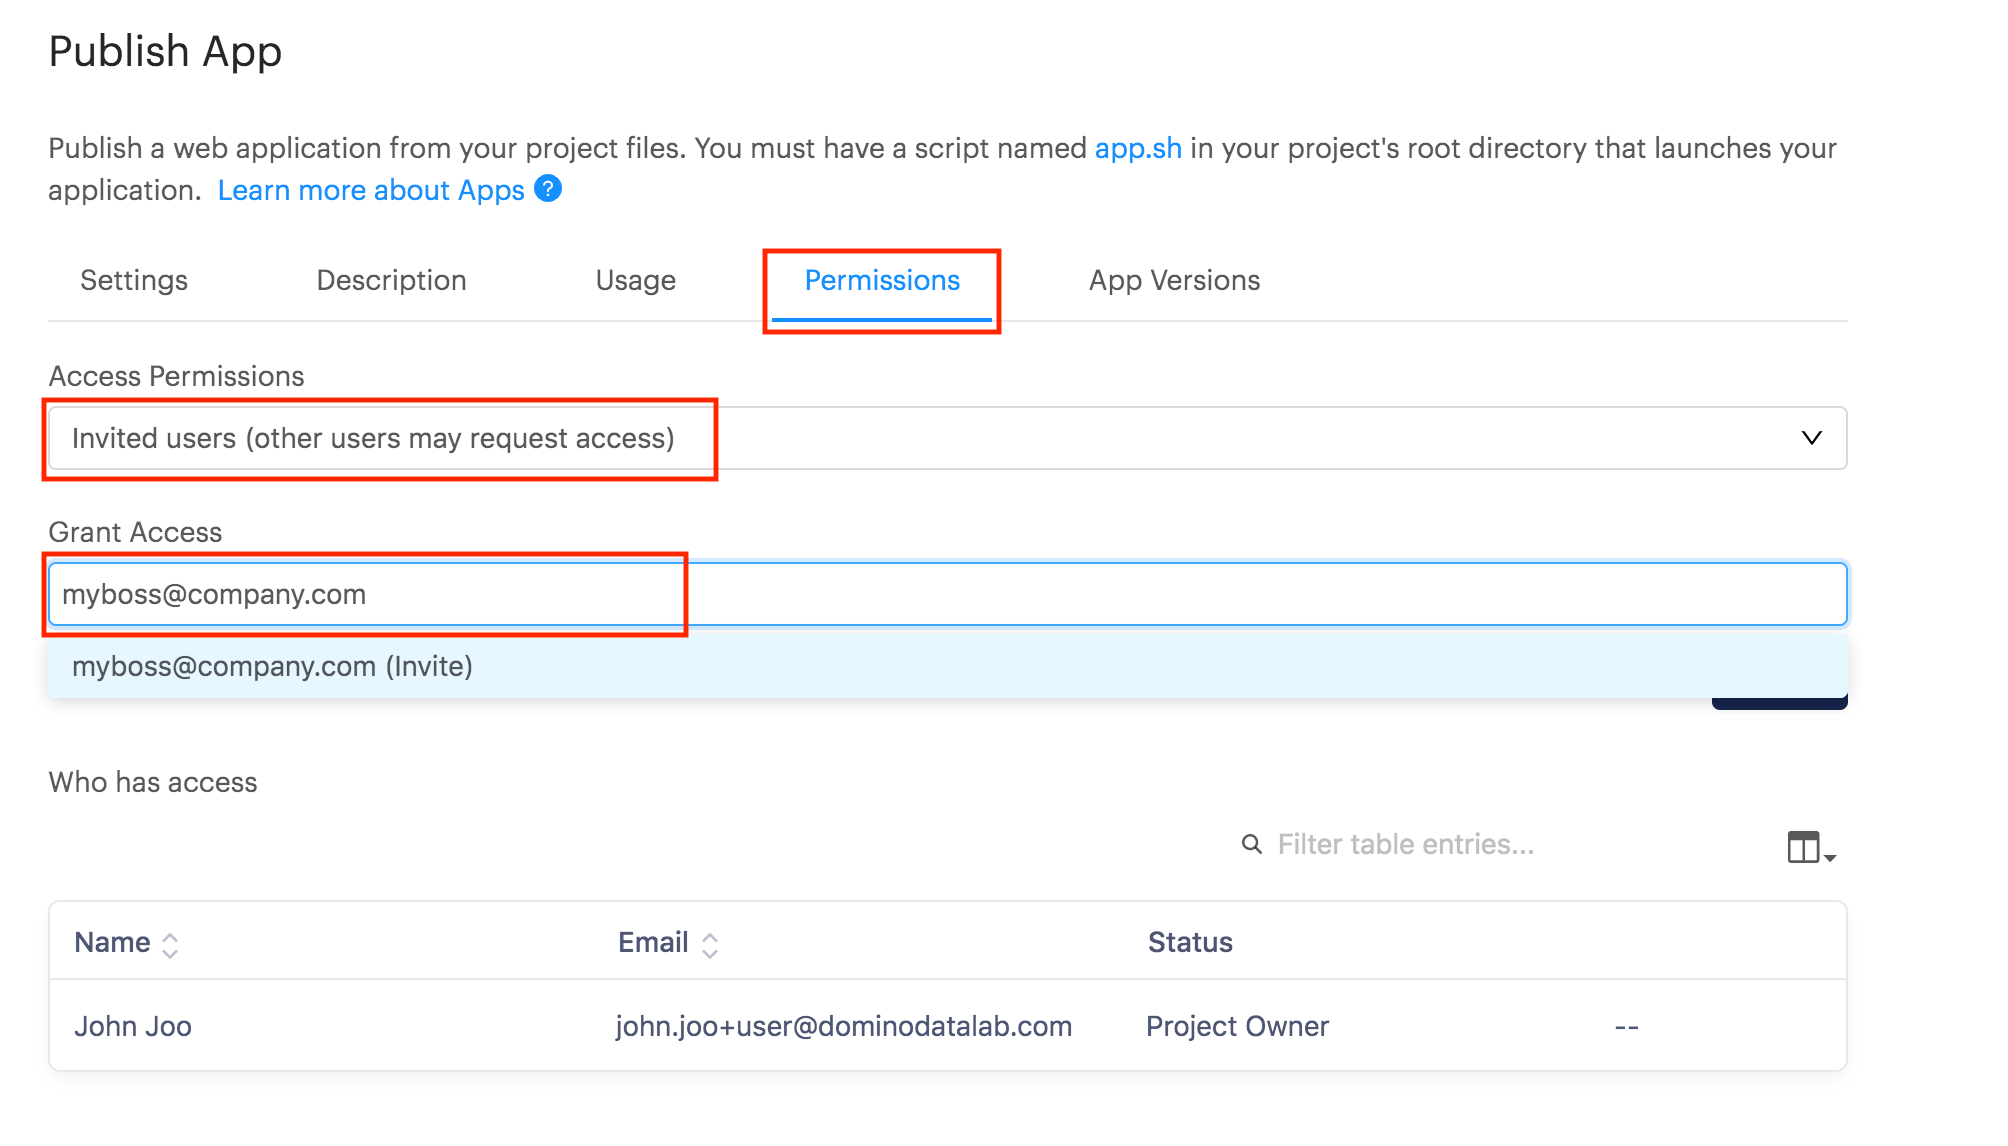
Share your app with your colleagues.
- Back on the Publish/App page, click the App Permissions tab.
- Invite your colleagues by username or email.
-
Or, toggle the Access Permissions level to make it publicly available.