

- Create a snapshot to create versions of a NetApp Volume or Domino Dataset.
- Use a naming convention and a folder hierarchy to organize data your way in the read/write portions of a NetApp Volume or Dataset.
Snapshotting: NetApp Volumes vs. Domino Datasets
Use NetApp Volumes when you need fast, large-scale snapshotting or integration with external storage systems.
Use Datasets if you don’t have NetApp Volumes set up, and you want to clone or branch datasets more flexibly within Domino.
Create a snapshot
You can take a snapshot from the overview page of a NetApp Volume or Dataset in the Domino UI. A snapshot captures the current state of the data in a read-only, versioned format. Caution: You should never modify files while a snapshot is in progress.- In the UI
- In the CLI (Datasets only)
- In the REST API
- Go to the NetApp Volumes or Datasets tab in your project.
- Select the NetApp Volume or Dataset you want to snapshot.
-
Click Take Snapshot and choose one of the following:
- Include all files: snapshots the entire contents.
- Include only selected files allows a partial snapshot.
- Optionally, add a commit message (NetApp Volumes) or a tag name for the snapshot. You can add multiple tags for NetApp Volumes.
- Click Confirm to begin.
Commit messages (NetApp Volumes only)
A commit message is a short, optional description attached to a snapshot. This description is also editable. It’s useful for recording the purpose, contents, or context of the snapshot, especially when creating many versions over time. Examples:- “Cleaned version with NA values removed”
- “Post-labeling data for training 3.2”
- “Before joining with demographic.csv”
- Track what changed
- Clarify the purpose without editing the Dataset or Volume description
- Improve transparency in team workflows
Add tags to a snapshot
Tags are human-readable labels that provide a stable, friendly path to a specific snapshot when you mount it in an execution. They let you reference a named snapshot in code or across projects, even if the tag later moves to a different snapshot.- Tags can be created or removed by NetApp Volume or Dataset owners or editors.
- Tags can be reassigned to newer snapshots as needed.
- Only the most recently added tag is used for automatic mounting in executions.
- Go to the Snapshots section for the Dataset or Volume.
- Select the snapshot.
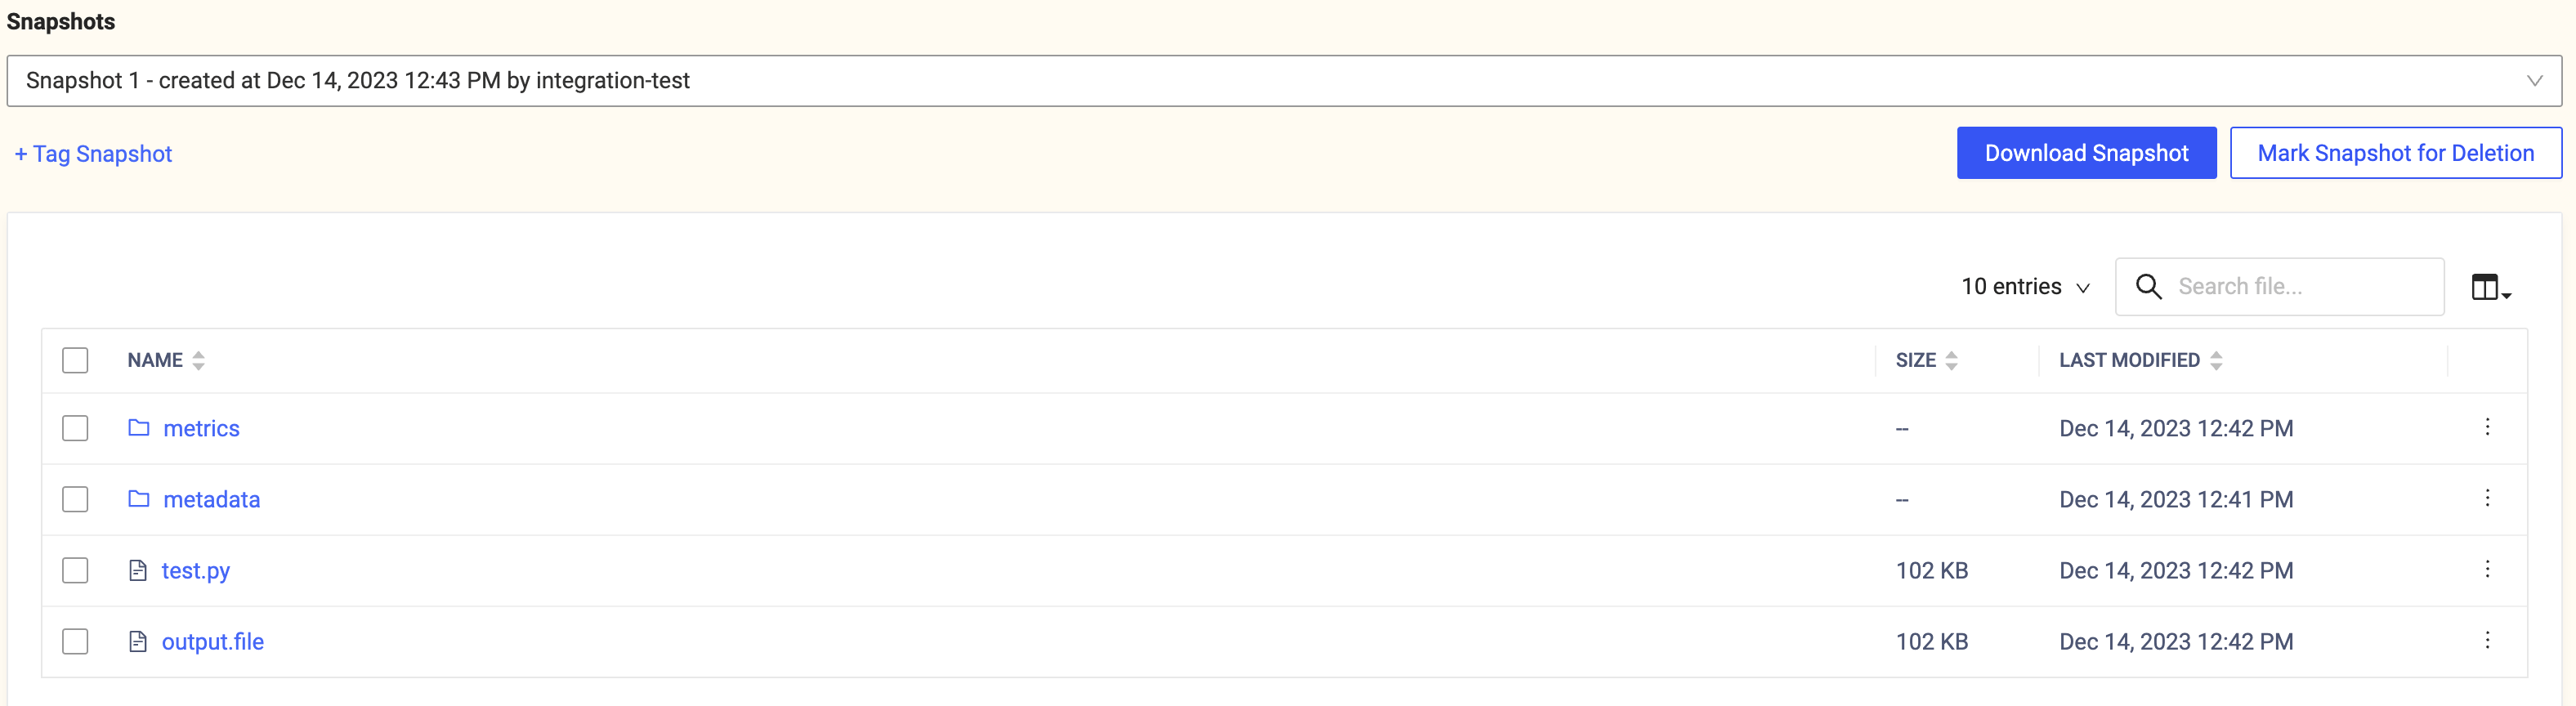
- Click +Tag Snapshot, enter a name, and click Add.
- To remove a tag, click the X next to the tag name.
Snapshot mounting in executions
If a snapshot has a tag, Domino automatically mounts it in any execution that uses the NetApp Volume or Dataset. If a snapshot has multiple tags, only the most recently added one is mounted. This mount path is in addition to the default mount, and it depends on the data and project types: NetApp Volumes-
Git-based projects -
/mnt/netapp-volumes/snapshot-tags/<name>/<tag-name> -
Regular projects -
/domino/netapp-volumes/snapshot-tags/<name>/<tag-name>
-
Git-based projects -
/mnt/data/snapshots/<name>/<tag-name> -
Regular projects -
/domino/datasets/local/snapshots/<name>/<tag-name>
Choose a snapshot per asset at launch
When you launch a Workspace or Job, or define a scheduled Job, you can pin each mounted NetApp Volume or Dataset to a single snapshot. Pin a snapshot to work against known-good data instead of the live version, without moving tags.- Start a new Workspace or Job from your Project, or create a scheduled Job.
- Open the Data Plane & Hardware tab. Domino lists each mounted NetApp Volume and Dataset in a table with Storage and Snapshot columns.
-
In the Snapshot column for an asset, choose one of:
- All snapshots, the default: mounts the asset the standard way, with its live data, every snapshot under its own snapshot number, and any tag mounts.
-
A specific snapshot, listed as
Snapshot #<version> - <date>: mounts that one version, read-only.
- Repeat for any other mounted assets, then launch or save.
snapshots/ path to read it from. Pinning also changes which other mounts the asset gets:
How long the selection lasts depends on what you launch:
Create a new Dataset from a snapshot
You can create as many snapshots as you need, but existing snapshots are read-only. Note: You can’t create a new NetApp Volume directly from a snapshot, but you can copy a volume for use in Project Templates, which includes its existing snapshots. You can create a new Dataset from a snapshot, modify it, and take a new snapshot:- In the UI
- In the CLI
- In the API
- Go to the existing snapshot.
- Click Copy to New Dataset.
- Complete the fields as needed.
- Click Upload files to add files to the Dataset.
- Click Take Snapshot > Include all files.
Download a snapshot
You can download a snapshot:- Open the overview page for the Dataset or Volume.
- In the Snapshots list, select the snapshot to download.
-
Click Download Snapshot to begin downloading.
- If the selected snapshot contains a folder or multiple files, it downloads as a
.zipfile (default) or.tararchive, depending on your system setting.
- If the selected snapshot contains a folder or multiple files, it downloads as a
Delete a snapshot
Deletion behavior depends on the volume type and configuration.Delete a NetApp Volume snapshot
Admins can directly delete snapshots for both NetApp Volumes and Datasets from the Admin UI. Delete a NetApp Volume has information about deleting NetApp Volumes.Delete a Dataset snapshot
Marked snapshots are no longer mounted in executions and are flagged for admin removal. You can restore a snapshot if it is marked for deletion. They are not fully deleted until removed by a Domino admin.- Open the NetApp Volume or Dataset overview page.
- Go to the Snapshots section.
- Select the snapshot to delete.
- Click Mark Snapshot for Deletion, then confirm.
Next steps
- Get the path to a snapshot
- Learn about Dataset best practices