

superghcnd_diff_20170123_to_20170124.tar.gz contains updates and new data collected between January 23 and January 24, 2017. Each diff file consists of three CSV files:
-
delete.csv- records to delete from station data. -
insert.csv- new data collected at stations during the period associated with the file. -
update.csv- changes to station data.
| USC00219072 | 20170120 | SNWD | 152 | H | 600 | ||
| USC00471287 | 20170120 | SNWD | 0 | H | 730 | ||
| USC00241127 | 20170120 | TMIN | -44 | H | 1700 | ||
| RSM00031369 | 20170120 | TMAX | -233 | S | 1700 |
-
Download the relevant
difffiles since it was last run. - Update the database - deleting, updating, and inserting records.
cron) job. Given that NOAA releases these files daily, we will schedule the script to execute daily. Domino makes that part very simple.
Domino Jobs
Domino Jobs execute scripts in your preferred programming language in a headless fashion, meaning that they run without a graphical user interface. Each job runs using an individual container (or cluster of containers) that starts up, runs, and shuts down automatically. The job will only consume resources during its execution. You can use any of your existing Domino Environments with your jobs, ensuring consistency and helping with reproducibility. You can learn more about jobs in the Domino documentation, but we will cover the basics here.Domino Data Source vs. Snowflake Python Connector
As you might imagine, the data update operation will need to perform diverse operations such as delete, update, and insert. For this reason, you should switch to using the Snowflake Python Connector instead of the Domino Data Source you used previously. While the Domino Data Source can handle virtually all operations, it’s optimized for data exploration and lightweight read operations. On the other hand, the Python Connector offers access to many of the highly optimized capabilities and workflows Snowflake offers, which you will be taking advantage of.Data processing with Snowflake
While Snowflake works great with SQL commands, it has especially fast data loading and staging capabilities. Snowflake performs large-scale data operations rapidly using the following workflow:- Uploads your CSV (or another delimited text format) data into your Snowflake staging area. The staging area is a temporary storage space used for data prep and is part of your Snowflake cloud space.
-
Loads your data from the staged CSV file into a temporary (or permanent) table using the
COPY INTOSnowflake command. -
Performs database operations (e.g.
DELETE,UPDATE,INSERT) using normal SQL notations. The code below follows this pattern.
The data update script
The script consists of a main function that orchestrates calls to individual functions responsible for specific operations. The main function,update_weather_data(), calls these functions in the following order:
-
Initialize_connection- obtains a database connection object using the credentials you stored securely in Domino. -
Get_update_start_date- checks the database to see what is the date of the latest weather records. This is used to identify how many files you will need to download to stay up to date with NOAA’s weather data. Note that this is not a failsafe approach to ensuring no duplicate records exist. -
Get_diff_file_urls- reaches out to the NOAA website to find the files you need to download and process. If none are found, the script will exit. -
Perform_updates- handles downloading the files, dispatching them to dedicated functions to delete (do_delete), update (do_update), and insert (do_insert) records, and finally clean up the downloads from your file system. -
A
mainblock - as the job will only call the script by name and not specify a function.
Create the script
To get started, go ahead and create a Python file in a Domino Workspace, as you have done for the Domino Launcher file. Name the fileDataUpdaterJob.py and save it into the project’s root folder.
What follows is the code with highlights of notable items that you can add to the script:
The constants
The main function
main function orchestrates the script’s execution.
- You try to connect to the database, call the functions that perform individual steps, and close the connection when the execution ends.
-
The call to
perform_updatesreturns an array containing the number of database records that were changed. -
Those numbers are used to populate Domino’s job visualization capability—custom job metrics.
To help you visualize how your job executions performed over time, Domino provides a line chart to accompany the job execution listing view. In this example, you control what the chart displays by saving a simple JSON file (
dominostats.json) to the project’s root folder. You then track how many row delete, update, and insert operations the job performs in each run by saving a JSON object that maps the counts as values to the keysDeletes,Updates, andInserts. Domino then takes the file and uses the keys and values to populate the visualization for the job. Domino collects the data over time to create the chart.
- Besides the visualization, the Jobs results table also displays the custom information in dedicated DELETES, INSERT, and UPDATES columns.
- Visualization can also alert you to job malfunctions and you can use email notifications to help flag issues when they happen.
- To learn more about this Domino feature, see Customize Job result views.
Initialize the connection to Snowflake
connect method. It then returns the connection object for use in the rest of the script. If the connection fails, the main function handles the exception and exits.
Find the latest date
Get a list of the files to download
Perform delete, update, and insert operations
do_delete function
do_delete function will read a chunk of rows from the delete.csv file at the specified location, dedicated to rows to delete from the database. It will load the rows into a dataframe and remove rows with data about stations not in countries that are part of the West European region. The resulting dataframe will be output into a CSV file.
Next, the function will create a temporary table in Snowflake and upload the CSV file you created to the Snowflake staging area. It will then copy the data from the CSV into the temporary table. The function will then create a transaction to contain the delete operation. The deletion itself will be done using a SQL statement that compares files in your station_data table to the contents of the temporary table. If the operation is successful, the function will commit the transaction; otherwise, it will roll it back. The function will return the number of deleted rows.
The do_update function
do_update function is similar to the do_delete function, except for the second SQL query that contains a SQL UPDATE statement.
The do_insert function
do_insert function is similar to the do_delete function, except for the second SQL query that contains a SQL INSERT statement.
Call the main function
main function is called whenever the script is executed.
Remember to save the script to your project’s root folder and commit the changes to the Domino file system.
Test the script
- To verify that the script runs successfully, open a Terminal from the Jupyter Launcher.
-
In the terminal tab that will open, enter the following call:
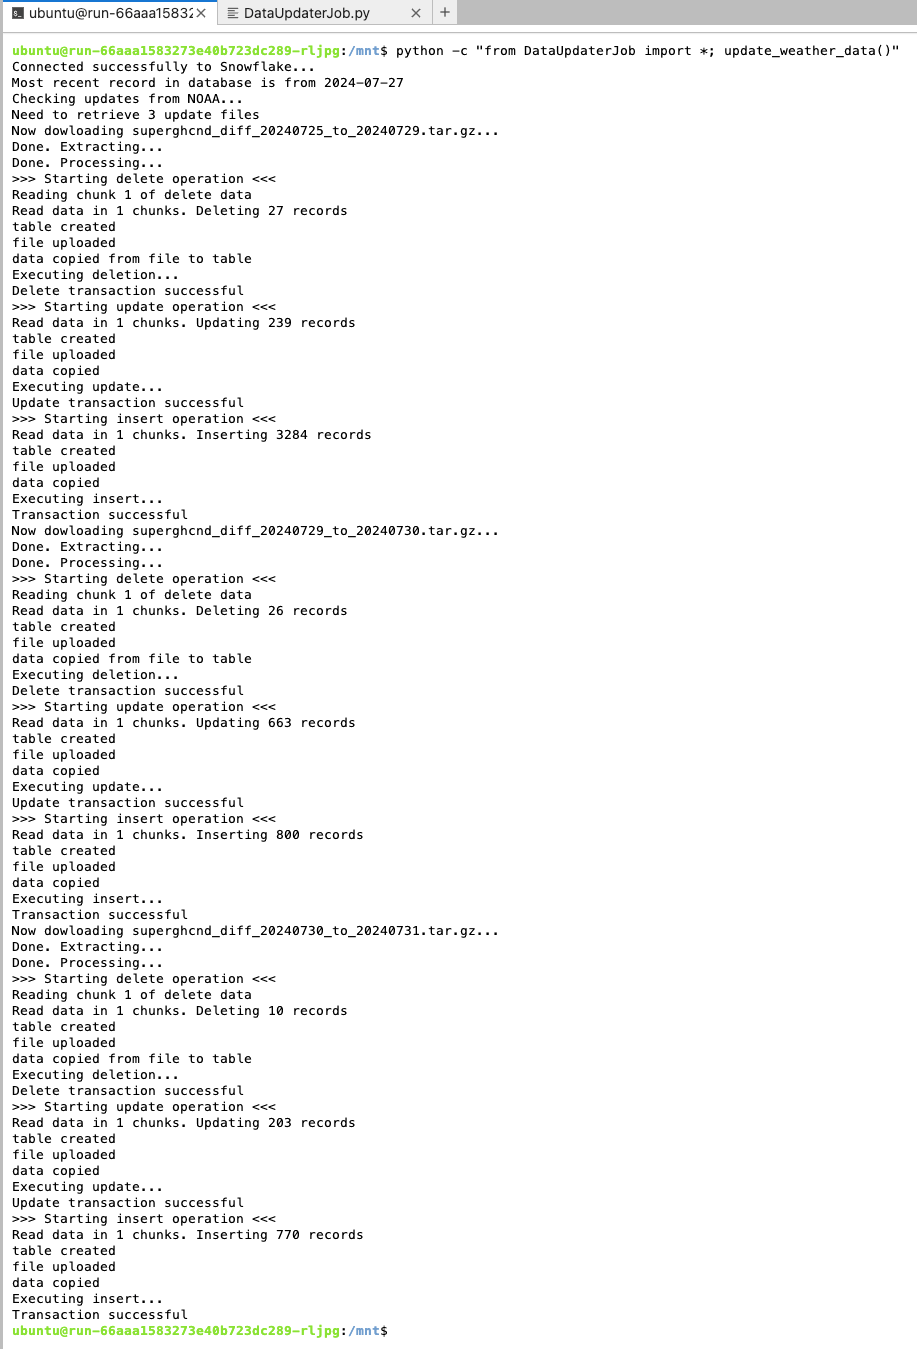
- Script execution may require up to several minutes and the messages on the screen will offer updates on its progress.
-
Ideally, the script will run without an error, and you will see an output similar to that in the image below. Note that the dates and values will differ from that in the image when you execute the script.
Domino Job setup
To set up your script as a job, follow these steps:- Click Jobs in Domino’s main navigation menu.
- Jobs can run once or on schedule, with automated setup and teardown. That makes them especially valuable for periodical model training and when using high-cost hardware like GPUs. To ensure your script successfully runs as a job, click the Run button.
-
The job setup menu will open. Now, fill out the form:
-
Add a Job Title (e.g.
Weather Data Update). -
Enter the File Name (
DataUpdaterJob.py). - Choose an execution Environment and Hardware Tier.
-
Add a Job Title (e.g.
- Since you are not using a cluster for the job and will connect directly to the database, you can click the Start button. Your job will start to execute and will appear in the list of Active jobs.
- Once the job execution is completed, it will appear in the Completed run tab. Click on the job you have just run.
- You will see that the job was completed successfully and the number of updates, deletes and inserts that the script performed. Like with the Domino Launcher, you can click on the job to see the detailed execution results view.
Schedule the Job
- To schedule the job to run, click the Schedules tab at the top of the screen.
- Click the Schedule a Job button. A form will appear. Similar to the previous job form, enter the details on the first step of the form.
- Click Next. As you are not using a cluster for your job, click Next again.
- Now, set a schedule for the job and click Next.
- You can now add your email address so that Domino can notify you when the job completes successfully or fails.
- Optional: If this job re-trains a model, you can also use it to update the model used in a Domino endpoint. You don’t need that at this time.
- Click Create. The job will now appear in the Schedules job listings where you can edit and update the job configuration in the future.
- Domino will trigger the execution at the scheduled time. When Domino executes the job, it will send you a confirmation email.