

How EDVs work
Domino runs on Kubernetes, so every EDV is backed by a Kubernetes Persistent Volume (PV) bound to a Persistent Volume Claim (PVC). Three things make a PVC eligible:-
It carries the label key
dominodatalab.com/external-data-volume. -
The value of that label is the storage type:
NFS,SMB,EFS, orGeneric. - It exists in the Domino compute namespace.
Set up the Kubernetes PV and PVC
A Kubernetes administrator must set up the Kubernetes persistent volumes (PVs) and Persistent Volume Claims (PVCs). Adjust the Domino compute namespace and the PVC names in the examples before you use them.
- NFS
- EFS
- SMB
- Generic
A static provisioning example for a Network File System (NFS) share. Provision the PV that refers to the NFS share by any mechanism appropriate for your environment.
Register External Data Volumes
In a hybrid deployment, one EDV can serve a shared file system reachable from several Data Planes. Domino matches EDVs to PVCs by the name of both the PVC and the underlying PV, and detects the additional Data Planes automatically during registration. If a PVC appears in a Data Plane you do not intend to use with the EDV, rename that PVC or PV so it no longer matches.1
Open the registration wizard
From the Admin application, go to Manage resources > External Data Volumes, then click Register External Volume.
2
Select the storage
On the Volume step, select the storage type: NFS, Windows Share (SMB), EFS, or Generic. From Available Volumes, select the backing Kubernetes PVC. In a hybrid deployment, Domino then lists the Data Planes where the EDV can be used.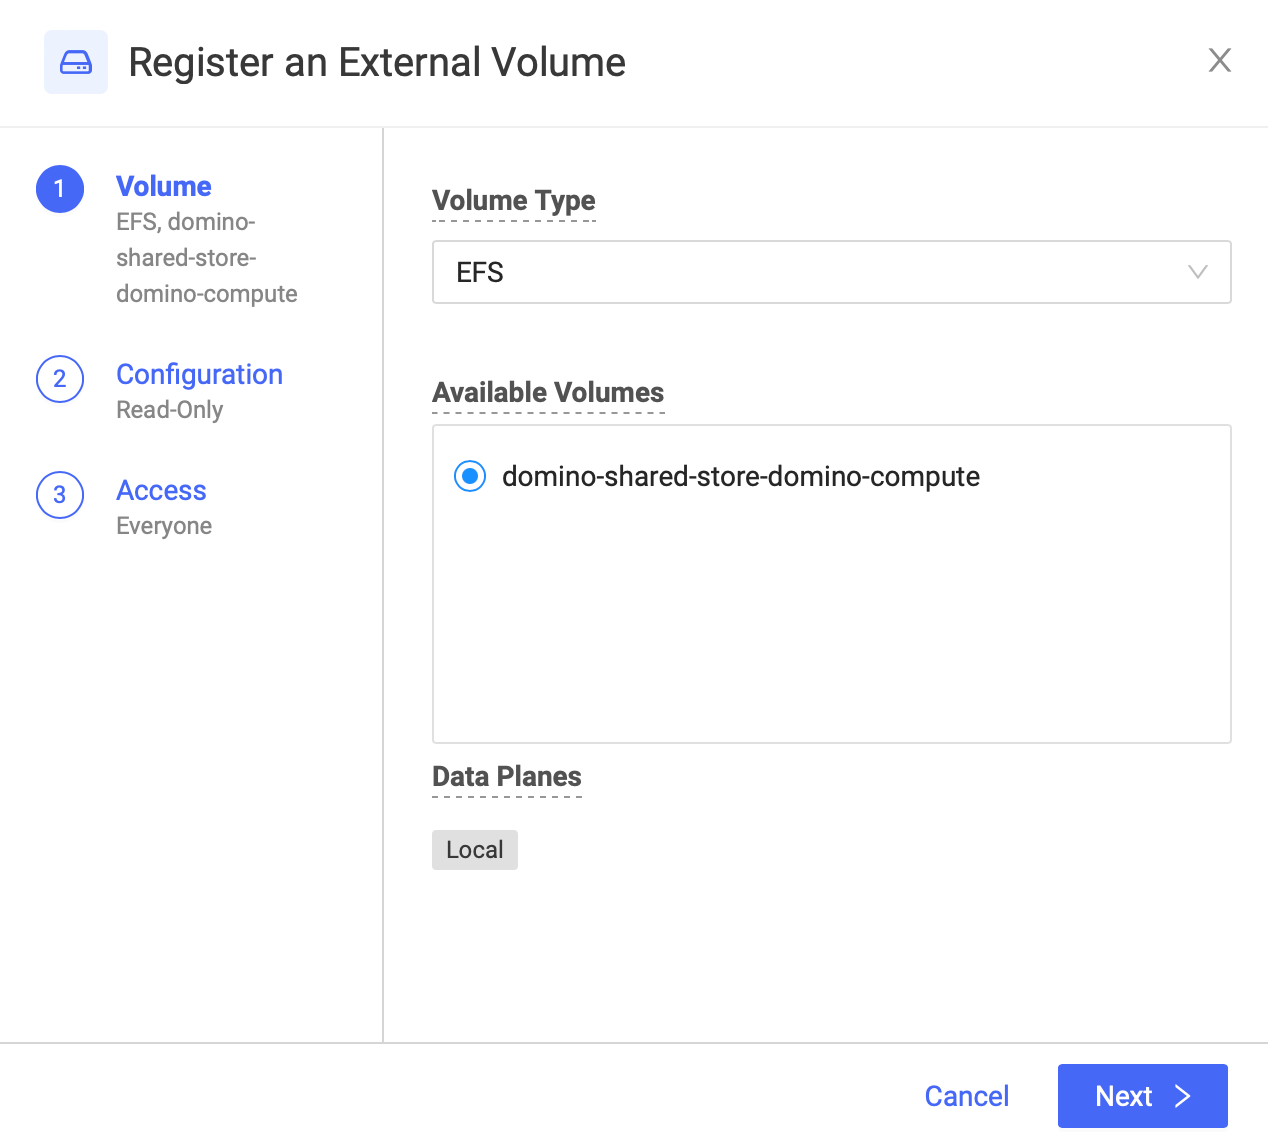
3
Configure the EDV
On the Configuration step: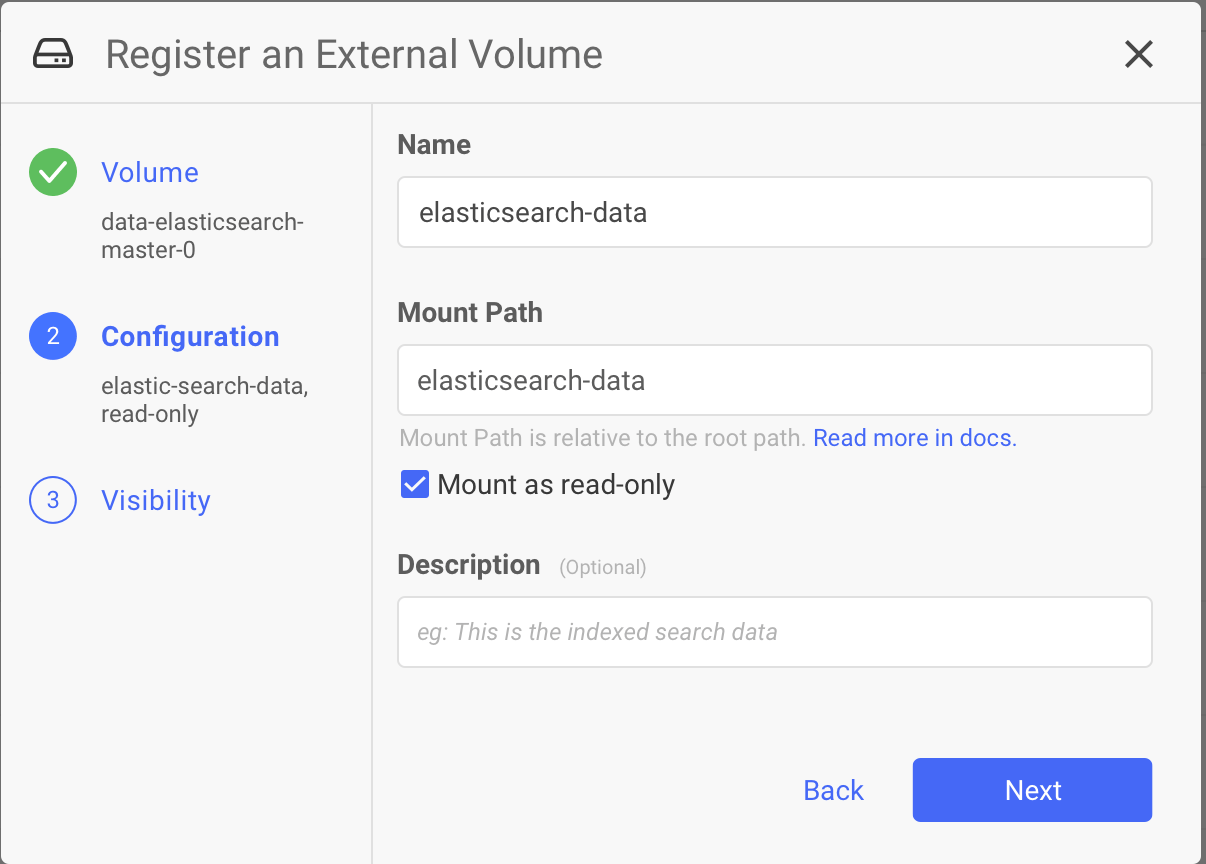
Read-write access is enforced at the Domino layer only. More restrictive access controls at the Kubernetes or NFS layer overrule this setting: if the PVC access mode is read-only, the underlying read-only permission wins regardless of what you select here.
4
Set access and register
On the Access step, select the Volume Access: Everyone to allow all logged-in users, or Specific users or organizations to limit access. Click Register.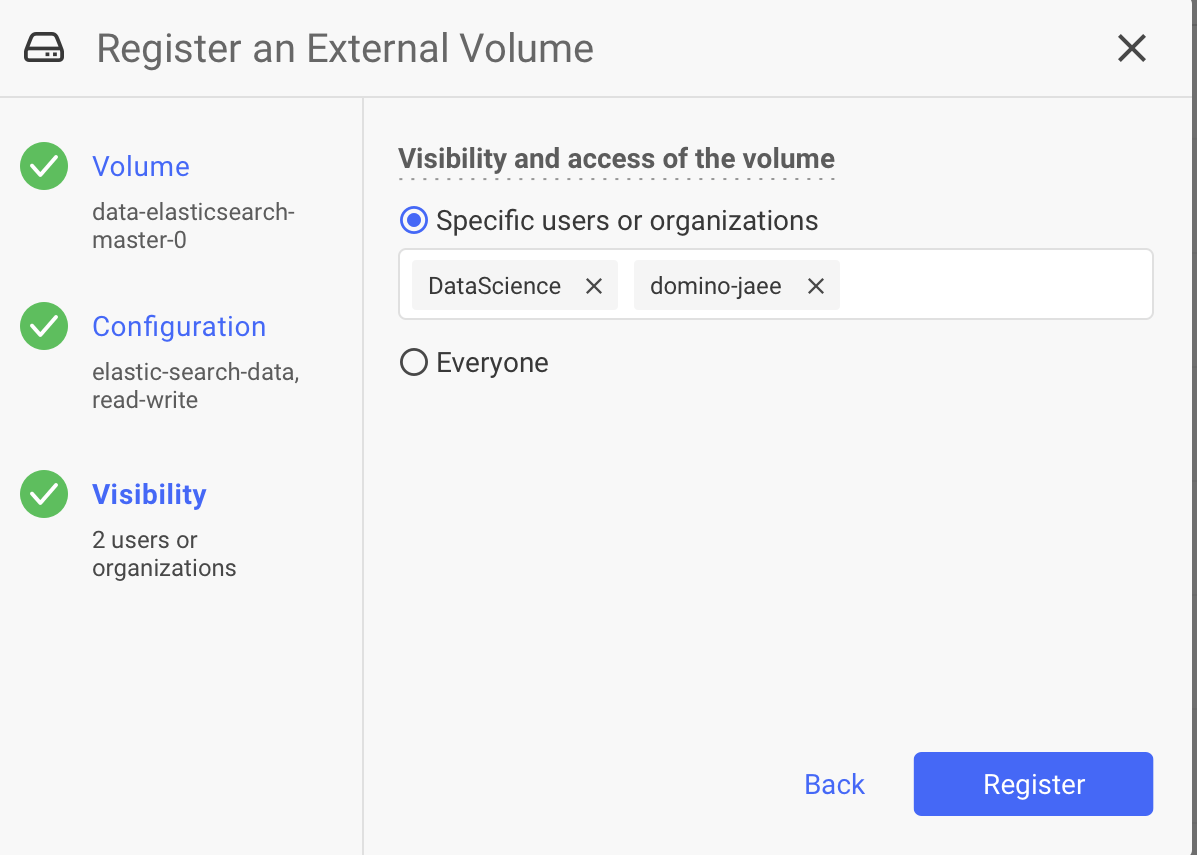
Regardless of this setting, you (SysAdmin) can always access any External Data Volume.
Associate Data Planes with an EDV
In a hybrid deployment, each EDV is associated with specific Data Planes. For security reasons, that set never changes on its own. Change it by modifying the PVCs in the relevant Data Plane, then editing the EDV.Add a Data Plane to an EDV
- Create the PV and PVC in the new Data Plane, with names matching the PVC already used for the EDV.
- Click the three-dot menu at the right of the EDV row, then click Edit. The new Data Plane appears at the bottom of the modal, highlighted in green to show that it is being added. If you do not see it, confirm the name of the PV and the name and label of the PVC.
- Click Update.
Remove a Data Plane from an EDV
- Remove the PVC and PV from that Data Plane.
- Click the three-dot menu at the right of the EDV row, then click Edit. The Data Plane appears highlighted in red to show that it is marked for removal.
- Click Update.
View, edit, and unregister EDVs
All three start from Manage resources > External Data Volumes in the Admin application.Control EDV visibility
Collaborators on one Project do not necessarily share access to the same EDVs. A user without volume access can never mount that EDV in an execution, but you can choose how much they see of it, trading discoverability against secrecy.
To set the level of censorship, use the
ShortLived.ExternalDataVolumesFullCensor feature flag.
See Mount an external volume for what your users see.
Related
- External Data Volumes covers what practitioners do with an EDV once you register it.
- Data Sources connect to external databases and object stores by query rather than by mount.
- Domino Volumes for NetApp ONTAP are Domino-managed NetApp-backed storage, distinct from EDVs.